Tile Laying. Comprehensive Guide
Types of Tiles
A large selection of ceramic tiles can sometimes be confusing, and buyers may begin to rely only on the design of the surface rather than searching for truly high-quality coverage. The appearance, undoubtedly, is an important criterion for selection. But as they say, the light does not fall on a wedge.
How to Check the Quality of Purchased Tiles?
Wear Resistance.If tiles are not resistant to wear, their price is worthless. Since ceramic can be used in a single-room apartment bathroom or for wall cladding of a multi-story building staircase, the degree of wear resistance should also vary among different types of surfaces.
You can find out what quality product you are purchasing based on special PEI marking: the least protected tiles will be marked as "PEI I", and the most durable one - as "PEI V".
Each wear resistance class defines the room in which this surface can be used:
- PEI I marking is used to denote decorative wall cladding tiles (not recommended for laying on floors in corridors - only on walls or ceiling in a bathroom, e.g., suitable for laying on a vanity or fireplace);
- PEI II marking - for floor tiles (provided that people mostly walk on floors in soft shoes/slipper), such tiles can be laid, for example, on a balcony;
- PEI III marking - tiles designed for use in residential rooms (however, such tiles should not be laid on stairs or steps of a house, it is also not recommended to use them in the entrance hall or corridor), suitable for small offices where people don't move intensively;
- PEI IV marking - this tile is intended for cladding any type of residential room surface, as well as floors in public places with low human traffic (up to street pavement tile durability, this variety doesn't quite reach yet, but it's suitable for garden paths on a dacha);
- PEI V marking - the highest wear resistance indicator - such tiles are recommended for use in public rooms with high human traffic (these tiles are laid on steps in public buildings, suitable for floor covering in garages, pools or saunas, restaurants and others).
Based on moisture absorption characteristics, tiles are divided into 8 groups: Group 1 - the most resistant (absorption no more than 3% moisture), it can be used to clad kitchen backsplash in a large restaurant, children's camp or food factory; Group 2 absorbs up to 6%, Group 3 - up to 10% and so on.
Furthermore, tiles belonging to the first three groups are considered suitable for cladding not only interior rooms but also external ones - from the street side. This tile hardly absorbs moisture, so it doesn't crack in frost: you can safely lay it on a porch or use it for walkways to the house/public establishment (then take care that tiles not only don't crack in frost but also don't slip).
Groups 4 through 8 can be laid inside rooms in any room except bathroom and kitchen, as these are areas with high humidity and frequent water contact.
When cleaning a room, every householder must know what tools and, in the literal sense of this word, with what diligence they can clean a particular type of tile.
Degree of Resistance to Chemical ImpactAnother classification is the degree of resistance of tiles to chemical impact:
- AA - not changed by chemical agents;
- A - minor external changes in ceramic tiles are acceptable;
- B - moderate changes;
- C - ceramic tiles of this class, when used with chemical agents, may lose their original appearance.
Finally, a technical parameter without knowledge of which you initially risk buying low-quality products - tile classification by grade:
- red marking - first-grade tiles;
- blue marking - second-grade tiles;
- green marking - third-grade tiles.
The grade of tile indicates how many defective tiles can be in a particular package of goods. In addition, the edges of ceramic tiles of third or even second grade may be curved, which makes laying tiles with offset, without joints (edge-to-edge), as well as any other decoration layout impossible. In some cases, even with joints, it may be problematic to lay tiles due to uneven edges.
IMPORTANT! Glossy tiles are slippery surfaces. For floor cladding, it is better to choose rough ceramic tiles.
On the packaging of tile, you may encounter these markings:
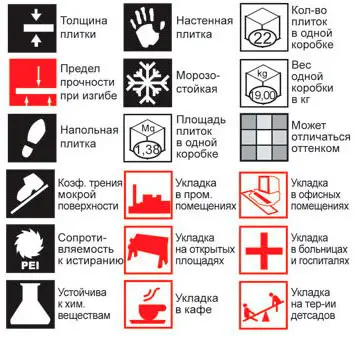
Photo 1 – Symbols on Tile Packaging
Tiles may also be of the following types:
- cotto (unglazed tiles made by extrusion method);
- cotto forte (glazed tiles, double fired);
- single-fired (tiles made by pressing, mostly intended for floor coverings);
- porous single-fired (tiles made by pressing, mostly intended for wall coverings);
- clinker (unglazed/glazed tiles on colored base, clinker tiles are made using the extrusion method - pushing melted material through a mold);
- granite ceramic, on red mass (made by pressing method);
- ceramogranite (pigmented unglazed tiles on white or colored mass).
In addition, there are particularly strong tile types mainly used for floor finishing (including outdoor), such as cast iron, vinyl and acid-resistant tiles, and quartzvinyl tiles.
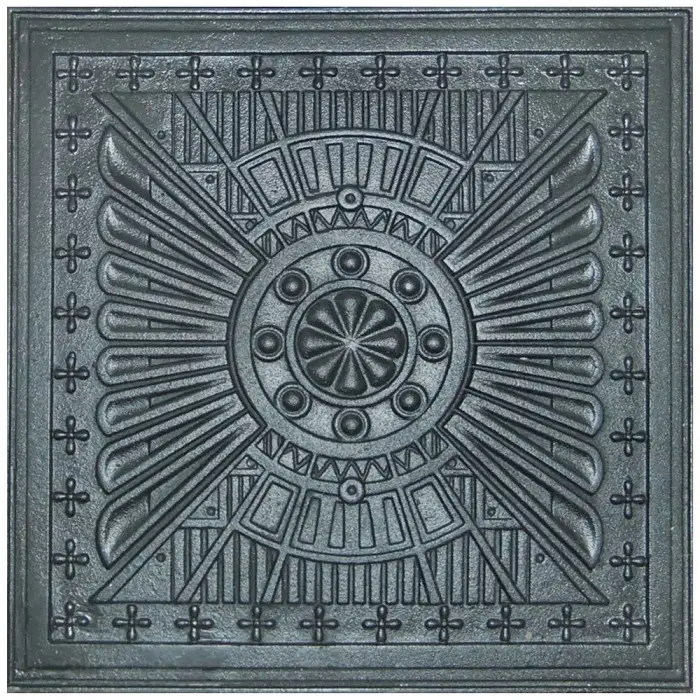
Photo 2 – Cast Iron Tiles
For floor coverings, there are also various decorative solutions - for example, samples of carpet tiles that can be laid by yourself much easier than the above-mentioned types
Tools for Tile Laying
You will need:
- tile cutter;
- construction level (to determine surface curvature and check the leveling of tile cladding);
- plastic/metal angles;
- smooth spatula (used for preliminary surface leveling);
- comb spatula (to apply adhesive mixture);
- rubber spatula with teeth (for applying grout in tile joints);
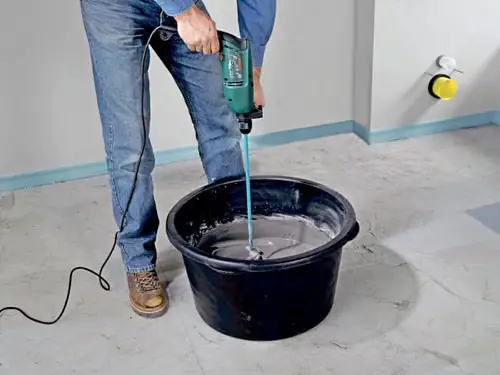
- drill with special attachments (to mix adhesive mixes);
- plastic crosses (for even tile laying);
- primer;
- waterproofing material;
- guides and laser for laying tiles;
- tile adhesive and sand-cement mixture;
- maize (applied on primer);
- metal mesh (if the room walls are wooden);
- grout for joints.
All materials can be freely purchased in most construction markets. Regarding the use of some tools, let's say that:
- a laser level is easier to use in work: you don't need to set additional stakes - the direction of tile laying is determined by a laser. The downside is that such equipment isn't available to everyone, and renting a laser level can sometimes be problematic.
- a tile cutter is more practical and accurate than the method of breaking tiles using a nail and hammer. The machine is also specific equipment, there's no point in buying it if you don't plan to do renovations later since this equipment hasn't found another purpose at home.
- clamps may also be useful if you're planning to level the floor with a cement screed before laying tiles, and plastic crosses need to be selected depending on the size of ceramic tiles - the cross diameter will determine joint width.
In any case, if you doubt your abilities or final result, a tile laying master usually costs about $8-15/m² depending on the method of tile laying and overall work volume. Professional "assistance" provided timely can end up cheaper than fixing defects.
Methods of Tile Laying
The following tile laying methods are distinguished:
- laying without joints or "joint to joint" laying;
Jointless laying is done without crosses, tiles are butted as accurately as possible. The size of joints in this variant is minimal. This type is only possible with identical tiles: any curvature or joint in this case would be a defect, since surface imperfections cannot be hidden.
- laying tiles in staggered pattern;
Tiles are laid only in a horizontal staggered pattern. The principle of laying is that the center tile of the next row should be positioned exactly over the joint - the connection between two tiles from the previous row.
- laying tiles diagonally.
Squares are usually laid diagonally, starting in the corners of the room where the first tile is placed, divided into equal triangles. The triangle tucked against a wall allows for laying tiles at 45 degrees.
You can also lay tiles in a checkerboard pattern, rhombus shape, use non-standard rectangular tiles to create interesting patterns using tiles of different sizes, lay tiles with inserts - in short, do whatever you're capable of. The consumption of tiles for decorative or irregular laying methods will be significantly higher than with jointless laying, so it's better to buy material with a surplus (at least one package should be kept: in any case, it will come in handy - if not during the renovation itself, then for replacing damaged segments during surface operation).
Much of the visual perception of a room will depend not only on the chosen tile pattern but also on its dimensions: laying large-format tiles is characteristic of road and sidewalk cladding, as well as floor cladding in public places, especially cultural buildings, philharmonies, theaters (a bright example is marble tile cladding). Large formats are also used in night clubs, recreational and sports centers (decorative cladding of large mirror or vinyl tiles on walls and ceiling zones, rubber tiles for attraction areas, etc.). The same diagonal laying requires 15% more material due to tile adjustment at the angle of inclination.
Tile Laying Scheme:
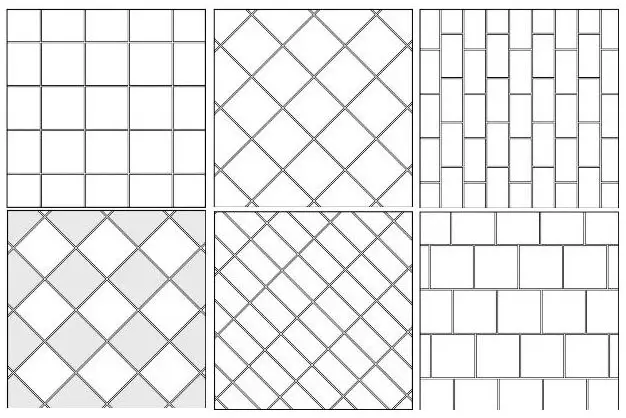
Photo 3 – Basic Schemes for Floor Tile Laying.
Tile Laying Design (Images)
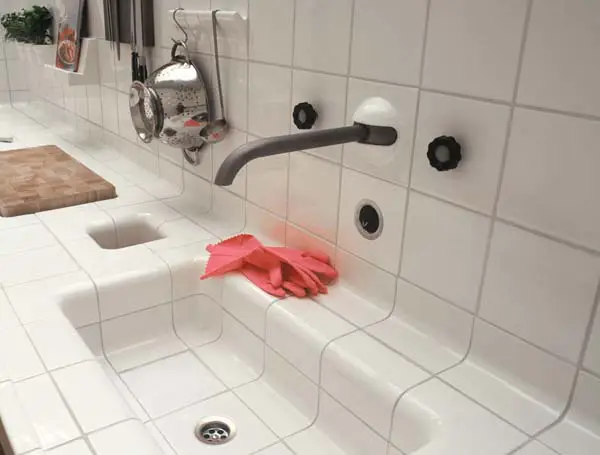
Photo 4 – Kitchen Solution
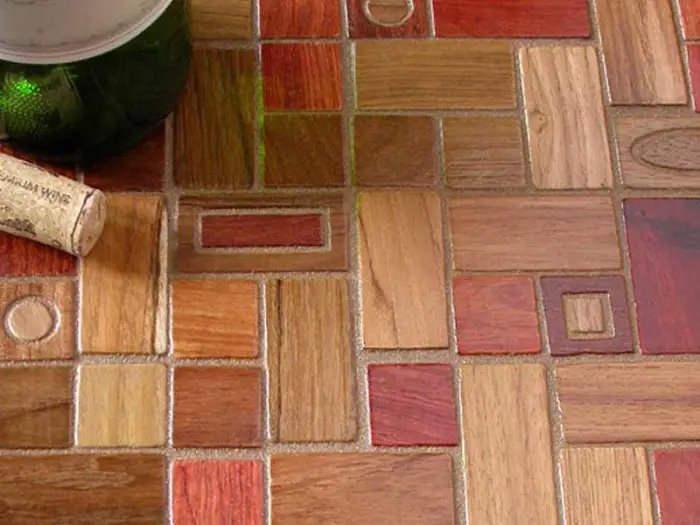
Photo 5 – Layout from Different-Format Tiles
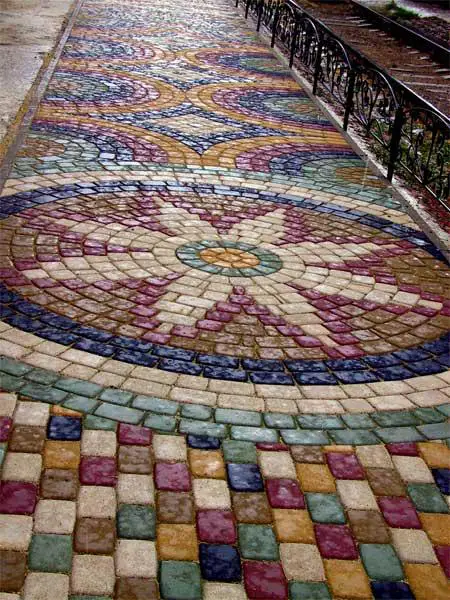
Photo 6 – Sidewalk Mosaic
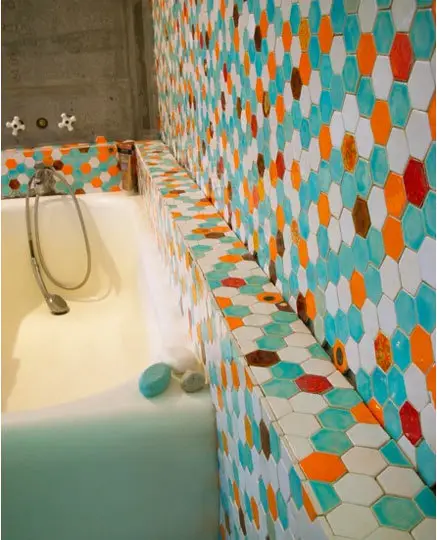
Photo 7 – Bright Solution for Bathroom
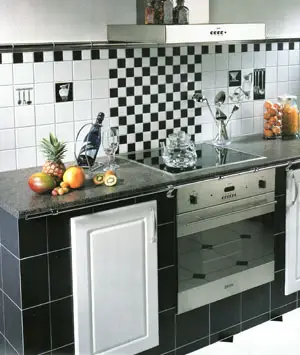
Photo 8 – Checkerboard Tile Laying in Kitchen Interior
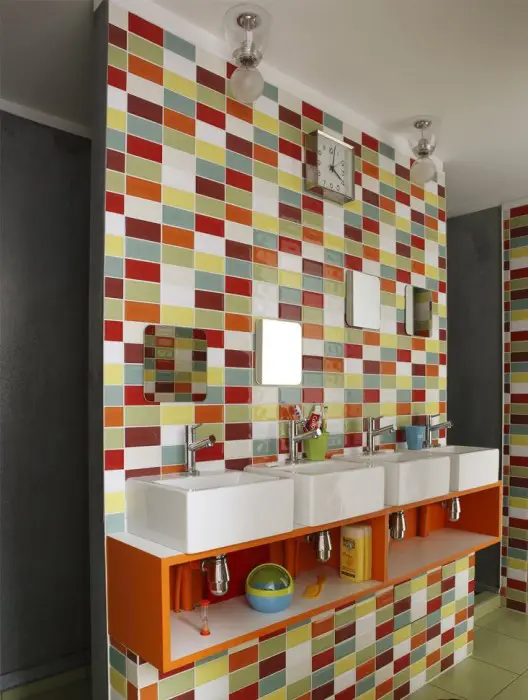
Photo 9 – Rectangular Tiles for Bathroom Wall Cladding (Horizontal Laying)
Preparation for Tile Laying
Wall and Floor Preparation. Check the perpendicularity of wall and floor surfaces. For this, use a plumb line or construction level. The gap should not exceed 2 mm per meter of height, otherwise tiles will be laid crooked. To level the floor you can use a cement-sand mixture (pour it on waterproofing).
However, tiles can only be laid on the screed after at least 45 days - this time, according to specialists' recommendations, should be enough for the concrete to fully set. On freshly dried concrete, a layer of primer is applied (it's also important to apply maize on the cement mixture for better adhesion). When laying tiles on a concrete base made the day before, time for screed setting is particularly important as it will protect the concrete surface from moisture and gas release.
The wall and floor surfaces are also checked for strength, and if necessary, leveled or replaced with new ones (same screed, wall spackle, etc.). When laying new tiles on old base surfaces, you must be extremely careful: any creaking, sagging or cracking of the previous surface already indicates that it's better to get rid of it.
Tiles should not be laid on paint - the material is heavy (these are not paper wallpapers!), so an old layer of acrylic paint may cause softness. The same applies to laying tiles on old tiles. This method will waste an additional 3-5 cm of room area. In our time, few people can afford such luxury. Laying tiles on linoleum is also forbidden: the surface covering that "walks" on the floor won't provide necessary stability for tiles, and therefore cracks will inevitably appear in joints and tile separation.
For other types of surfaces, the requirements are standard: walls/ceilings/floors should be clean, dry, leveled and primed with maize. We will discuss surface preparation for tile laying in more detail below.
Plan tile layout on surface and calculate the required material at this stage. So, wall marking. Self-laying tiles should be done carefully: don't rush to use the spatula and adhesive: draw a tile laying scheme on paper at a smaller scale, but keep proportions of existing elements. Main mistakes in the preparation stage - poorly chosen placement of whole tiles and trimmed tiles (e.g., when a visible area contains not a whole tile but its "bite"), as well as incorrect measurement of wall/floor curvature with a level.
IMPORTANT! Placement of tiles on surfaces by hand is better to do by placing a whole tile in the center of the working area, and then drawing and arranging other tiles around it - these rules are even described in SNiP and GOST on the order of tile cladding work. However, the visual center of a room doesn't always coincide with the center of the floor area in the room. The placement options for the central tile can vary due to, for example, special room furniture or pattern position on tiles.
Tile Laying Technology: General Rules
IMPORTANT! It is not recommended to install tiles on liquid nails in humid rooms or outdoors by yourself.
SVP (Tile Leveling System): VIDEO
IMPORTANT! Correct wall tile laying is from bottom to top, reverse order (top-down) - technically unacceptable, even if it's about using high-durability mixtures or fixing base tiles.
Laying Tiles on Gypsum Board and Other Types of Surfaces: Base Preparation Technology
For laying tiles on gypsum board:
IMPORTANT! When buying gypsum board, pay attention to its color! For example, green - this is moisture-resistant gypsum board designed for bathrooms or kitchens.
Gypsum board on brick can be fixed not only using guides but also with gypsum mortar Perfix - this is one of the proven and economical options for installing sheets.
More details in the video below.
Laying Tiles on Gypsum Board: VIDEO
Methods of Preparing Other Surfaces:
- on GVL and GVLV, tiles are fixed using special adhesive mixtures and mastics made by Knauf or Krep;
- on plaster, tiles can be laid after thorough surface priming of wall/ceiling;
- on polystyrene, as well as on foam blocks and other materials often used for house insulation, balcony walls, tiles can be laid if the material was securely fastened to the house's wall/floor/ceiling and covered with special mesh that improves adhesion to adhesive (this option is acceptable for tile work in wooden houses or on balconies in any type of housing);
- on OSB (Oriented Strand Board), ceramic tiles can be laid if a layer of waterproofing is applied to OSB (e.g., MIRA), and tiles are fixed with elastic adhesive from the same manufacturer (according to reviews, tiles attached to OSB can last about 10 years if the base under the tiles is solid and reliable);
- on CSD (Cement-Particle Board), ceramic tiles can be laid in a standard way if the boards are not mobile;
- on plywood, tiles must be glued using a special two-component adhesive, not only permanently joining surfaces but also serving as waterproofing;
- on particle board, it is not recommended to install tiles because this base is too sensitive to humidity and temperature fluctuations - there's a high risk of surface deformation;
- for laying tiles on the ground in the yard, remove the layer of vegetation soil, lay a layer of bitumen on the soil, perform sand preparation of the surface and then lay tiles on top of the sand layer. Borderstone laying is done in the same way (to place tiles on a grave, wait at least 3-5 years until the soil settles).
More detailed methods of base preparation are described in SNiP 3.04.01-87 and SNiP 2.03.13-88.
Laying Tiles on Kitchen
During finishing work in the kitchen, tiles are most often used for floor cladding and also to make the kitchen backsplash. The options for tile laying here are incredibly wide: for example, rapid cladding using ceramic mosaic (element sizes up to 10x10 cm) mounted on a frame (frequently with silicone or fibrous mesh). It also looks great when the backsplash is cladded in a stone-like or brick-like style.
A bright eco-friendly option for backsplash cladding - cladding with cork tiles. This durable, natural and lightweight coating is not afraid of moisture and sunlight. Due to its lightness, it can be used on walls made from gypsum board: it won't add weight to the structure and will protect the gypsum board sheets from moisture.
Types of Kitchen Cladding: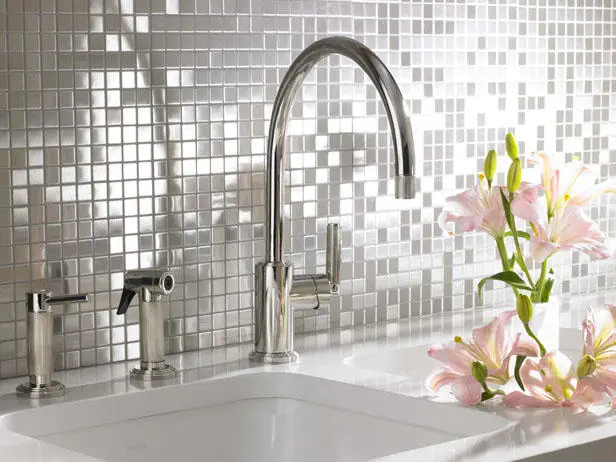
Photo 10 – Backsplash Cladding with Mosaic on Frame
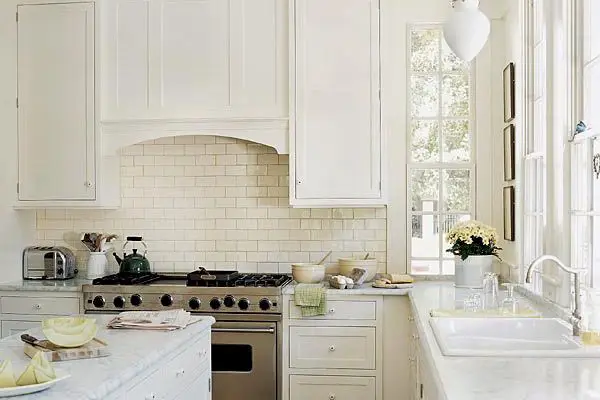
Photo 11 – Backsplash Cladding 'Like Brick' (in White Color)
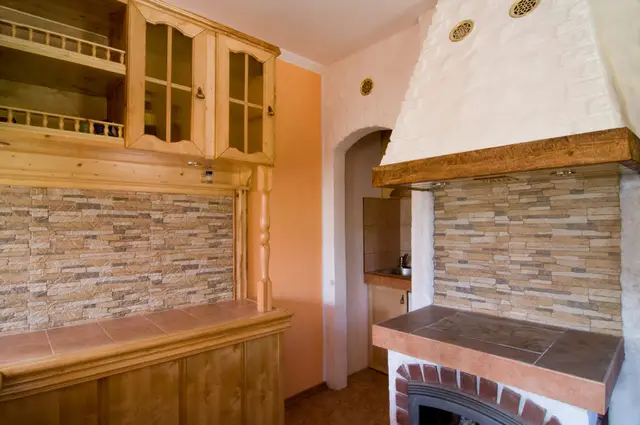
Photo 12 – Backsplash Cladding 'Like Stone'
Laying Tiles on Wall: The Main Point
The technology of laying tiles on a wall differs from floor or ceiling tile laying only by the required direction of movement: it should begin from the bottom and gradually move upward.
Also, tiles on a wall are laid not from the floor (due to frequent surface curvature; clamps placed under the first row for horizontal leveling are not used here), but with a 30-40 cm offset: at this height, after checking horizontal alignment using a level, fix a guide that will serve as the base for the first row of tiles.
The bottom row is installed last, cutting tiles if necessary along the floor line.
Laying Tiles on Wall: VIDEO
Laying PVC Tiles
Laying PVC tiles is a relatively fast process (compared to laying ceramic tiles). You will also need a flat and dry base, as well as layout on the installation site. However, all the essence of this work is to apply adhesive on the back side of PVC tiles and glue them to the floor by rolling the material with a heavy rubber roller.
Installation of tactile tiles (PVC) can be done both indoors and outdoors, as this surface coating and adhesives used for its fixation have increased resistance to the effects of moisture, air temperature, and mechanical loads.
Adhesive for Tile LayingTile adhesive must be selected based on the surface to be cladded, frequency of use of that surface, and type of material being glued:
- ceramogranite due to low water absorption and ability to withstand sudden temperature changes requires the use of elastic and frost-resistant adhesive type SC-17; MAPEI - Adesilex P9 (P4 and P10 can also be used), Kerabond T adhesive and similar ones;
- clinker in terms of technical characteristics is largely similar to ceramogranite (clinker is usually mounted on a stove); for mounting clinker tiles, you need adhesive containing fire clay and kaolin - e.g., Hydrosit adhesive (type KT Adesilex P4);
- regular wall cladding tiles (white or red clay in the base) can be laid on standard tile adhesive with a cement basis, but for tiles with complex textures, you need to use an adhesive containing fiberized aggregate - such adhesives prevent sliding off vertical and horizontal surfaces; these are types of CERESIT SC-11; MAPEI-Keraflex/25 GR, Adesilex P9; SOPRO Glue No. 1-400;
- for mosaic, special adhesives and grouts (used for grouting joints) that resist large amounts of moisture and high temperatures are used - these include CERESIT CE 40 aquastatic, MAPEI-Kerapoxy, Ultracolor PLUS, SOPRO Saphir and SOPRO Dur HF glue.
There are also self-adhesive tiles that don't require additional adhesive.
$ Tile Laying Cost
A master, indicating the price for his services (job listings for tile layers can be found in any media and construction service websites), estimates the approximate cost of work. Price adjustment occurs when removing old coating, disposing waste, delivering construction and cladding materials to your home, in rare cases - the master's travel to the site.
In addition, there are several rules for this type of work:
- the more expensive the tiles, the more expensive their installation (i.e., don't expect to have marble tiles installed for the price of ordinary ceramic ones);
- the more complex the base, the more expensive its cladding (laying tiles on wood - from 15$/m², while ordinary ceramic tiles can go for as little as 5-7$/m²);
- the larger the work area, the higher the cost (however, long-term customers often receive discounts from many crews).
The price list for the above-mentioned works, on average, looks like this:
- removal of old coating - from 2-5$/m²;
- floor leveling (concrete screed) - from 5-8$/m²;
- tile laying - from 7-10$/m².
Tile Laying: VIDEO
Tile Laying Cost
Kyiv - from 55 UAH/m²;
Moscow - from 250 rubles/m².