Tile Laying on Warm Floor
Laying tiles on a warm floor will save you from discomfort and reduce the risk of mold in the bathroom.
Let's go step by step.
Laying a warm floor under tiles
The "warm floors" system from the class of expensive renovations has long moved to the class of public availability. According to the principle of heating, electric and water heated floors are distinguished. Electric floors in turn include a heating system using electric cables, electric mats, and infrared floors. Of the listed, the last option is the most efficient. It is better to avoid laying a water heated floor: this type of floor heating is unsafe and inefficient.
The main advantage of infrared warm floors is that they can be laid under any type of floor covering material - both under ceramic tiles and "capricious" laminate. When choosing, pay attention to offers from such manufacturers:
- Solar ville (South Korea);
- IFR (Russia);
- Caleo (Korea).
Products of these brands are more in line with the price/quality ratio than others.
In this article, we will consider the principle of laying a film warm floor (electric mat).
For work, you will need:
- film floor elements;
- temperature sensor;
- thermostat;
- sharp knife;
- painter's tape.
Work process:
Determine the area for film installation.
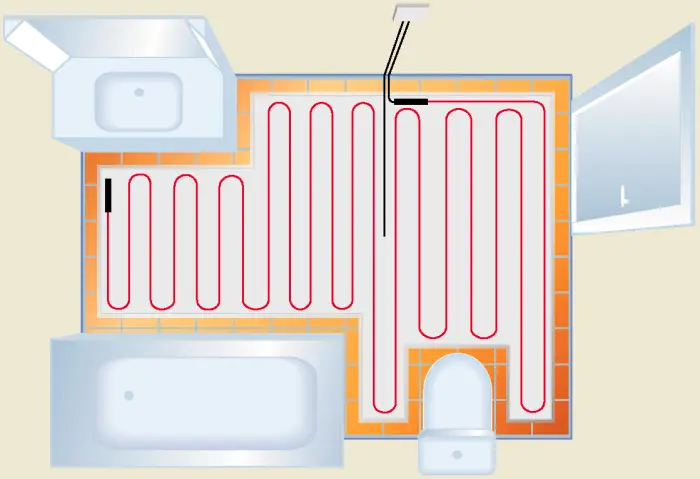
Figure 1 — Determine the installation area of the film
Prepare heating elements for installation: cut the film roll according to the perforation line, without breaking the integrity of the heating elements. Install special contact clamps on the heating element, as well as thermostat and temperature sensor, connecting individual floor elements into a single circuit.
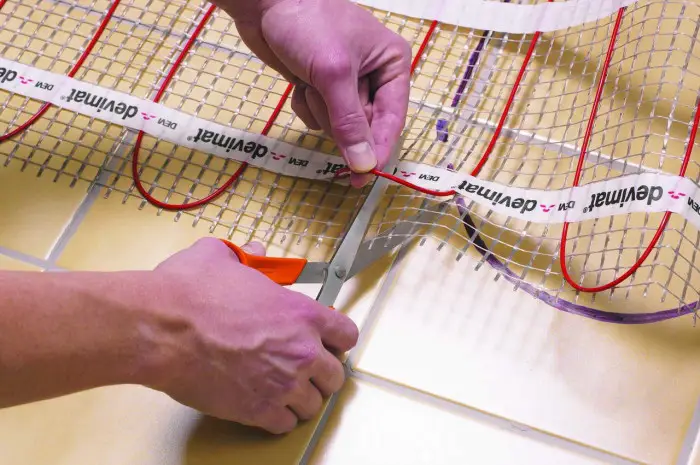
Photo 1 — Prepare heating elements for installation
Prepare the bathroom floor surface. The base is cleaned of old flooring and construction waste. Obvious defects in the floor must be eliminated. With a concrete base, this includes grouting cracks, leveling depressions, etc.
On the cleaned base, apply a primer (you can use, for example, Sopro GD 749), then cover the floor with a layer of elastic adhesive solution. Insulation is laid on the floor while the adhesive mixture is not yet set: the surface can be covered with insulating plates (in the range of the same manufacturer, pay attention to Sopro FDP 558 plates) or a single thermal insulation film. These preventive measures are not superfluous: the floor will become stronger and more reliable.
This will be sufficient to ensure not only the reliability of the floor base but also its thermal insulation properties.
Lay the floor heating elements on the prepared base and secure them with painter's tape. Make two cuts in the thermoplastic film:
- one — under the contact connection;
- the second — under the main power wire.
Connect the main wire to the thermostat and perform a test start of the system. Testing the floor operation is an obligatory stage. Before pouring the screed, it is important to ensure that you do not tamp down defective material into the cement layer.
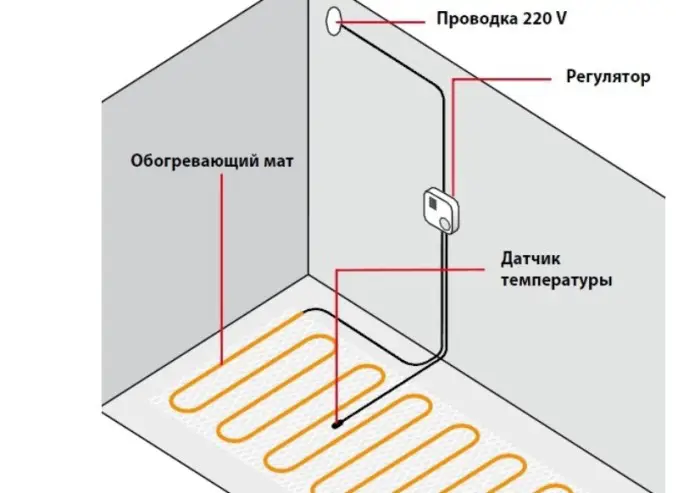
Figure 2 — System warm floor wiring diagram
If the system is functioning correctly, you will be able to feel warmth within a few minutes by bringing your hand near the film. If everything works properly, turn off the thermostat and continue with the installation work.
After a layer of elastic grout or any other protective coating of the type, a hydro-insulation layer must be applied. Usually, it is not limited to one layer and two layers are laid for reliability.
Now you can pour the screed. The film floor is first covered with a non-metallic mounting mesh, and then a thin layer of cement-sand mixture is applied on top. If the work is done in non-humid rooms, the screed can be replaced with a gypsum fiber board secured with dowels.
The result of the completed work should look like this:
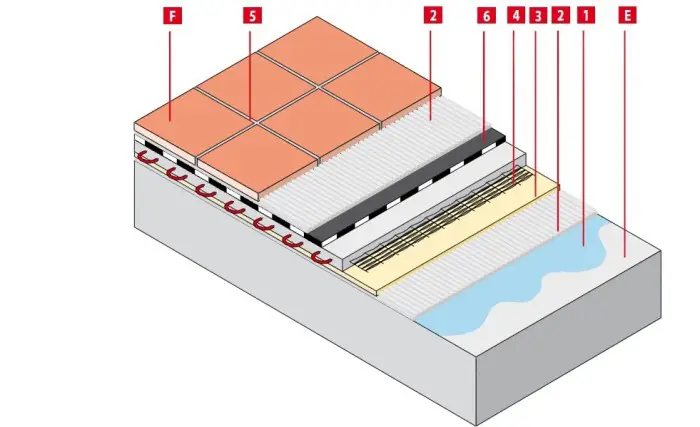
Figure 3 — Tile laying on warm floor: 1 — primer; 2 — elastic thin-layer adhesive solution; 3 — insulating plate or film; 4 — electric heating mat; 5 — wide elastic grout; 6 — hydro-insulation at least in two layers; E — screed; F — tiles
Warm floors, by the way, can be not only an additional heat source but also the main one. You can also lay mats only in those places where it is most needed. For example, in the case of a bathroom, there is no point in heating the floor under the bathtub itself - you can avoid laying mats there.
What to pay attention to:
- Electric mats can only be used for surface cladding with ceramic tiles and natural stone; they can also be used for PVC coverings, parquet, and carpeted floors.
- One controller should serve only 8 m² of warm floor area. In other cases, a protective relay must be installed in the circuit of the installed controller.
- Electric mats should only be connected by specialists.
- When choosing a film floor, pay attention to products from the following brands:
Tile Laying on Warm Floor
Tiles are a rewarding material, so they can be laid on any type of warm floor without fear of unpleasant consequences. The tile laying technology on a warm floor does not differ in any special way from the usual tile cladding.
We recommend reading the article: Instructions for laying tiles on the floor by yourself
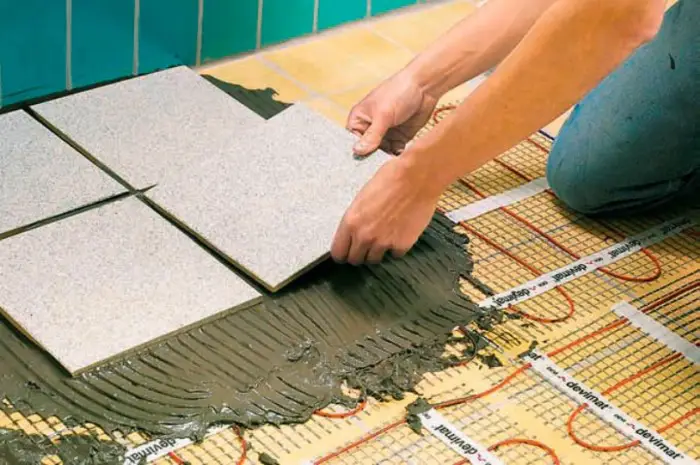
Photo 2 — Laying tiles on warm floor
For work, you will need:
- tile adhesive for laying on warm floor
- tile grout
- a small rubber spatula (grouting joints)
- a notched trowel (applying adhesive solution)
- plastic crossbars
- wooden ruler
- a level
Work process:
Mix and apply adhesive to a 70x70 cm area of the floor.
Also coat tiles with the adhesive solution using a notched trowel.
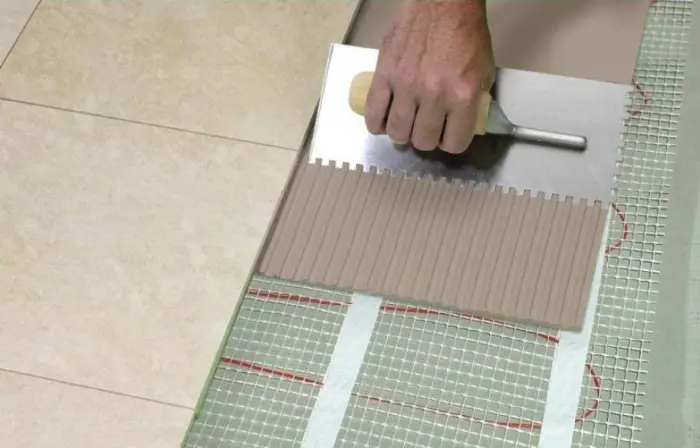
Photo 3 — Applying adhesive solution for tiles
Carefully lay the tiles on the floor, slightly pressing them down (pressing in the center of the tile). Pay attention to the evenness of the laying.
To level the joints between tiles, install plastic crossbars (the size of the crossbar must correspond to the required joint size) at a rate of one crossbar for every 4 tiles being joined.
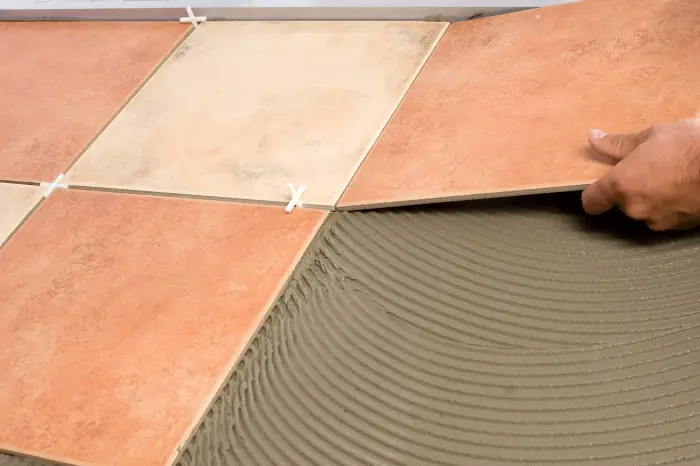
Photo 4 — Installing plastic crossbars
After checking the evenness of the laying (use a level and wooden ruler for determination), remove the crossbars. Be careful: if the adhesive solution is left to set, it will be impossible to correct the curvature without dismantling the covering. Similarly, removing the crossbars will also be impossible.
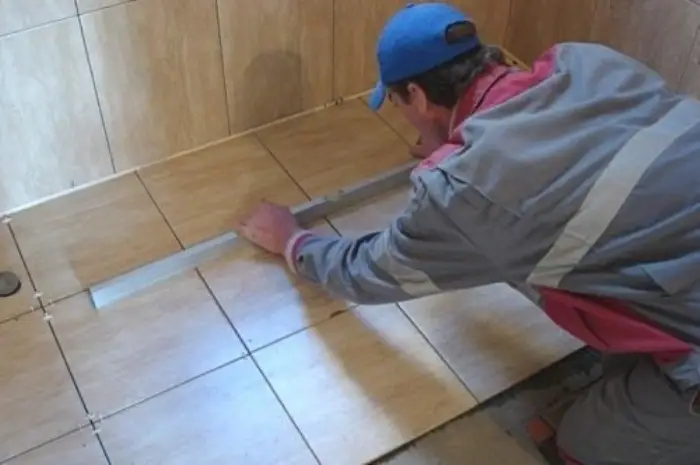
Photo 5 — Check evenness of laying with a level
Do not walk or apply other loads to the fresh tile covering for at least one day.
After the adhesive base dries and tiles are securely fixed to the floor, proceed to grouting the joints. The grout paste should completely fill the joints between tiles. Do not be afraid to put more than needed - excess grout can easily be removed after drying (knife, wash).
Attention! Do not turn on the warm floor system until the tile work is fully completed! The time required for the structure in the bathroom to fully set is approximately 3 weeks!
Also, make sure that the sensor wire of the thermostat system is located on the surface of the screed directly under the tile covering!
Some craftsmen cover the screed with a primer layer before laying tiles. When selecting a quality adhesive solution for ceramic tiles, this part of the work is not mandatory.
Remember that the floor must be leveled (checked with a water or laser level) before any of the above-mentioned types of work!
Choosing a Mat for Warm Floor
In this matter, it is better to consult with a specialist, but here are the basic data about the products of the mentioned manufacturers.
- THERMO;
The company offers to use special mats for wet rooms. All Thermo mats are two-core shielded.
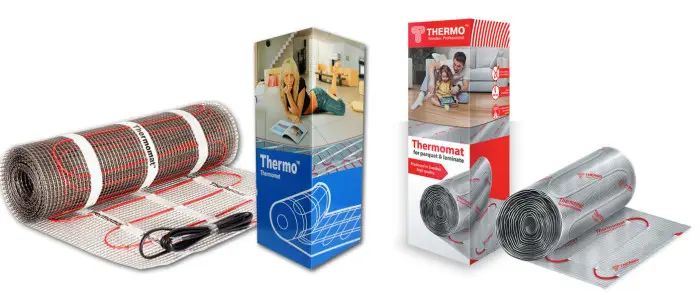
Photo 6 — Thermo brand two-core shielded mats
Mat thickness: 2.8 mm. Thus, the floor in the bathroom will rise no more than 1.5 cm (excluding tile laying). These are ultra-thin warm floors. The manufacturer produces mats with power from 180 to 1460 W/m, length from 2 to 16 m, and area from 1 to 8 m². The price of the mat accordingly varies from 140 to 400 EUR.
Country of origin: Sweden.
- ТЕПЛОЛЮКС;
This is also a two-core thin mat for floor heating (general purpose).
The manufacturer produces mats of standard width - 50 cm. The power of the products ranges from 130 to 1895 W/m, length - from 2 to 27 m, area from 1 to 13.5 m². The material price varies within the range of 90 to 380 EUR.
Country of origin: Ukraine.
- DEVI;
The company DEVI specializes in manufacturing warm floors and heating systems. In the product catalog of the company, you can find not only the heating elements of the floor itself but also all necessary accessories for them.
The electric mat from DEVI is a shielded two-core mat.
The manufacturer, working on a wide consumer market, produces products not only for standard voltage of 220 V but also for 230-volt systems.
The heating power ranges from 69 to 1647 W/m, mat length - from 1 to 24 m, area from 0.5 to 12 m². The price varies within the range of 140-630 EUR.
Country of origin: Denmark.
You can familiarize yourself with an example of laying the heating mat of the DEVI brand by watching the video:
The average service life of these mats is 20 to 50 years. However, note that the warranty period applies only to individual elements of the warm floor, not the entire structure as a whole.
The power of the mat is directly dependent on the area to be heated. For example, to warm a bathroom floor of 2 m² (note that the heating element will not be placed under the bathtub), we will need a mat with power up to 170 W/m.
When choosing accessories for the selected heating material, it is better to buy products from the same manufacturer. Thermostats may cost from 35-40 EUR.
$ Cost of Maintaining Warm Floor
Given that you will turn on the heated floor for about 4-5 hours a day, avoiding excessive heating throughout the day, we get:
2 m² x 170 W/m x 4 (5) h ≈ 2.3 rubles/day.
Cost of warm floor installation:
Kiev: 40-80 UAH per sq. m. depending on the master
Moscow: 600-900 RUB per sq. m. depending on the master
Cost of tile laying on warm floor:
The tariff does not differ from the usual tile laying on the floor and costs:
Kiev: 50-100 UAH per sq. m. depending on the master's skill level
Moscow: 500-900 RUB per sq. m. depending on the master's skill level.