Installation of Drywall: Ceiling (Photo Instruction)
Proper installation of drywall on the ceiling should begin with mounting the starter profile: along the perimeter of the walls, a horizontal layout is made and the starter profile is nailed down.
In this article we will consider the principle of organizing a simple ceiling frame and its finishing with drywall.
Single-level ceiling from drywall
Proper installation of drywall on the ceiling should begin with mounting the starter profile: along the perimeter of the walls, a horizontal layout is made and the starter profile is nailed down. Before mounting, the sealing tape is attached to the starter profile (optional). Load-bearing profiles in this type of installation should be arranged across the sheet, not along it.
IMPORTANT! Drywall bends better transversely than longitudinally. The weakness of the sheet is the basis for this method: mounting done in this way will increase the stiffness of the structure.
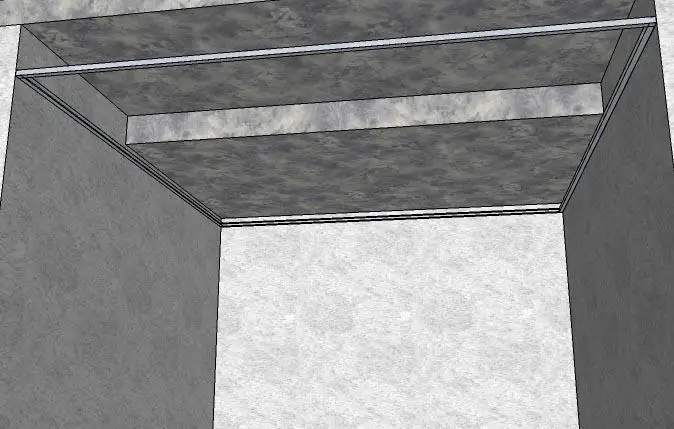
Figure 1 — Mounting the starter profile along the perimeter of the room
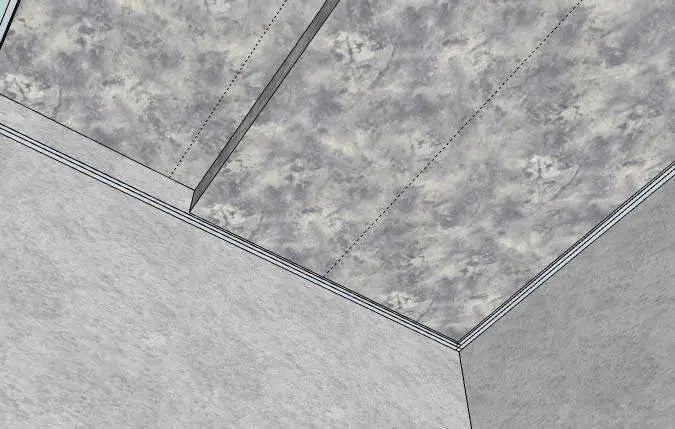
Figure 2 — Layout for mounting load-bearing profiles
In the considered example, the drywall ceiling is used as a leveling surface to eliminate height differences in the ceiling.
The layout on the ceiling should correspond to the dimensions of the drywall sheet used for work. In the example, a 2500 mm long sheet was taken as a basis. That is, the lines should be drawn at a distance of 1252 mm from the walls and from each other (half the drywall sheet + 4 mm for technical clearances).
Thus, load-bearing metal profiles will run across the drywall sheet through its center and along its edges (in the example, a small bathroom-type room is considered).
Hangers for load-bearing profiles are mounted to the ceiling according to the layout. Fasteners should be placed on a plane with a spacing of no more than 600 mm.
IMPORTANT! Fasteners for load-bearing profiles should be positioned so that they do not align with the intersections of nodes where longitudinal and load-bearing profiles meet.
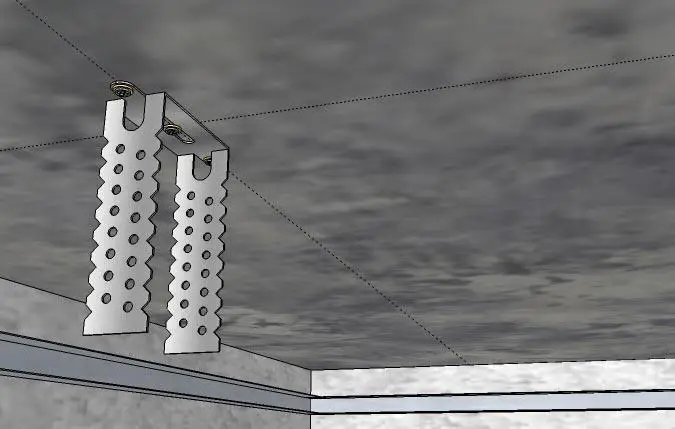
Figure 3 — Fastening for the load-bearing ceiling profile
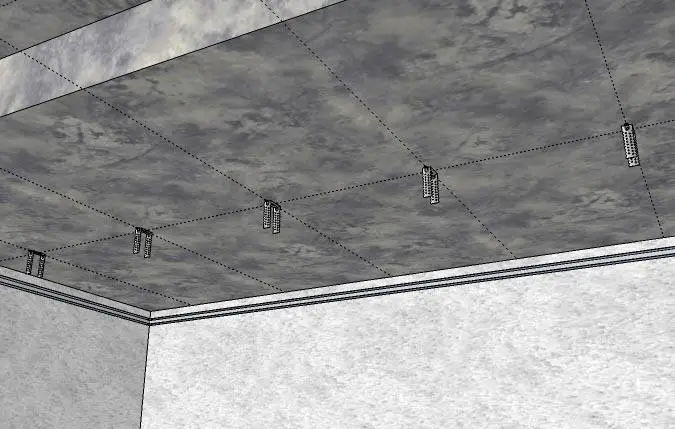
Figure 4 — Mounting of hangers along the central line
Hangers to the ceiling are often mounted using anchor clips, or anchor bolts can also be used (especially if it's about hollow-core slabs).
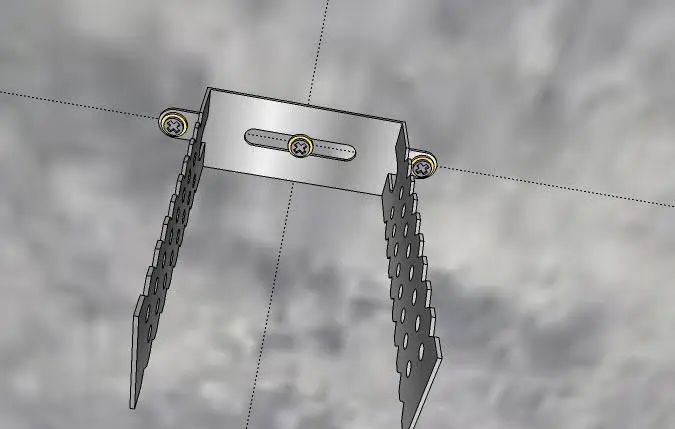
Figure 5 — Example of fixing the hanger to the ceiling
The process of assembling the ceiling is significantly accelerated by laser tools. The laser is mounted on supports at level (approximately 3 mm above the installed starter profile).
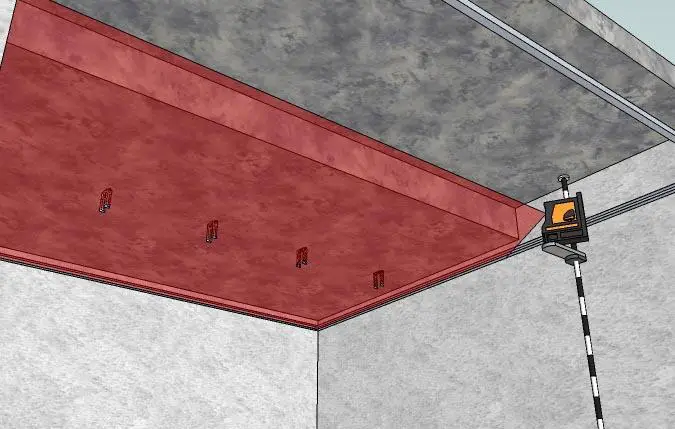
Figure 6 — Mounting the laser under the ceiling
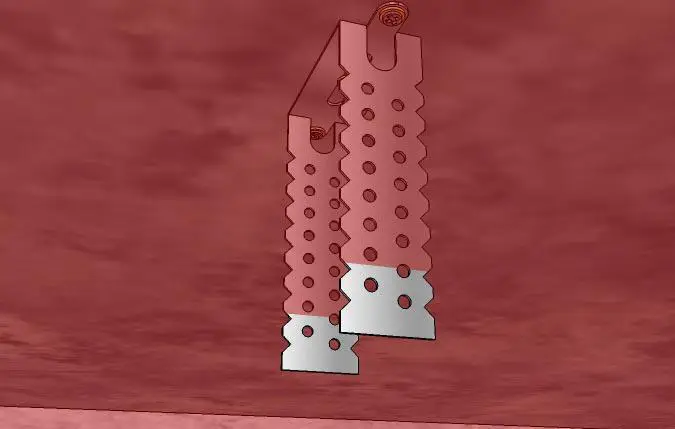
Figure 7 — Fasteners that extend beyond the area outlined by the laser beam should be cut to length
It is best to cut hangers with metal shears, aligning with the boundary of the beam. After that, you can proceed to mount the load-bearing profiles.
The load-bearing profile is inserted into the starter and secured to the hanger with self-tapping screws for metal. At least two screws should be driven into each side of the hanger.
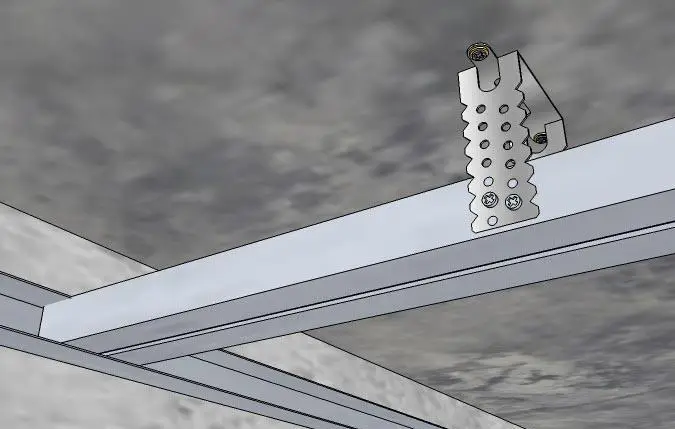
Figure 8 — Securing the load-bearing profile in the starter
IMPORTANT! If it's about a drywall ceiling installed at a considerable distance from the base ceiling, adjustable hangers should be installed.
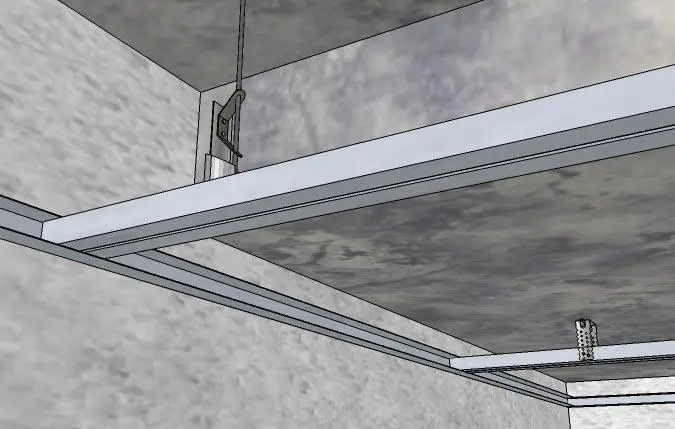
Figure 9 — The spacing between adjustable hangers should not exceed 600 mm
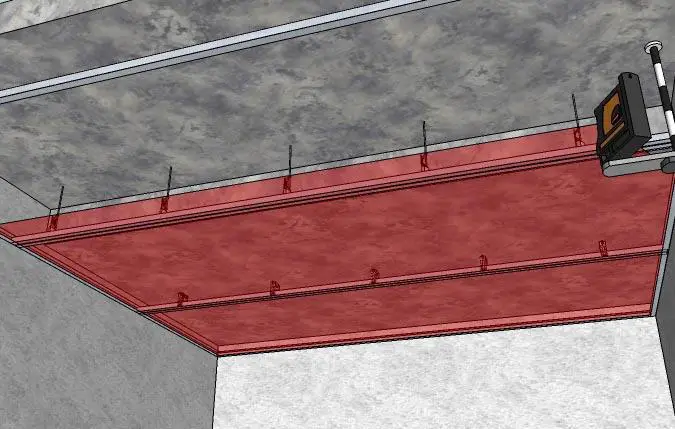
Figure 10 — Continuously control the horizontal alignment of the constructed element using a laser
After mounting the guide profiles, you can proceed to mount the longitudinal ones. The longitudinal profile should be mounted at a shorter distance than the guide profiles, with a spacing of no more than 400 mm so that it does not intersect the mounting points of the load-bearing profile.
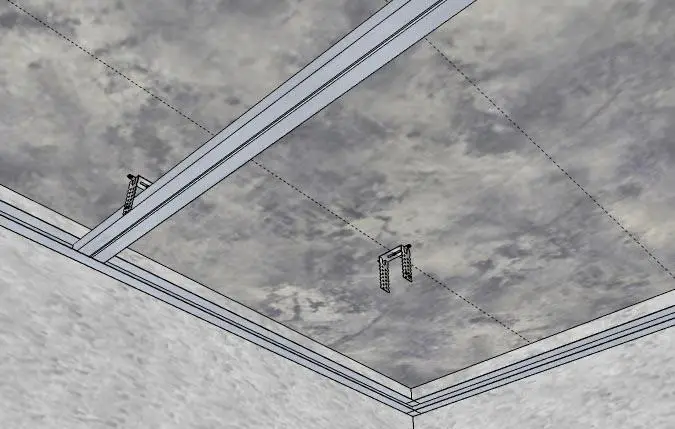
Figure 11 — The longitudinal profile should be installed correctly in this way
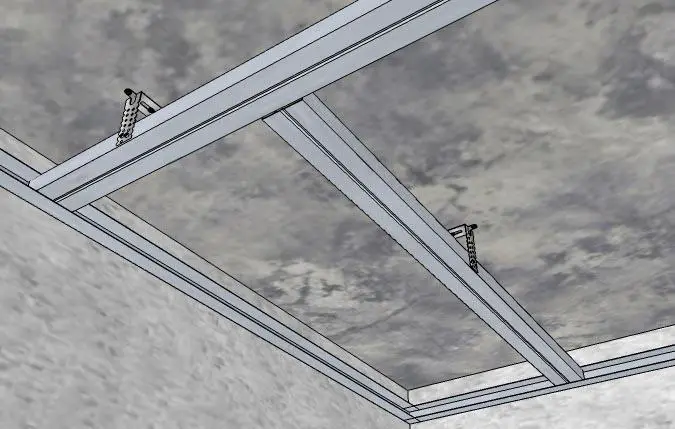
Figure 12 — Mounting the longitudinal profile
Due to such a length, sagging of the structure is impossible, so the profiles are connected to each other using special fasteners — crabs.
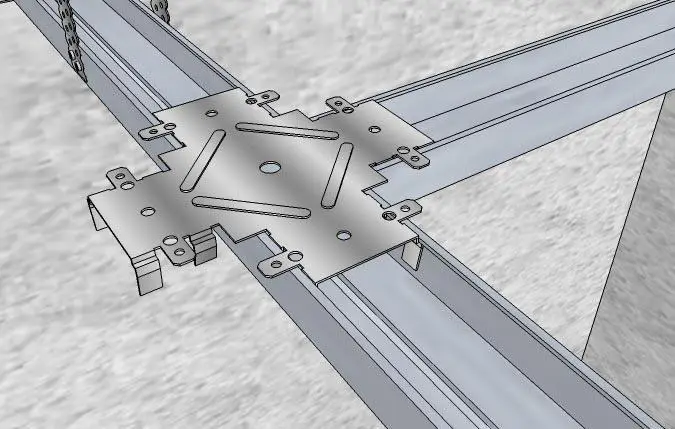
Figure 13 — Example of securing a crab
The crab is fixed in the profiles with screws.
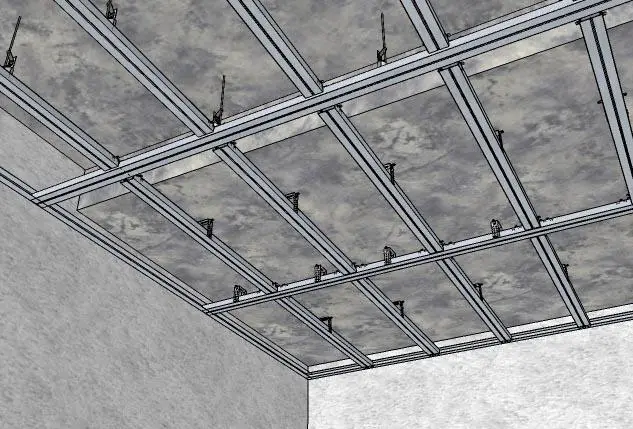
Figure 14 — Finished frame
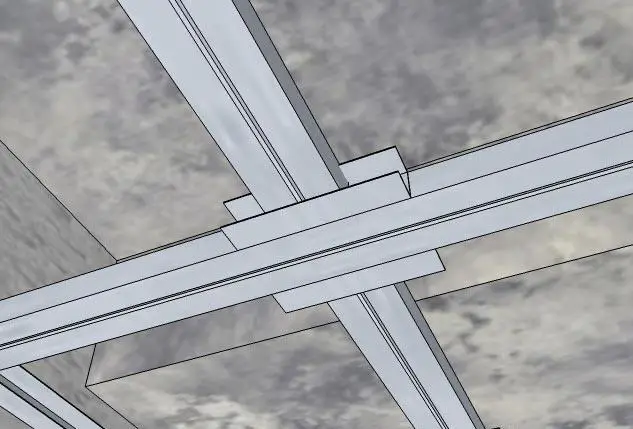
Figure 15 — To reinforce the structure, two segments of the starter profile are screwed to the load-bearing profile
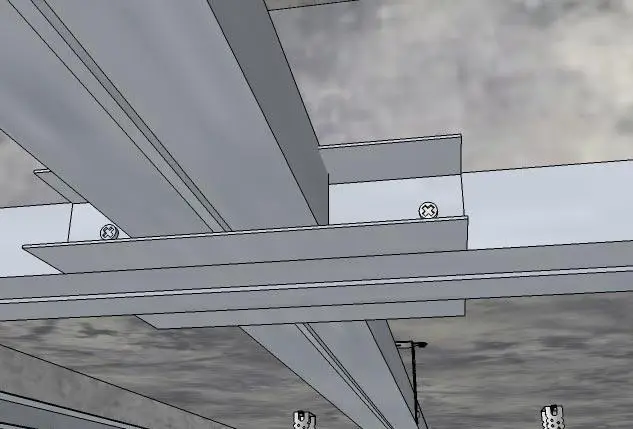
Figure 16 — Example of how to strengthen the guide profiles for drywall and the structure as a whole
The frame is ready. Now you can proceed to mounting the drywall sheets. The installation process for drywall sheets requires a 2 mm gap from the walls.
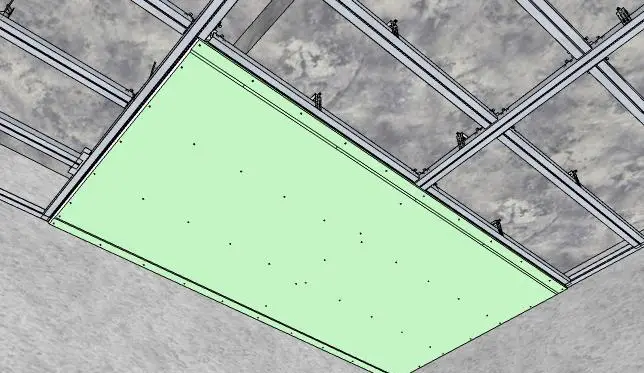
Figure 17 — Securing the first sheet. Pay attention to the frequency of securing drywall with screws
The sheets are mounted with a stagger of approximately 1200 mm, adding an additional 2 mm for mounting clearances.
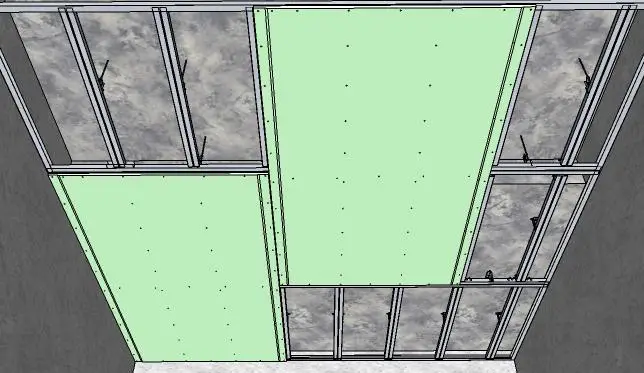
Figure 18 — Mounting a drywall sheet with a stagger of half the sheet
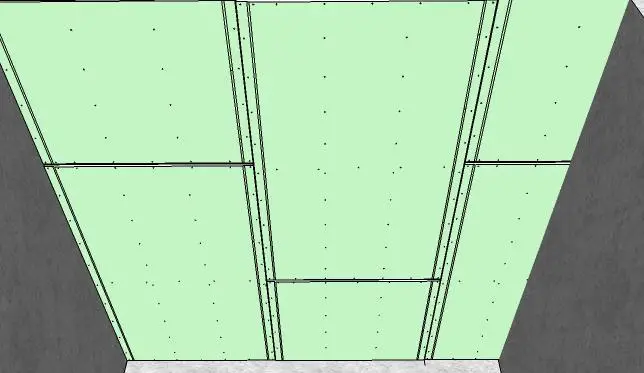
Figure 19 — The same principle is applied to mounting the remaining sheets
Installation of the drywall ceiling is complete. Thanks to this system, pipes and other communications that interfere with the interior of the room can be covered with drywall. Also, we recommend paying attention to the design of drywall ceilings.
Often even in simple ceiling structures, customers request installation of recessed lights (drywall lights are often small lamps with a power of up to 50 W).
How to Install Lighting Under Drywall
To install lights, before mounting the drywall, all necessary electrical communications should be run through the frame. If you don't want to deal with electrical wiring, you can install removable battery-powered lights.
The rules for preparing drywall for light installation are similar to how a hole is made for a junction box or socket. We have already written about installing a switch: the wiring is run to the mounting point behind the drywall sheet, and a hole is drilled in the drywall with a special bit according to the layout, the wires are connected, and the device is installed. The same scheme applies to ceiling lights.
Installation of drywall on the walls is done according to the same principle, but installation of walls from drywall requires a more robust frame structure and, optionally, insulation.
IMPORTANT! You can calculate all necessary materials online: there are programs available that allow you to enter only the working surface area and select the type and scope of work. As a result, in just a few seconds you get a ready shopping list for any drywall structure!
Drywall Installation: VIDEO
Drywall Installation: PRICE
Guides for drywall:
Purchase guides and other aluminum components of the frame can be bought starting from $0.1 per piece to $1.2 per piece. The price may depend on the material used to make the element, the manufacturer of the product, and its parameters.
Drywall installation:
- In Moscow: ceiling works – from 280 rubles/m², wall works – from 190 rubles/m², partition installation – from 300 rubles/m².
- In Kiev: ceiling works – from 65 UAH/m², wall works – from 45 UAH/m², partition installation – from 80 UAH/m².