Gypsum Plaster: Technical Specifications and Application Technology
Regarding modern housing, the level of comfort in some apartments can only be compared to life in a stone bag. And half of the responsibility for this lies in the materials used during construction or renovation. Today, it is impossible to cover walls with lime because the material does not adhere to concrete. This is where gypsum plaster comes to the rescue.
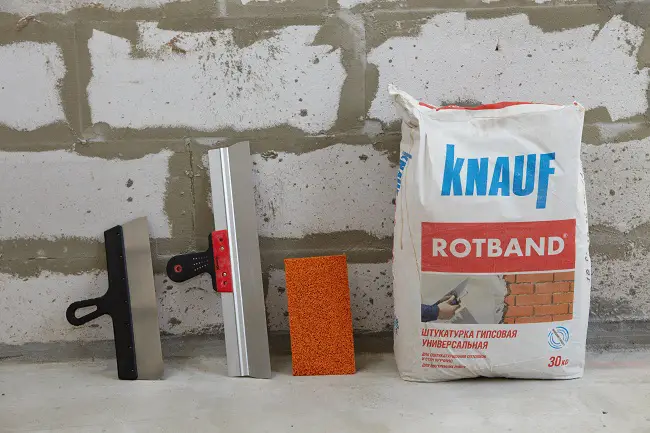
Photo 1 — Masterclass on Working with Gypsum Plaster KNAUF Rotband. Tools and Materials for Work
Gypsum wall plaster ensures air permeability of the room and gradually brings the humidity level in the apartment into order. In rooms with gypsum plastered walls, it's even better to sleep!
White Gypsum Plaster TEPLOON
It's better to explain the properties and application of gypsum plaster on a specific example. Why TEPLOON? It is a quality material in the mid-price range, and it's easy to try working with it for both professionals and beginners.
TEPLOON (manufactured by UNIS) is a lightweight gypsum plaster with perlite, which significantly reduces the weight of the mixture while giving it thermal insulation properties. This plaster can be used to remove deep wall irregularities without overloading the base.
Gypsum plaster TEPLOON White is allowed to be used in renovation works in medical and children's institutions — it is an environmentally clean material. Therefore, the answer to the question of whether this plaster is harmful is obvious: of course not!
The property of gypsum plaster to allow vapor and moisture to pass through also prevents the growth of microorganisms on the coating (mold, fungi, algae).
Material usage:
- plastering for interior works;
- full or partial wall leveling;
- can also be used for ceilings;
- decorative finishing can be applied over TEPLOON afterward — wallpapers can be glued, walls painted, or the surface prepared for tile installation.
Composition of gypsum plaster:
- gypsum;
- fine aggregate filler;
- chemical additives.
Gypsum Plaster: Material Specifications
- working temperature range − from +5 to +30°C;
- maximum layer thickness (without reinforcing mesh) − 5-50 mm;
- mixing ratio − 0.45-0.55 liters of water per 1 kg of dry mix;
- consumption of gypsum plaster per 1 m² (layer thickness 10 mm) − 8.5 kg;
- initial setting time of the mixture − 50 minutes;
- final setting time of plaster − up to 180 minutes;
- complete drying time (layer thickness 10 mm) − 5-7 days;
- thermal conductivity of the material − 0.23 W/m°C.
Advantages of Gypsum Plaster:
- Wall finishing without reinforcing mesh is allowed for layer thickness from 5 to 50 mm, and the thickness can be increased up to 70 mm for filling recesses. For ceilings, a layer up to 30 mm thick can be applied.
- This is an eco-friendly material with high vapor permeability and low thermal conductivity.
- Among materials in its class, this one is one of the most economical in terms of consumption per 1 m².
- When applied according to technology, it does not shrink and does not crack.
- The ready mixture is plastic, making it easier and faster to work with.
- There is no need to skim the surface after drying.
Surfaces on which gypsum plaster can be applied:
Gypsum plaster can be applied to concrete, foam concrete, gypsum, cement-sand bases, brick masonry, and any other non-deformable surfaces.
Applying Gypsum Plaster
Regarding usage, gypsum-based plaster is easy to handle. Below we will try to provide comprehensive answers to the most common questions about this process.
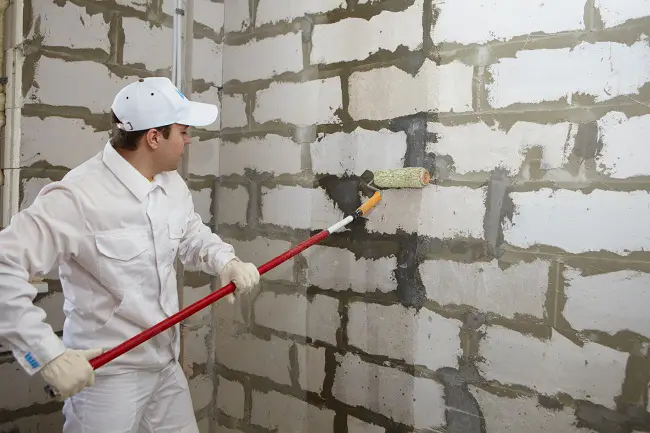
Photo 2 — Wall Priming After Cleaning the Surface from Dust
How to Prepare the Base for Plastering?
First, remove old wall or ceiling coatings and clean the wall of oily contaminants, dust, and debris.
Level the base by filling in cracks or smoothing protruding fragments. If there are significant recesses on the wall surface (over 20 mm), applying the TEPLOON mix for leveling is mandatory (a filler like PLASTER may also work). Before filling the defects, clean the coating of dust and other contaminants that could hinder adhesion.
Wait at least 2 days before applying the plaster.
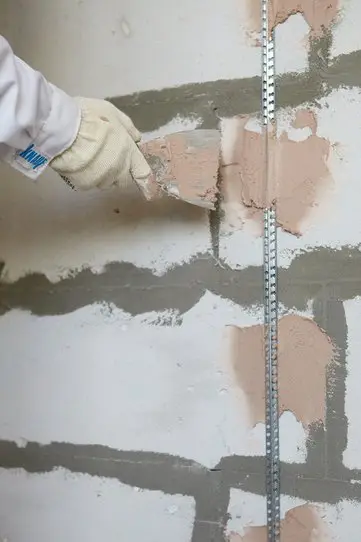
Photo 3 — Fixing Anchors in Plaster
Before starting plastering work, the base should also be primed to improve adhesion (product from the manufacturer − UNIS primer, applied in two layers). If working with uneven or highly absorbent surfaces, the primer should be applied in multiple layers (applicable for gas concrete, gypsum board, etc.). Moisture-resistant surfaces can also be coated with special primer that helps the plaster and base adhere better.
IMPORTANT! Gypsum plaster should not be used on wood: these materials do not adhere to each other. Although forum posts showed that our brother found a solution to this issue by coating the walls with Concrete Contact. Though, to be honest, it's a risky method.
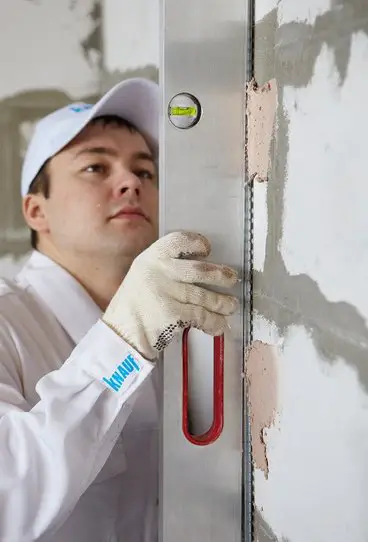
Photo 4 — Leveling the Anchor in the Mixture
How to Mix the Mixture?
Pour water into the dry mix in a ratio of 0.45-0.55 liters per 1 kg of plaster and mix for 1-3 minutes. It is more convenient to mix using a mechanical method with a construction mixer. After mixing, let the mixture stand for about 5 minutes and then remix.
Another important point: follow the mixing order of "dry mix - water". The mixture does not require any reinforcing additives, so there should only be two ingredients in the gypsum plaster mix: water and the contents of the bag.
IMPORTANT! Excess or insufficient water, non-recommended additives by the manufacturer, and violation of application techniques can cause plaster to crack or spread. Be careful when performing work and strictly follow the instructions.
It is better to lay polyethylene sheeting on the floor before starting plastering work.
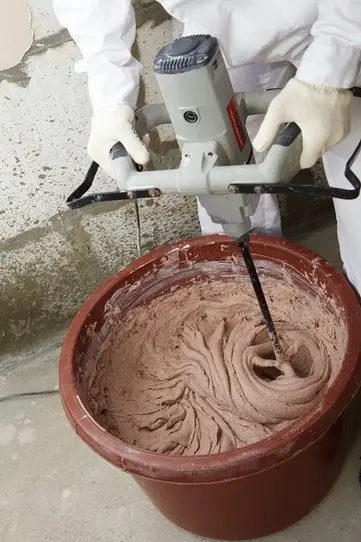
Photo 5 — Mixing the Mixture for Wall Plastering
How long does plaster dry?
There are several answers to this question, depending on what you meant:
- time until the mixture in the container sets − 50 minutes;
- time until plaster sets on touch − from 50 to 180 minutes;
- time to wait until the applied plaster is fully dry − 5-7 days.
How to Plaster Walls by Yourself?
Wall plastering should be done using anchors. Metal guides up to 3 meters long are installed at a distance of 1.2 meters apart depending on the length of the rule − another essential tool.
IMPORTANT! Beginners are recommended to use a 1.5-meter rule, placing anchors accordingly at 1.2-1.3 meter intervals.
First, install the end anchors 30 cm from the adjacent wall, then evenly place intermediate anchors between them. The guide rails are attached to the wall vertically at the marked line using alabaster (the manufacturer recommends using TEPLOON plaster). The mixture is applied to the wall in steps of 15-20 cm and pressed into it, aligning by level (the mark indicating where the final surface will lie is important). The fixing mixture usually sets in about 3 hours (alabaster in as little as 20 minutes).
How to Use a Trowel?
When plastering walls, you can use a wide trowel or a float. The prepared mixture should be applied to the working surface within half an hour using the throwing method (high density application) from bottom to top. When throwing, the plaster layer should slightly exceed the anchor level.
After filling the entire wall section (beginners are recommended to start with filling one gap between anchors), excess material is removed with the rule applied along the anchors.
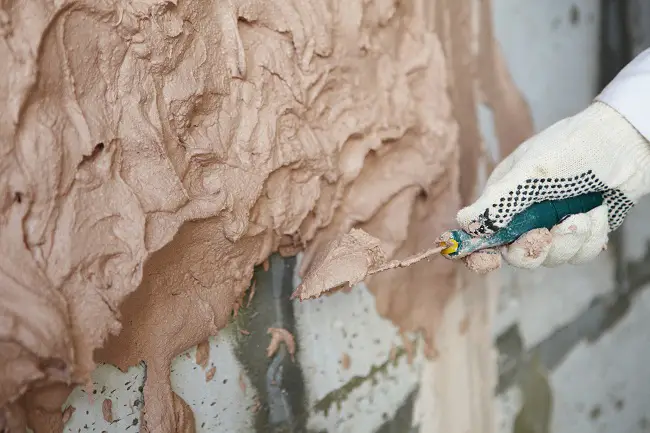
Photo 6 — Throwing Plaster onto the Wall
Gaps formed during application should be filled with mixture 50 minutes after starting to apply the mixture to the wall. Excess material is again removed with the rule.
The resulting flat surface, after drying, is suitable only for tile installation (to wallpaper walls, the surface must be polished).
For walls, apply a layer no more than 50 mm thick; for filling recesses − up to 70 mm.
For ceilings, it is technologically correct to apply no more than 30 mm of mixture.
How to Apply Gypsum Plaster Layer More Than 50 mm Thick?
If the surface height difference exceeds 50 mm, the wall should be pre-leveled with TEPLOON plaster in multiple layers, with each layer reinforced with plaster mesh. Anchors do not need to be installed in this case.
IMPORTANT! Plaster mesh can be replaced with cross-shaped grooves in fresh plaster. These are applied with a comb or toothed trowel.
The leveling thickness should not exceed 30 mm. Each subsequent layer of plaster must be applied only after the previous layer has dried and been primed.
How to Use a Rule?
The drawbacks of working with a rule are overzealousness and haste. When using a rule, it's important not to press the rule too hard, otherwise, grooves will form on the wall surface. The pressure on the rule should be applied where the anchors are located under the rule.
Evenly and confidently, move the rule from bottom to top in a curved motion.
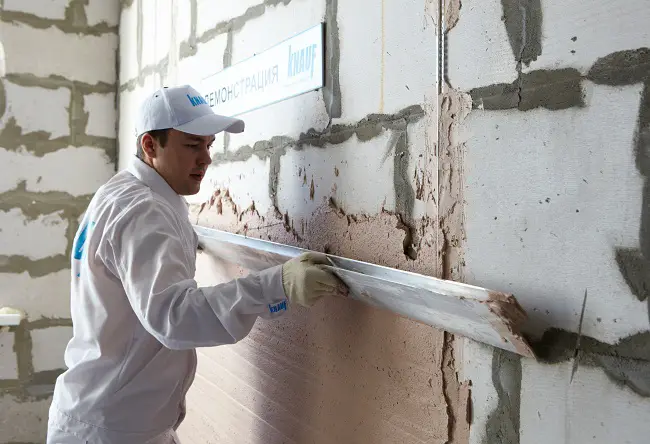
Photo 7 — Working with the Rule
Purpose of Polishing and Smoothing: Why Is It Needed?
Smoothing and polishing the surface after drying will provide a perfectly flat surface ready for further renovation work in the room. Depending on the thickness of the plaster layer, 90-120 minutes after finishing, the plastered surface should be moistened with water and rubbed with a sponge. Walls covered with gypsum milk should be polished.
This is conveniently done using a trowel or float.
After 5-7 days, once the surface has completely dried, it can be wallpapered or painted.
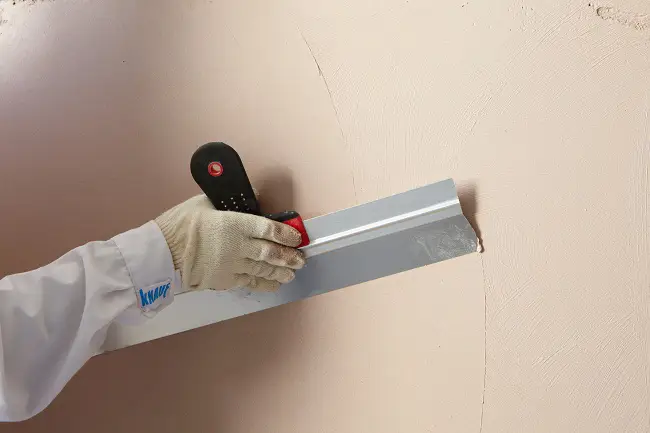
Photo 8 — Leveling the Surface
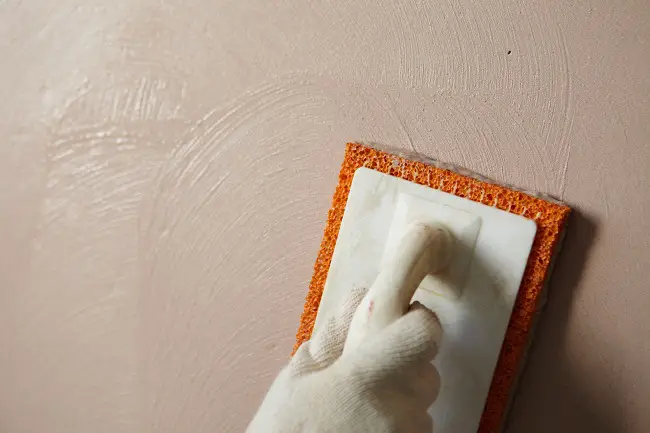
Photo 9 — Finishing the Plastered Surface
Machine-Appplied Gypsum Plaster: What Is It?
This is the same material (price difference rarely exceeds $1.5 for machine-applied plaster), intended for mechanical application. For exterior work − an indispensable method! Agree, facade finishing or finishing large interior areas would take much more time if done manually. Gypsum machine plaster is not used outdoors − it is suitable only for interior finishing and costs approximately $7.6-8.9 per 30 kg of dry mix.
Gypsum Plaster vs. Cement Plaster: Which Is Better?
The vapor permeability of cement plaster is 0.09 mg/m·hPa, while that of gypsum plaster is 0.11-0.14 mg/m·hPa. These are practically identical figures. When finishing walls, it's important to know the vapor permeability of the base material: for example, the vapor permeability of shells is 0.10-0.12 mg/m·hPa, so using gypsum plaster on shells is safe.
Which plaster is better − that's a question whose answer depends on several factors:
- price;
When comparing different types of plaster, it's a mistake to look only at price and weight of the package. The reason is that the specific weight of cement mix is almost twice as high as that of gypsum. Therefore, consumption per 1 m² will differ: for example, gypsum plaster on average requires 9-10 kg/m², while cement plaster can go up to 20 kg/m². Now let's look at the price.
The price of gypsum plaster is about 1.5 times higher than that of cement mix, which discourages unskilled buyers. In the end, this seemingly cheaper gypsum plaster is only slightly more economical than cement.
- need for finishing skim coating;
Gypsum plaster, unlike cement plaster, does not require skim coating when applied properly.
- shelf life of the mixtures;
The so-called
Need a renovation specialist?
Find verified professionals for any repair or construction job. Post your request and get offers from local experts.