Shelves from Gypsum Board Made by Yourself (PHOTOS)
If the sight of an old-fashioned bookcase with mirror doors and a dozen identical shelves upsets you, you can take an alternative route—make shelves from gypsum board according to your own sketches, without overly restricting the flight of imagination.
Whether it is bookshelves from gypsum board (see photos below), shelves for a TV or a shelf from GKL for your grandmother's favorite set, with proper load calculation, such shelves will become reliable and functional surfaces that complement interior design.
Shelves from Gypsum Board (PHOTOS)
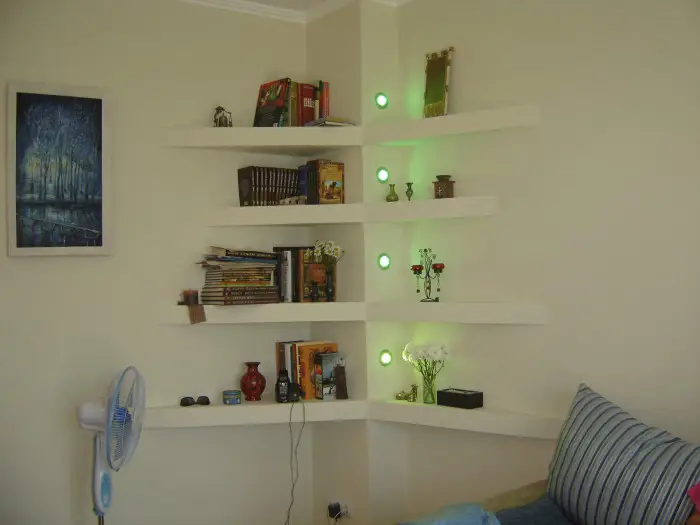
Photo 1 — Corner shelves from gypsum board—a great way to organize, in effect, a dead space, making it functional or decorative
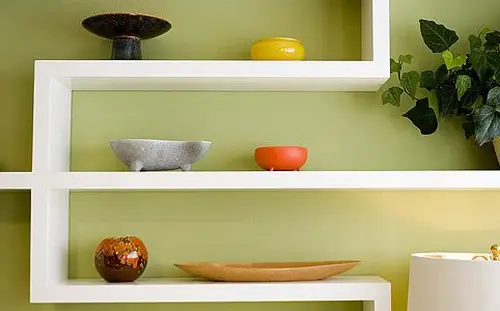
Photo 2 — Wall-mounted shelves from gypsum board can be any size and shape. This material is valued for the ability to experiment with construction forms
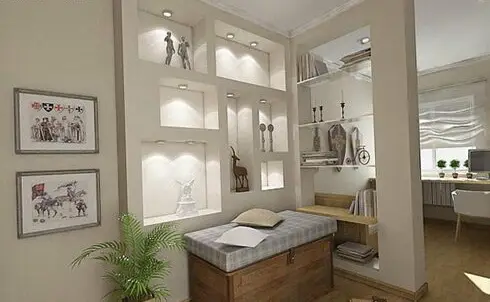
Photo 3 — Functional design of a gypsum board structure in the living room
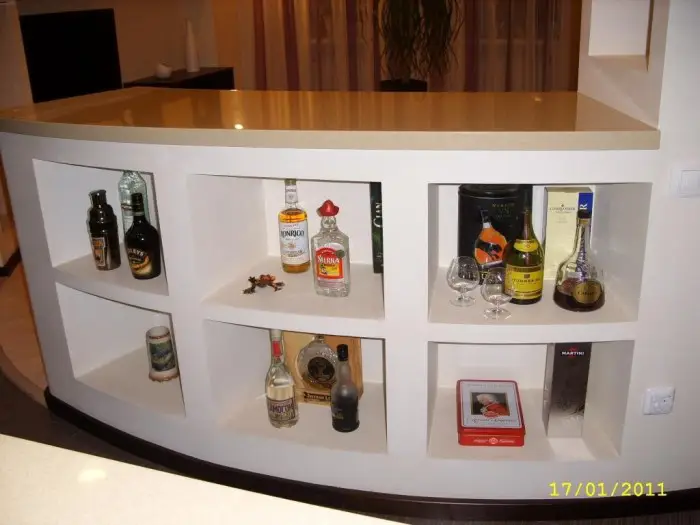
Photo 4 — Semi-circular gypsum board constructions of this type will look great in a kitchen that adjoins the living room
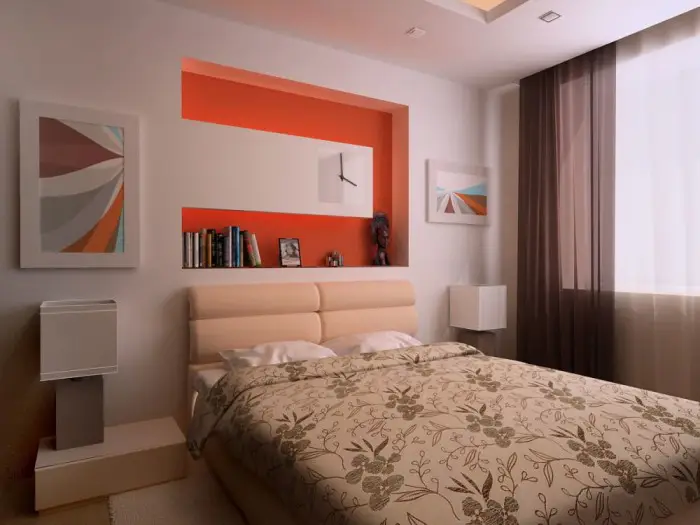
Photo 5 — Shelf from gypsum board in the bedroom above the sofa, as well as in any other room of the apartment, does not have to be mounted on the wall. Wall shelves built in a niche style look much more interesting
How to Make Shelves from Gypsum Board by Yourself: Step-by-Step Instructions
To make wall-mounted shelves from gypsum board, you will need the following materials and tools.
Materials:
- galvanized profile 50x25 mm;
- arch profile (if curved constructions are to be made, such as arches from gypsum board with shelves or bent shelves);
- guide rails;
- screws and anchors with expansion;
- gypsum board;
- primer;
- reinforcing mesh for joint treatment (special paper tape or fiberglass mesh).
Tools:
- drill;
- electric planer;
- angle grinder;
- level rail;
- measuring tape;
- plumb line;
- pencil;
- hammer;
- pliers;
- saw;
- knife;
- spatula;
- brush;
- sandpaper.
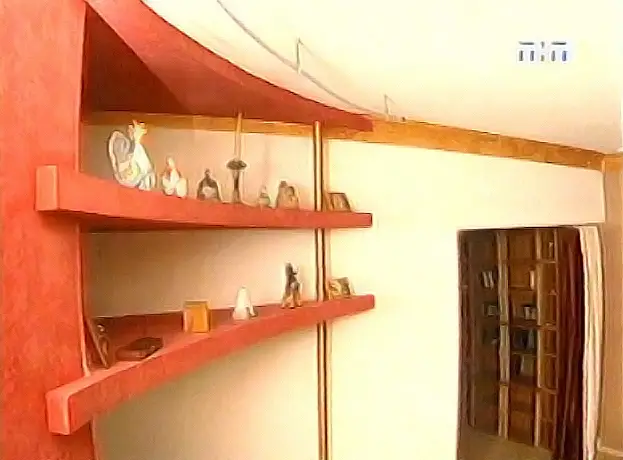
Photo 6 — Another shelf from gypsum board in the corner
Installation of Shelves from Gypsum Board
Draw the shelf.
First, you need a sketch—how the shelf should look after installation. Based on the sketch, make necessary measurements and mark the approximate location of shelf mounting on the wall.
Mount the frame from the profile for gypsum board.
There are several installation options. First, mounting shelves during the construction of a gypsum board wall, and secondly, installing gypsum board shelves on an already completed wall. In the first case, you will get built-in shelves (like niches) in the wall body, and in the second case—protruding decorative or functional surfaces.
The base of the shelf is a frame made from metal profile measuring 50x25 mm.
Mark the wall by level.
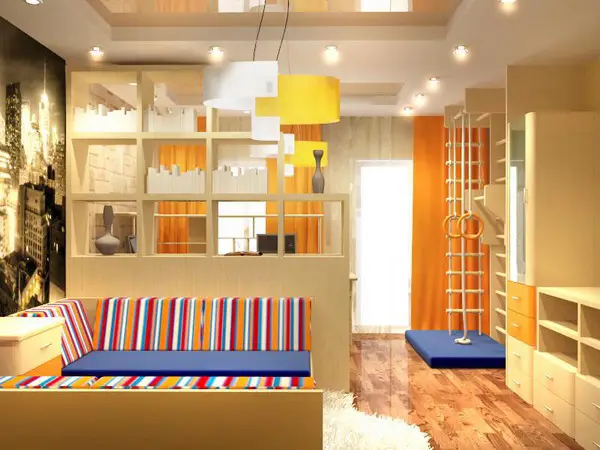
Photo 7 — Shelves and partitions from gypsum board in the child's room
To secure the metal frame to the wall, use a drill and screws. The mounting step should not be less than 250 mm.
How to choose the best profile for building gypsum board structures, we wrote in one of our previous articles. Much of the relevant information you need can be found there.
Suppose beautiful shelves for you are not the main criterion: you are interested in a strong structure capable of withstanding significant weight (e.g., a home library or TV). If the shelf is designed for heavy loads, you will need:
- instead of standard gypsum board, whose thickness is from 9.5 to 12.5 mm, use only thick gypsum board (thickness of at least 18 mm) and other fasteners (such as butterfly screws), because it is impossible to fix such a shelf with regular screws;
- mount the profile to the wall at a more frequent step;
- use brackets and frames during installation to greatly reinforce the structure.
After mounting the profile, begin installing guide rails that create volume for the structure frame. Guide rails are transverse and longitudinal strips. To strengthen the structure, guide rails should be mounted to the ceiling or floor, plus crossbeams will be placed between the profile and guide rails.
For illustration, let's look at working on an example of how to attach a frame for a shelf under the ceiling for hidden lighting. Organizing the same 60 cm below the window for flowers in the hall or a shelf for shoes in the hallway will not be a problem either. The only difference is that in the second case, there will be no ceiling mounting for the shelves.
Hanging the frame:
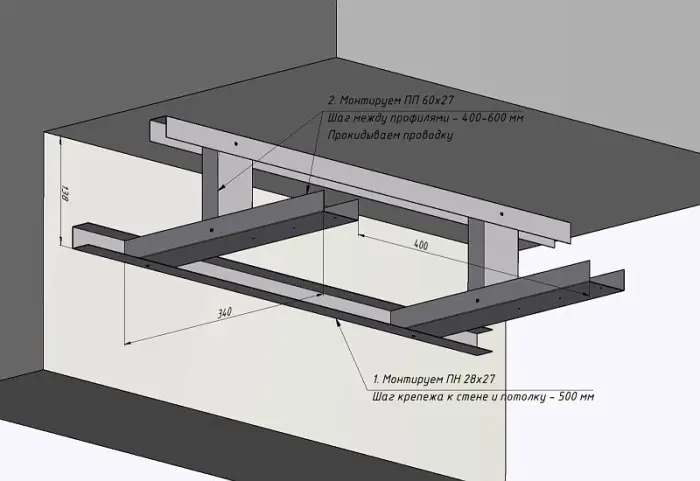
Diagram 1 — Mounting profiles on the wall and ceiling, connecting profiles with each other
Sheathing the frame with gypsum board:
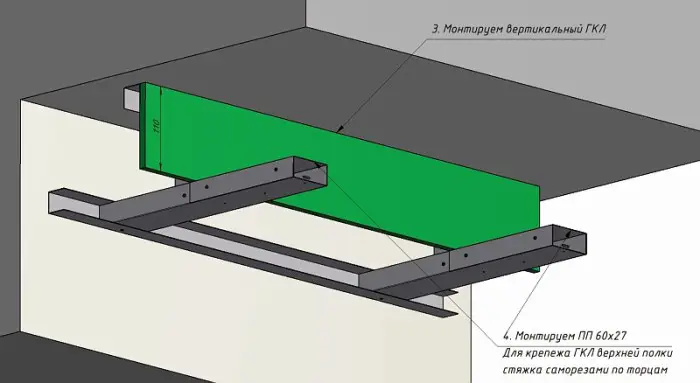
Diagram 2 — It is better to start sheathing with mounting the vertical element
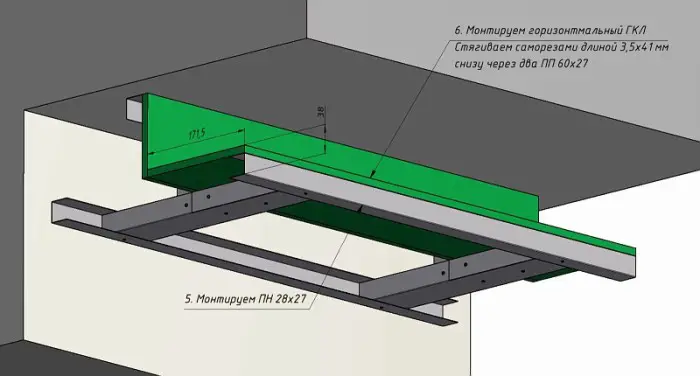
Diagram 3 — Mounting the horizontal sheet
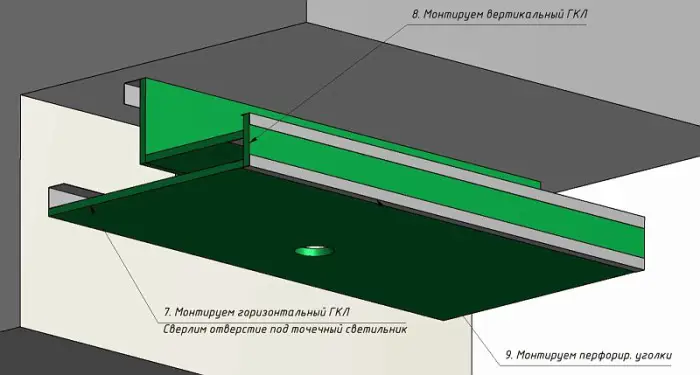
Diagram 4 — Completing the sheathing of the shelf with gypsum board
Installing lighting in the shelf:
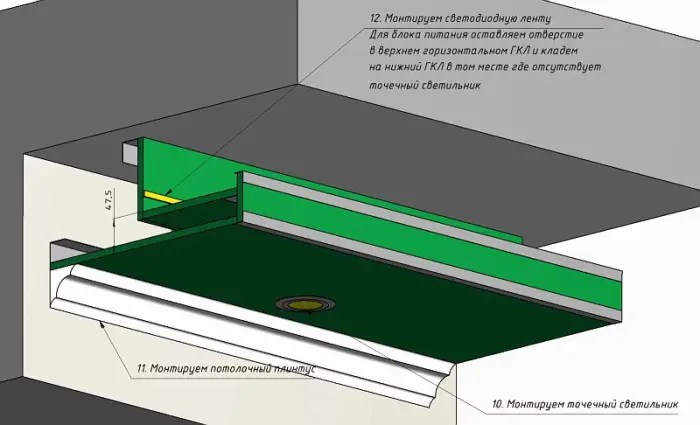
Diagram 5 — Installing LED tape and spotlights
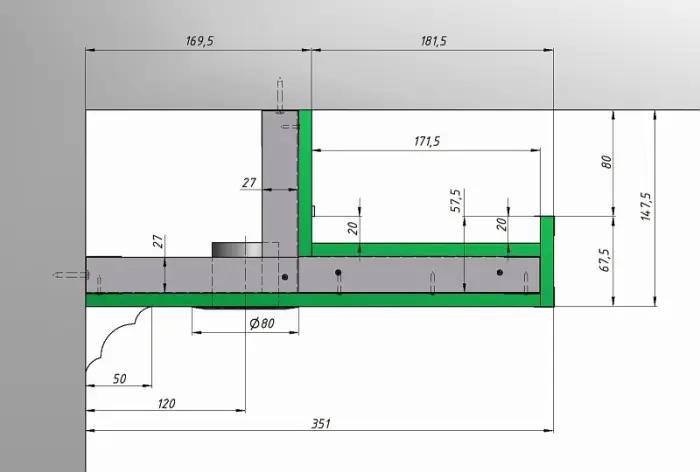
Diagram 6 — Control calculations
Corner shelves are mounted using the same method as longitudinal ones.
IMPORTANT! To reinforce the shelf structure, it is recommended to mount two base profiles on the wall. In such a case, the shelf will be thicker but stronger.
Sheathing the frame with gypsum board.
Gypsum board sheets are mounted to the frame based on the load: the greater the load, the more frequent the sheet mounting to the profile.
If your task is to hang shelves from gypsum board in a bathroom, you should use only moisture-resistant gypsum board, i.e., GKLV (this type of gypsum board is green in color).
IMPORTANT! When sheathing the frame with gypsum board, remember: sheet joints should be located in the center of the profiles.
Sheet joints after completing the installation should be covered with fiberglass mesh and spackled.
IMPORTANT! If a shelf or partition with lighting is planned, run electrical wiring before starting work on the gypsum board frame. Holes for light fixtures in the gypsum board should also be drilled before mounting to the frame.
Gypsum board can be mounted as separate elements or as whole sheets, cutting the material with a knife after mounting.
If shelves from gypsum board are clear, what about shelves that need to be hung on a gypsum board wall covering?
How to hang a shelf on gypsum board?
First, during wall sheathing, it is necessary to determine the placement of hanging structures and reinforce the frame in places where they are planned to be mounted:
- install an additional sheet of gypsum board between the wall and the finishing layer if mounting is done on a metal frame;
- coat the gypsum board sheet with adhesive over the entire surface, not just point-by-point, if mounting is done using a glueless method.
If this was not provided for, shelf mounting should be done using special fastening elements—'butterfly' fasteners (the principle of mounting is clearly visible in the image below). Fasteners with 'butterfly' design can withstand a load of up to 5 kg. For fixing heavier structures (load up to 15 kg), mounting strips can be used.
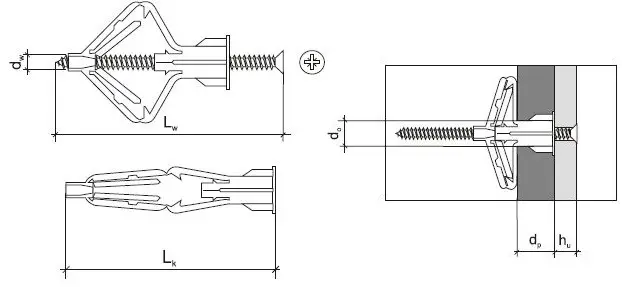
Diagram 1 — Fastening 'butterfly'
Can the maximum allowable load be exceeded?
Not recommended without additional reinforcement. In case the load on a shelf mounted on gypsum board exceeds allowable limits, it is better to secure the structure with floor supports or ceiling cables, transferring the main load from the wall to other surfaces.
Shelves from Gypsum Board Made by Yourself: VIDEO
$ Shelves from Gypsum Board: Price
- in Moscow - from 230 rub./m²;
- in Kyiv - from 55 UAH/m².