Plastering with and without guides: why complicate the process?
Plastering without guides: VIDEO
Plastering with guides: technique
Plastering walls with guides allows you to achieve good results, where the tolerance will be only 1.5 mm (when plastering with lime or cement mortar). With this method, by the way, you can also develop quite a high work speed, which is also good.
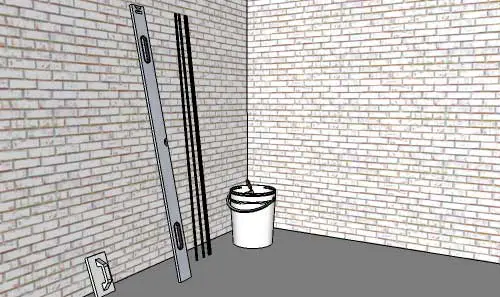
Figure 1 — Working surface
For the job you will need:
- a level up to 2 meters long (the level must have adjustable eyepieces);
- guides (as guides, you can use a wooden strip 10x10 mm or regular metal guides made of galvanized steel);
- a foam (carbolic acid) trowel;
- self-tapping screws;
- a rubber band - 'Hungarian' (can be replaced with a regular cord);
- protective gloves;
- a master trowel;
- containers;
- mortar.
Work procedure:
Estimate the surface unevenness by eye and preliminarily determine the expected thickness of the plaster layer.
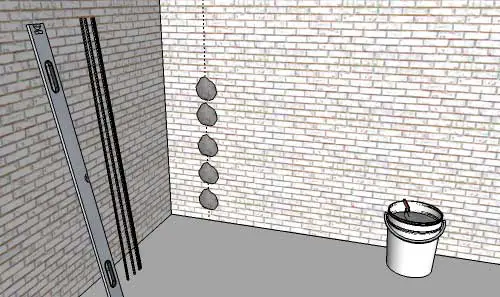
Figure 2 — Installing the first guide - a 30 cm offset from the wall and applying the fixing mortar along a vertical line
From the corner of the room, move about 30 cm and apply equal portions of the fixing composition for guides. Keep in mind that the finishing surface will be offset from the wall by 2/3 of these mortar portions. From the fixing composition, make a vertical line.
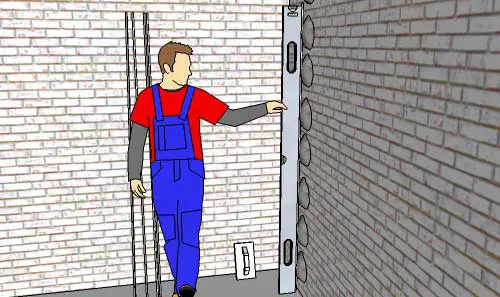
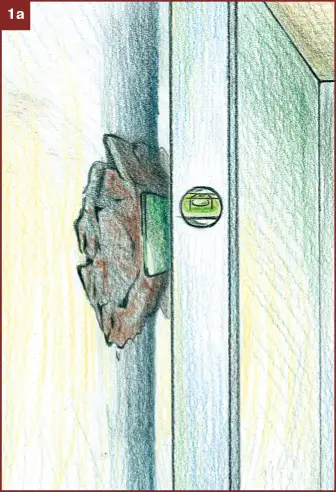
Figure 3 — Embedding the guide into the composition and checking with a level
The guide must be 'embedded' into the applied mortar on the wall to the desired level. While doing this, look at the eyepiece. Thus, initially we need to install two guides at opposite ends of the wall.
IMPORTANT! If you are doing plastering work for the first time, don't try to tackle large volumes of work at once. Not everything may go as you'd like or there might not be enough time to finish a large job on schedule. Start small: limit yourself to one wall.
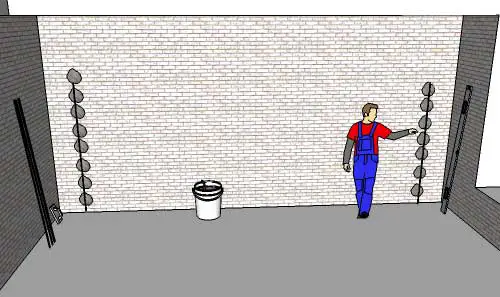
Figure 4 — Similar attachment is done on the opposite side of the wall
In our case, brick wall plastering is performed. In any brick masonry, there are small gaps or cracks: these can be used advantageously - they make a perfect base for fasteners.
If your walls do not have such gaps, drill a hole and hammer in a dowel. These fasteners are needed to grip the cord or 'Hungarian'. One dowel is fixed at the first guide, another one is attached to the second guide. The fasteners for guides must be installed strictly horizontally. The cord (with a contrasting red cord, it's easier to work with than with barely visible black or white) is stretched between the fasteners.
The first guides are installed.
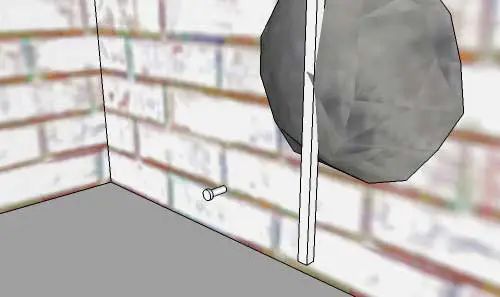
Figure 5 — Before installing intermediate guides, screw a self-tapping screw in front of the first guide for stretching the red cord
Intermediate guides are installed as follows:
Determine the locations for intermediate guides. They should be placed at equal distances from each other so that the rule used to level the plaster is slightly longer than the intervals.
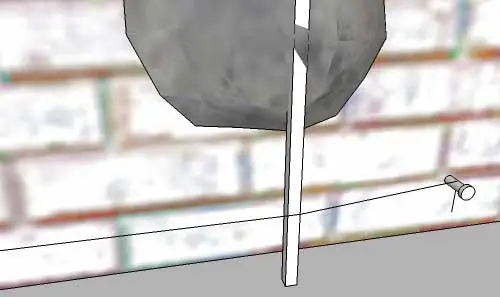
Figure 6 — The second self-tapping screw is mounted symmetrically from the opposite side and the tension is set
IMPORTANT! For a beginner doing DIY work, it's better to choose a shorter rule and accordingly install 1-2 more guides no more than 1.2-1.3 meters apart from each other. The length of the rule should be 1.5 meters.
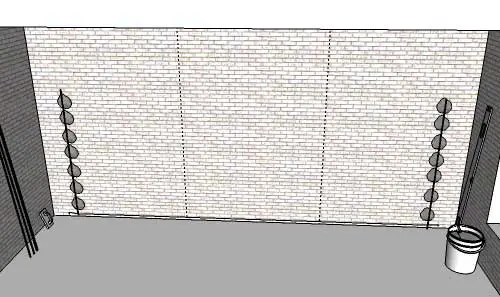
Figure 7 — Wall after setting up the level tension
Mark the locations for installing intermediate guides with a dashed line on the wall. Extend the dashed line to intersect with the red cord and drill a hole for the dowel/self-tapping screw under it.
Insert the dowel into the hole and screw in the self-tapping screw (the head of the screw should not go beyond the cord).
IMPORTANT! After tightening, the self-tapping screw should not touch the cord!
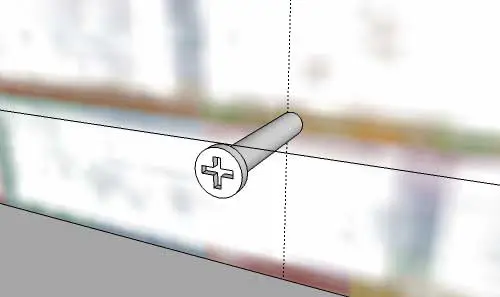
Figure 8 — The fastener for the self-tapping screw for intermediate guides should look like this
This marking system will allow you to install plastering guides at the same plane level with minimal deviations, or even without them.
As in the case of the first guides, further guide installation is done according to markings on the applied fixing composition. The intermediate guides are also pressed into the mortar, placing the strips slightly above the self-tapping screw. While using a level, tap on the guide's head and gradually immerse the strip into the fasteners for guides (remember to look at the eyepiece!)
Guide installation is completed.
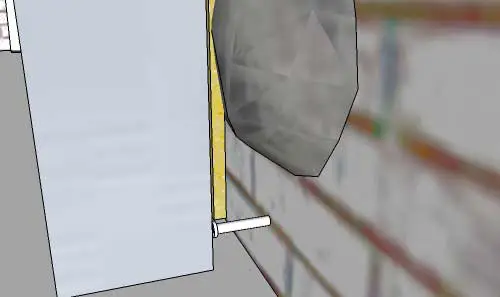
Figure 9 — How to install guides using self-tapping screws
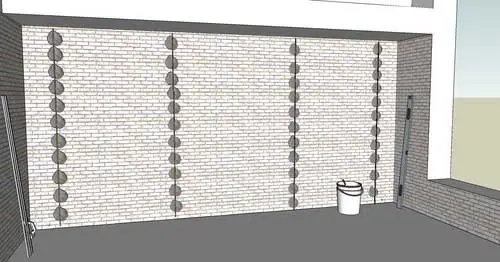
Figure 10 — How to install guides for plastering on walls up to 18 sq.m.
IMPORTANT! If you follow the instructions, installing guides should not take more than 20 minutes (for a wall area of 18 m²).
Applying plaster
Let the fixing mortar, applied under guides, dry a bit (1 hour will be enough). Then you can start applying the mortar to the wall surfaces in the gaps between guides. You can use a trowel or a master trowel for this.
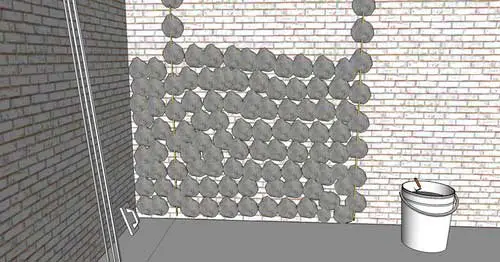
Figure 11 — It's time for plastering - fill the first gap between guides with mortar, moving from bottom to top
THIS IS INTERESTING: If you're in a hurry, you can try to plaster the wall manually without any additional tools. The main thing is to protect your hands from getting mortar on the skin.
IMPORTANT! The area to be covered with plaster is not only your decision. You should also consider the wall material properties. For example, red brick in masonry absorbs water faster than white or silicate brick, where you can cover the entire wall surface with mortar at once. On walls made of red brick, it's better to start working on small areas, while on white brick walls, you will have to wait after covering the whole surface because the mortar should stop flowing down the wall and give some moisture to the masonry.
TRICK: If you know that you will be working in a humid room or in cold conditions, you can add plaster of Paris to the mortar for faster drying.
The mortar that has protruded beyond the guides must be removed using a rule, slightly pressing it against the guides. You should not press too hard. Pass the rule over the mortar and guides several times.
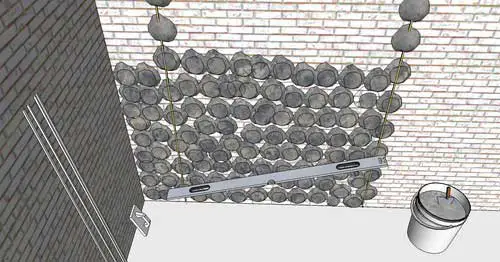
Figure 12 — Remove excess plaster by passing the rule over the gap several times
IMPORTANT! If the pressure is too strong, with a long rule (1.5 meters or more), the guide may bend in the middle and, accordingly, press the applied mortar with a curve. Therefore, pressure on the rule should be applied as close to the guides as possible.
Use the cut-off excess for a second time, thoroughly mixing the collected mortar from the surface, and filling in the gaps and voids.
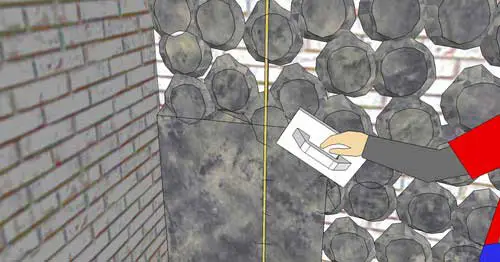
Figure 13 — Fill voids with plaster using a master trowel or any other convenient tool
Additionally check the work with a level. Then remove the guides and carefully fill in the grooves with mortar.
Wait for the composition to dry, and the wall leveling at the initial stage can be considered completed.
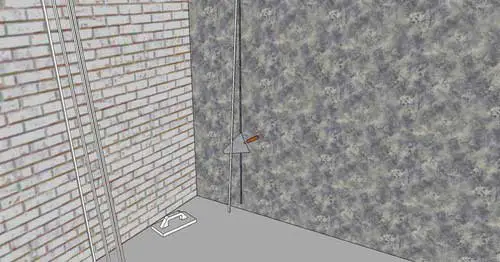
Figure 14 — Remove the guide by prying the strip from the bottom edge
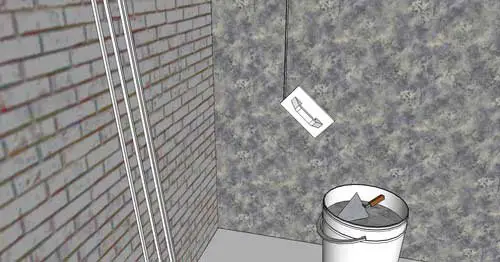
Figure 15 — Finishing line - carefully fill in the groove
Plastering walls with guides: VIDEO
Plastering with guides: cost of work and materials
You can buy guides up to 3 meters long in any construction store. The price is rarely over $0.8-1.2 (depending on whether they are plastic, wooden or metal guides).
In some cases, you can also buy fasteners for guides for plastering - small but reliable fasteners at 10 cents per piece, attaching to the wall with 6 self-tapping screws (20 pieces in one package).
The cost of plastering depends on its type: for example, Knauf HP START (30 kg/pack.) - universal plaster costs from $8.5/pack, with a consumption of 1 pack for 4 m² (plaster layer thickness 10 mm), while Knauf MultiFinish (25 kg/pack.) gypsum plaster for rough surfaces costs from $11/pack, with a consumption of 1 pack for 20 m² (layer only 1 mm thick).
If you're unsure how to properly set up guides and have never worked with plaster before, contact a master:
- in Moscow, plastering walls costs around 180 rubles/m²;
- in Kiev - from 35 UAH/m².