Tile Laying in Bathroom
Tile Laying in Bathroom: Material Selection and Calculation
Tile should not only be wear-resistant but also visually pleasing. That is why in a small bathroom with high ceilings, it's better to lay the tiles horizontally on the walls: this will visually expand the room.
Tile Laying in Bathroom: Material Selection and Calculation
Tile should not only be wear-resistant but also visually pleasing. That is why in a small bathroom with high ceilings, it's better to lay the tiles horizontally on the walls: this will visually expand the room.
There are also classes of tiles based on wear resistance and water resistance. For bathroom tiles, look for the following markings:
- at least PEI II (wear resistance class for floor tiles intended for residential use with light foot traffic);
- tile from groups 1-3 in water resistance (this type of tile absorbs almost no moisture – between 3% and 10%).
Another important indicator is resistance to chemical cleaning agents (for bathroom use, a tile with marker AA – no change after treatment; or A – minor changes allowed) is suitable.
When calculating the amount of ceramic tiles needed to tile a bathroom, you will need paper (preferably graph paper) and a pencil: draw the bathroom room with proportions of walls and locations of fixtures (if tile laying will be done without removing the bathtub, toilet, or sink). Write down the parameters of the tile type you have selected earlier and fill in the floor/walls with tiles on your drawing. This way, you can plan the arrangement of decorative elements (if used), better design tile laying, and calculate the required amount of material.
If walls or floor in a bathroom are laid with one type of tile without decorative elements, it is sufficient to calculate the area of floor/walls and divide the resulting number by the area of one tile. As a result, you will get the number of tiles needed for tiling.
IMPORTANT! This is the minimum amount of material, however, considering that some tiles may be damaged during installation and you need to keep a few extra tiles for replacement, it is recommended to buy tiles with at least a 10-12% surplus.
Base Preparation
The best base for tile laying is concrete. For floor leveling and screed pouring, floats are used. The screed should cure for at least one month before tile work begins. Delaying is one of the reasons why many choose dry mixes, plywood, or ceramic granite sheets for leveling.
The principle of preparing floats is described below on the photos.
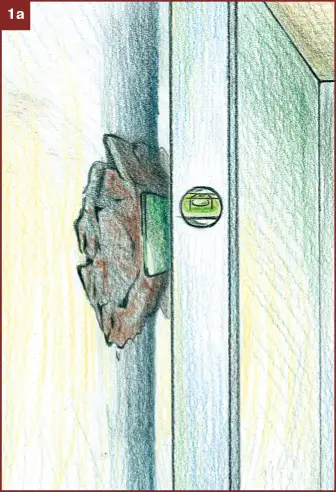
Photo 1 – Float level: gypsum plaster applied pointwise on the floor or wall surface
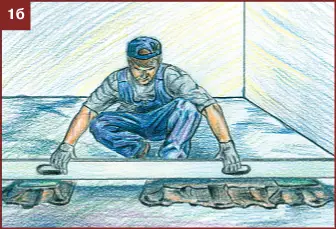
Photo 2 – Floats for floor leveling
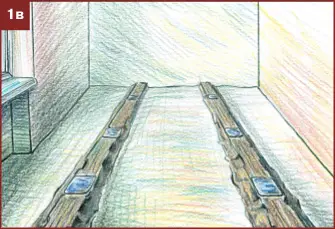
Photo 3 – Floats for leveling the floor or wall surface, ready to begin work
Floats are also used when laying tiles on gypsum board: sheets are fixed with gypsum mixture, coated with primer, and after checking the wall level, tiling can begin.
Tile Laying Options on Bathroom Walls
When tiling a bathroom, including walls and ceiling, start with installing tiles on the wall.
IMPORTANT! If tiles of the same size are chosen for vertical and horizontal surfaces in a bathroom, make sure that the tile joints on floor and walls are parallel and transition into each other.
Laying Method Without Cutting
If the wall length is divisible by tile width, you can lay them without cutting from a corner, performing layout on the wall.
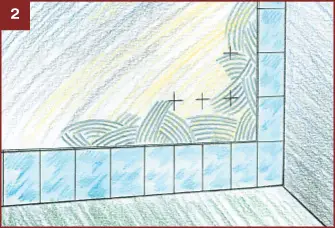
Photo 4 – Tile laying method 'without cutting'
If the wall length is not divisible by tile width:
a) tiles are installed from so-called 'red corner' – with whole tiles starting from the most visible angle of the bathroom (this method is effective if for distant corners, tiles are cut by no more than half of their width);
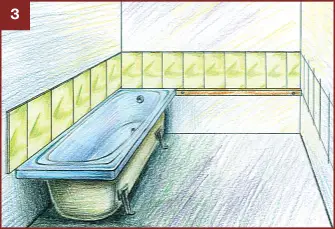
Photo 5 – Tile laying method 'from red corner'
b) if cutting tiles for the distant corner exceeds this proportion, divide the wall in half and begin laying from the center, placing the center of the first tile vertically (see photo below).
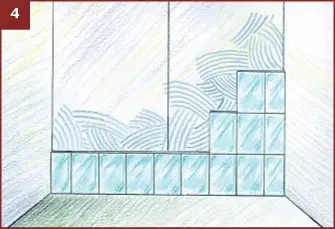
Photo 6 – Tile laying method from the center
IMPORTANT! For tile cutting, use special tools. Mechanized ceramic cutting results in clean edges with fewer chips and less waste.
If the bathtub is not being removed, start tiling by level with the bathtub, securing the first row on a rail.
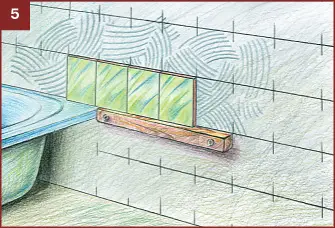
Photo 7 – Tile laying method by bathtub level
There are also methods of tile installation with reference to the bathroom door, specific rules for wall tiling in corners (e.g., non-cut tiles are always laid on projecting angles), etc.
Tile Laying Technology on Bathroom Floor
Bathroom walls, unlike floors, can be tiled with other materials (washable wallpapers, for example). For the bathroom floor, there is only one option: tiles. To install a floor tile covering, you will also need a layout scheme and area calculation.
The sequence of tile work for any surface type is largely identical.
Quick instructions for laying tiles on the floor:
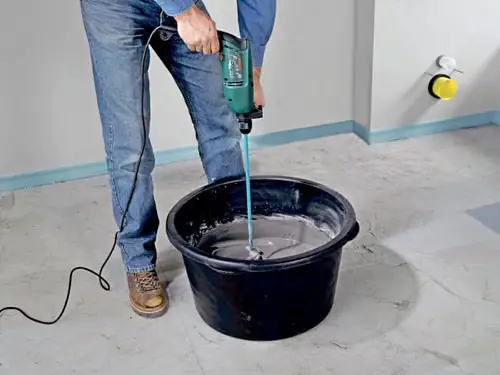
IMPORTANT! Tiles are attached with special tile adhesive mixed in portions due to the rapid drying of the mixture when left unused.
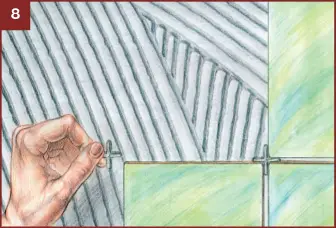
Photo 8 – Fixing crosses between tiles
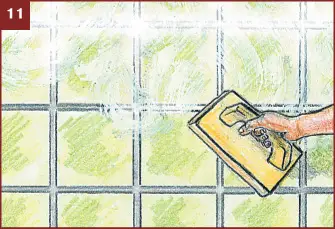
Photo 9 – Grouting joints
Bathroom tile work concludes with sealing the bathtub and wall junctions.
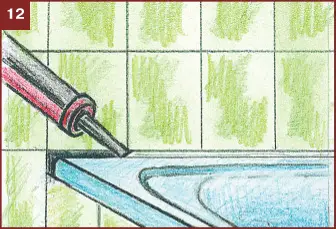
Photo 10 – Sealing bathtub and wall junctions with sealant
For DIY tiling of a small bathroom, you may need about 2-3 days (excluding time for adhesive to cure and without accounting for screed or wall leveling).
Tile Laying in Bathroom: Cost
How much does it cost to renovate walls and floor surfaces in a bathroom (or how much can you save by doing the work yourself)?
The cost of tile work mainly ranges from $7 to $10 for floor tiling and $10 to $12 for wall tiling.
Tile Laying in Bathroom: VIDEO
This video contains recommendations for performing work from one of the leading construction materials manufacturers – Ceresit (the video includes examples of using materials for tile tiling, as well as samples of different types of bathroom tile work).
Cost of tile work:
Kiev – on average from 75 UAH/m²;
Moscow – on average from 370 RUB/m².