Mounting gypsum board, all features of the technology
How to mount gypsum board to a wall or ceiling
Toggle bolts - with their help, you can install both metal and wooden battens, as well as attach pre-glued GKL boards to concrete or brick walls. Bolt sizes are selected based on the condition and strength of the base.
Photo 1 — Toggle bolts and straight hangers for mounting a frame for gypsum board
Special toggle bolts - anchors, not hammered in but screwed into the base, are used for mounting gypsum board. They are specially designed for hollow structures.
Hangers and similar products are used to additionally secure the batten under gypsum board to the base.
How to mount gypsum board to a wall or ceiling
- Toggle bolts - with their help, you can install both metal and wooden battens, as well as attach pre-glued GKL boards to concrete or brick walls. Bolt sizes are selected based on the condition and strength of the base.
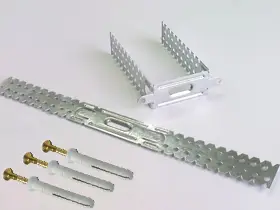
Photo 1 — Toggle bolts and straight hangers for mounting a frame for gypsum board
- Special toggle bolts - anchors, not hammered in but screwed into the base, are used for mounting gypsum board. They are specially designed for hollow structures.
- Hangers and similar products are used to additionally secure the batten under gypsum board to the base. Straight hangers are particularly convenient for installing guide rails on low ceilings. An example of anchor hanger use - mounting battens to rafters on a roof.
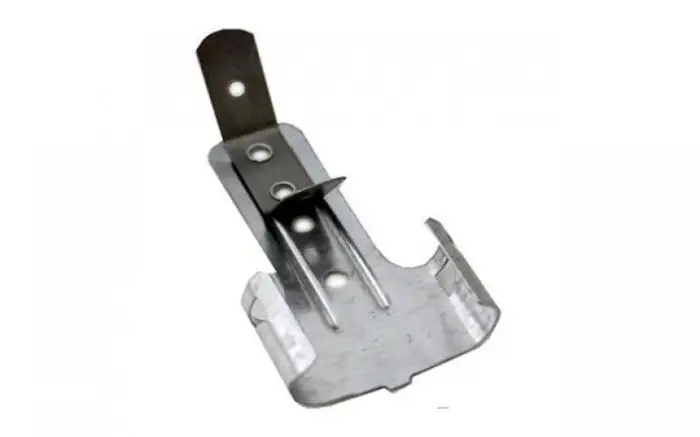
Photo 2 — Anchor hanger
- Connecting profiles to each other is done using single-level and two-level connectors - crabs, and profile extenders. All metal parts and joints of the frame are connected to each other with small galvanized self-tapping screws for metal, 9.5 mm in length.
- Gypsum board is mounted to metal profiles or wooden rails using self-tapping screws 25-35 mm in length. Galvanized steel screws for wood and metal differ in thread pitch.
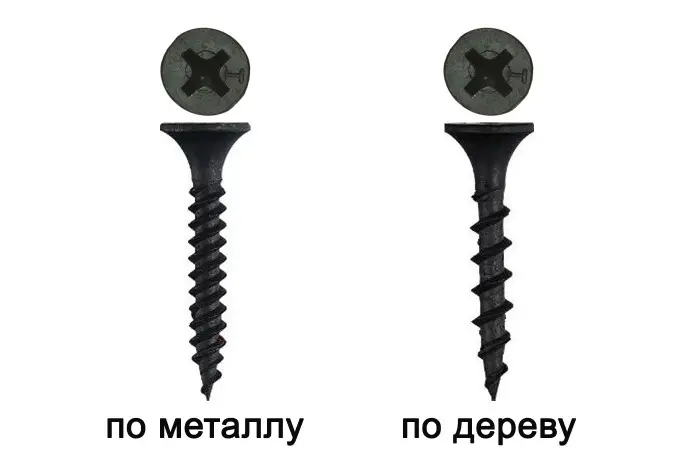
Photo 3 — Self-tapping screws for metal and wood - thread differences
- Self-tapping screws of various lengths are used to mount gypsum board on mounting foam, leveling the surface. A small hole is drilled next to each screw, into which mounting foam is injected.
- Gypsum board can also be mounted using nails instead of screws, if a screwdriver is not available. Nails are driven into wood with a special hammer for gypsum board to avoid damaging the board.
- Sliding mounting is used to mount guide rails to the ceiling when rigid mounting is inconvenient. For example, if gypsum board needs to be mounted to a beam that might still settle, the frame is mounted on a sliding hanger system. Metal brackets with holders and spacers of the required length are convenient for large distances between the floor slab and the frame.
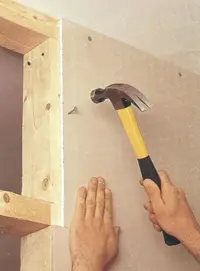
Photo 4 — Driving nails into gypsum board
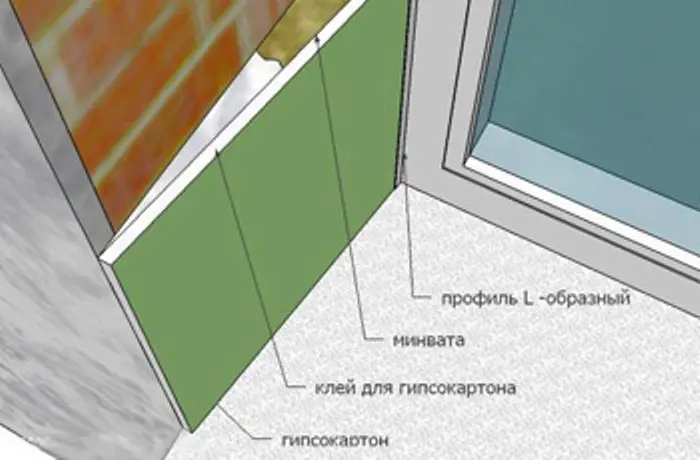
- Mounting gypsum board to relatively flat surfaces, such as gas concrete or foam blocks, can be done without toggle bolts, nails, and screws. It is sufficient to mount the gypsum board with adhesive. Minor irregularities will be leveled due to the distribution of glue between the wall and the gypsum board. Near a window, or more precisely, at the window reveal, gypsum board can be mounted both with adhesive and on profiles that frame the window. Door reveals are best mounted using adhesive. For additional assurance, once the adhesive has dried, GKL can be additionally reinforced with toggle bolts.
IMPORTANT! Mounting gypsum board to a wall is not the only question related to gypsum board. When walls made of gypsum board are built and finishing work is completed, a problem arises with mounting items to gypsum board.
Installing a socket in gypsum board
An opening is cut into the gypsum board sheet at the required location for the mounting box.
The outlet cover is either simply screwed in with four screws or first placed on lime plaster.
Before this, holes for the wires must be drilled in the box and the wires pulled through them.
Then the wires are connected to the terminals of the socket mechanism, it is screwed to the outlet cover, and the cover is installed on top.
Do not forget that any work with electrical wiring, including socket installation, is performed when there is no voltage - the power supply must be disconnected.
Hanging a chandelier on gypsum board
Mounting a chandelier on gypsum board is more difficult than on other substrates, due to its significant weight. There are several mounting options. A heavy chandelier can be suspended from a hook in the floor slab: the chain and protected wires of the required length are passed through an opening in the gypsum board, clamped with a wide washer and secured with wing nuts.
Alternatively, a spring pin and threaded rod can be used. If the chandelier is light, it can be attached to a gypsum board ceiling using a hook-wingnut, toggle-bolt, or simply long screws, depending on the intended mounting system. Heavy chandeliers are mounted only to floor slabs, light ones - to profiles to which the gypsum board is attached. The mounting method for the chandelier should be planned before mounting the gypsum board.
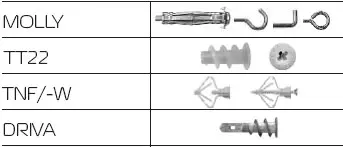
Photo 5 — Gypsum board anchors
Mounting a baseboard to gypsum board
Mounting a baseboard to gypsum board can be done using liquid nails, but this is the least durable option. A baseboard can be properly secured using special plastic anchors for gypsum board or simply self-tapping screws. Batten mounting is done in a similar way: using liquid nails or Molly anchors.
Tension ceiling
Mounting a tension ceiling to a gypsum board structure is done not to GKL, but to a specially mounted profile. Special clips are used for securing the fabric on this profile.
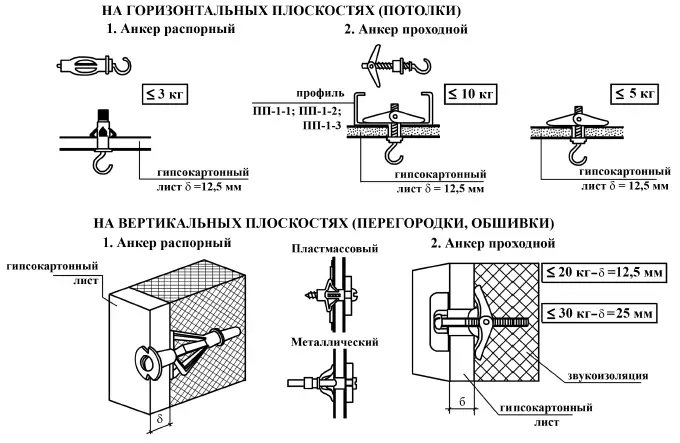
Photo 6 — Scheme of using anchors for hanging items on gypsum board
Mounting furniture to gypsum board walls
The 'butterfly' mounting method, already mentioned several times, is a universal way to mount light furniture such as shelves. A butterfly can secure a cornice for curtains, a mirror, or even mount wall cabinets. However, only butterflies won't suffice if mounting heavy items such as kitchen cabinets.
Mounting cabinets is planned and prepared in advance: during frame mounting, it is reinforced with additional profiles, a special rail is installed at the point where the cabinet will be hung, and even better - wooden inserts are embedded into which furniture will later be mounted. The same applies to mounting a TV and air conditioner: the frame is reinforced or mounting with Molly anchors is done to the existing frame. Wooden inserts are also necessary for mounting a sink on gypsum board.