Installing Gypsum Board Yourself. Internal Wall Finishing
At the same time, gypsum board (although there is also special moisture-resistant type) fears humidity, leaks, and is not suitable for heavy loads (it is better not to hang many bookshelves). But despite this, the popularity of gypsum board finishing does not decrease, and one of the reasons is the possibility to install a wall made of gypsum board yourself.
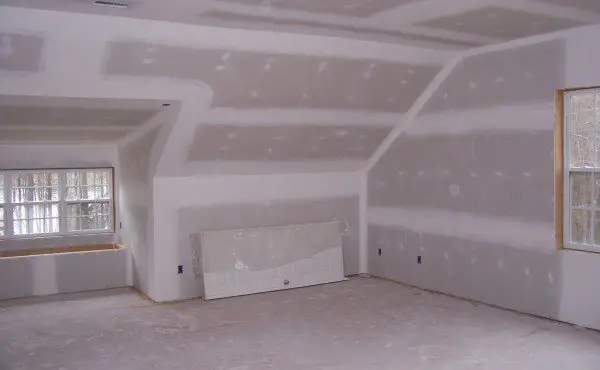
Photo 1 — Attic finished with gypsum board
Installing Gypsum Board on Walls - Technology
There are various methods of installing gypsum board panels, and the installation order for each one is slightly different. One of the principles of classifying installation methods is the stud frame under gypsum board. Its presence or absence, what to make it from and how to install the stud frame under gypsum board - all of this affects material and labor costs for wall leveling.
IMPORTANT! Installing gypsum board using metal structures is the most common method. Steel profiles guarantee the strength of the frame. Mistakes in stud frame installation are one of the reasons for cracks in the finished finish and may lead to removal of the gypsum board. Therefore, it is very important to install the profiles correctly.
Installing Gypsum Board on Walls Using Metal Profiles - Step-by-Step Guide
Marking for the FrameUsing a painter's string on the floor, mark a line that will be the boundary of the frame. With a plumb line, level, and pencil or the same string, transfer the line to the ceiling. Mark strictly vertical lines on the walls where the uprights will be installed. The spacing between them should be such that the joints of the gypsum board sheets during installation fall in the center of the upright profiles. Usually, the spacing between the profile axes is 600 mm.
Installing Guide RailsHorizontal guide profiles on the side that will be adjacent to the base are covered with a special sealant - a tape that ensures sound insulation. Then, using a drill, holes are drilled in the base, into which anchors are inserted, and the profile with insulation is screwed in with self-tapping screws. To ensure that guide rails hold the Gypsum Board tightly, the spacing between screws should be 500-1000 mm, but one segment of the profile must be attached to the base at least in three places.
Securing HangersVertical hangers, marked on the walls, are secured in the same way as guide rails to additionally provide structural stiffness.
Installing UprightsAccording to the markings on the walls, vertical uprights are inserted into the horizontal guide rails. It should be remembered that the open side of the uprights should face the wall or be directed toward it. First, the upright is inserted into the guide rail on the floor, then at the ceiling. The upright is screwed to the guide rails and hangers.
Installing Gypsum BoardProper installation of gypsum board sheets must be done by several people. Ideally, two people should hold the sheet, and a third - secure it to the profile with self-tapping screws. Installation starts from the top, and the distance between self-tapping screws should not exceed 25 cm. Joints between gypsum board sheets should not align with each other, so gypsum board sheets are installed with a staggered pattern. Installation of columns and other complex elements is done according to the same principles, with the required shape achieved by cutting the profile and gypsum board sheet.
Creating Openings for Sockets, Switches, etc.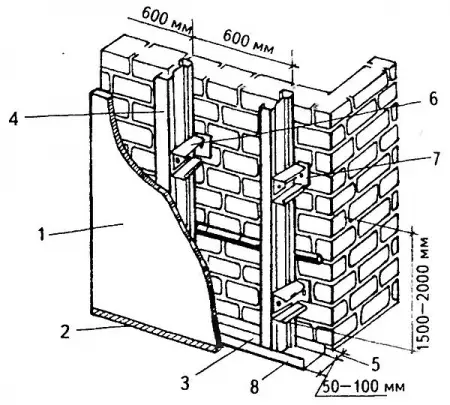
Photo 2 — Installing Gypsum Board Using Metal Profiles - One of the Possible Variants
Using wooden lathes under gypsum board is less common, as wood fears moisture. The installation instructions for wooden strips are practically no different from installing metal profiles. First, mark the frame, then secure wooden uprights and braces to the walls with anchors. Check if the frame is even. Gypsum Board sheets are secured to the profile in the same way: their placement rules should be such that joints fall in the center of the strips, and no one cancels that.
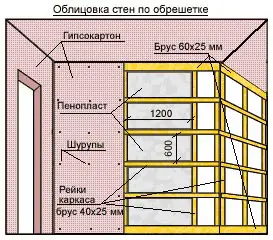
Photo 3 — Installing Gypsum Board Using Wooden Lathes - One of the Possible Variants
How to Glue Gypsum Board
Installing gypsum board with adhesive is the fastest method, but it is suitable only for relatively even surfaces - with a height difference of no more than 20 mm. This method is the most gentle on room space - it takes up less space, and Gypsum Board sheets fit tightly to the wall. The marked sheets are secured to a clean, primed wall surface or 10-centimeter strips of gypsum board with adhesive for gypsum board, such as Perlfix. For this purpose, the Gypsum Board sheets themselves must also be primed.
Adhesive is applied depending on the surface relief around the perimeter and in the middle of the sheet evenly with a notched trowel or small dollops using any suitable trowel.
IMPORTANT! For greater reliability, after the adhesive has set, Gypsum Board sheets can be secured with anchor bolts.
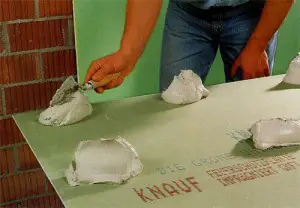
Photo 4 — Installing Gypsum Board on Walls Using Adhesive
IMPORTANT! Installing gypsum board with adhesive is done after careful marking, identifying irregularities and protrusions, determining a common level to which all sheets will be aligned.
There are various options for how to install gypsum board, in addition to the one described above. They differ not only in technology but also in adhesive materials. For example, some use installing gypsum board with construction foam. The guide for installing with foam is slightly different from working with adhesive. In this case, Gypsum Board sheets are screwed to the wall using long screws, and then construction foam is injected through holes in the sheet.
Installing Gypsum Board Yourself, VIDEO
Tools, Materials and Accessories for Installing Gypsum Board
Depending on the installation method of gypsum board, you may need:
- For marking: level, plumb line, pencil, painter's string, tape measure. It is easy to do marking using such professional tools, more precisely a device like a laser plane builder.
- For installation: knife, metal shears, screwdriver, drill, hammer, spatulas, hoist, spatula, accessories for cutting excess gypsum board from edges, cutting holes, etc.
- Materials and accessories: Gypsum Board sheets with the necessary characteristics (e.g., moisture-resistant), steel profiles: guide and uprights, metal hangers and connectors for their installation, wooden strips, anchors, self-tapping screws, bolts, washers, adhesive, foam. For securing gypsum board with anchor bolts, it is convenient to use a construction gun like the SPIT Pulsa 700P gas-powered construction gun.
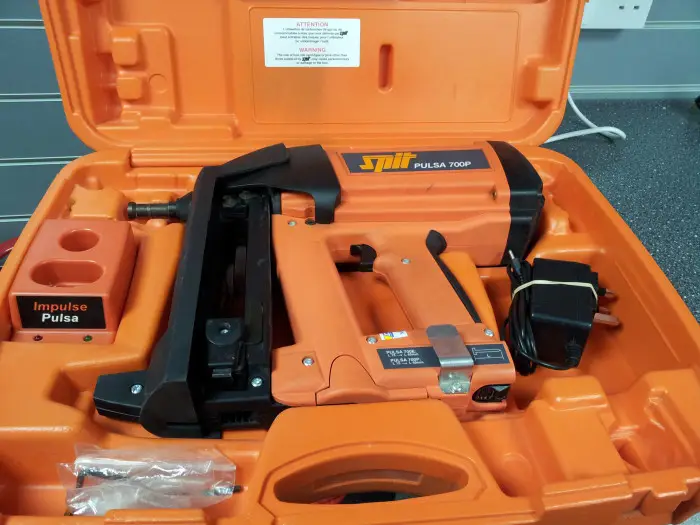
Photo 5 — Construction Gun SPIT Pulsa 700P
Secrets of Installing Gypsum Board
How to Cut Gypsum BoardThe answer to the question "how to cut gypsum board" is very simple and predictable: you need a knife for cutting gypsum board. How to cut a sheet evenly: use a long ruler as a straightedge, score the paper along it, press down on one side of the sheet - the gypsum core will crack, and then cut the paper layer with a knife.
Cutting gypsum board in large volumes can be done with a special cutter. The edges of the cut sheets should be made at an angle to increase the area of joints that will later be spackled. For this, a line is marked at a distance of 5 mm from the edge and cut diagonally to remove excess gypsum board.
How to Cut Gypsum Board, VIDEO:
Insulation Under Gypsum BoardOften rooms require insulation, especially balconies or loggias. For insulation under gypsum board, glass wool or mineral wool is usually used. Work with insulation is performed at the stage when the stud frame is installed, but the Gypsum Board sheets are not yet attached.
Wiring Under Gypsum BoardWiring under gypsum board must be completed before the installation of the gypsum board and insulation. Electrical wiring is installed when the stud frame is in place. To comply with standards, electrical wires should be run through metal conduits or flexible tubing made of non-flammable plastic. A full distribution of electrical wiring is done along walls and ceiling, then, during the installation of Gypsum Board sheets, holes are cut for junction boxes and wiring leading to lights. The corresponding wires are pulled through the holes.
Junction boxes can be installed immediately after Gypsum Board sheets are installed, but installing sockets, switches, spotlights, and chandeliers should wait until all finishing work is completed.
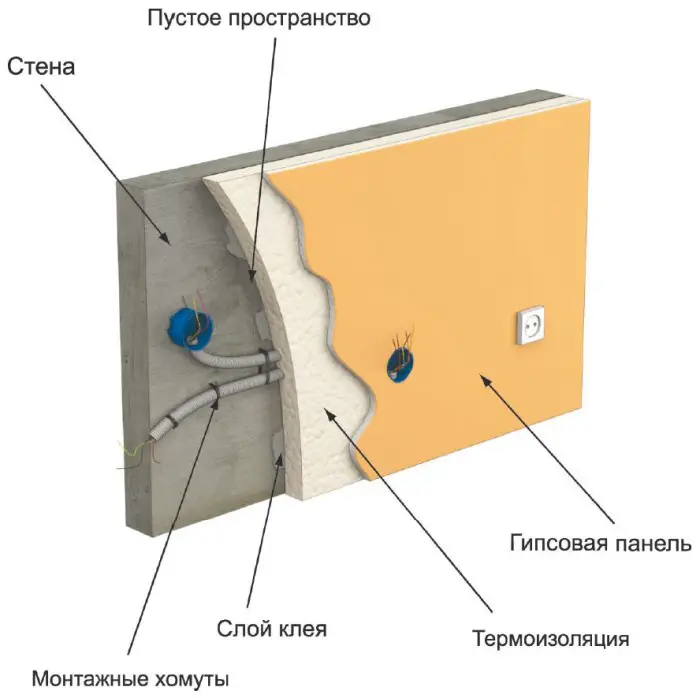
Photo 6 — Installing Wiring Under Gypsum Board
Seams of Gypsum BoardSeam sealing of gypsum board is an important stage in creating a flat surface. It's important to properly seal the corners and seams of gypsum board so that cracks don't appear on them over time. For this, the seam is spackled, then an armoring tape for seams is applied on top, and another layer of spackle is applied. For external door and window corners, angular profiles must be installed on the spackle. Spackling is also done at places where screws are screwed in.
After the spackle has dried, all treated areas should be thoroughly sanded with a sanding block. If the surface is not flat enough, it is necessary to completely re-spackle the walls and then sand with a block after drying.
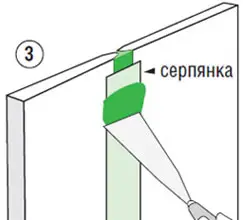
Photo 7 — Proper Seaming of Gypsum Board
Finishing Work with Gypsum BoardAfter performing the above-mentioned manipulations, an appropriate question arises: what to prime gypsum board with and whether it needs priming. To correctly perform finishing work, it is UNCONDITIONALLY necessary to prime gypsum board. If the next stage is painting with water-emulsion paint, then priming can be done with paint diluted with water in a ratio of 3:1.
The technology for working with other finishes, such as wallpaper or decorative plaster, requires the use of special primers recommended by manufacturers of the final coating. The surface of gypsum board is easy to treat by hand because it is very flat.
How to work with gypsum board when painting, plastering, or covering it with wallpaper can be learned from the instructions for the selected finishing materials.
Tile on Gypsum BoardA special type of finish is laying tiles on gypsum board. In general, gypsum board is an undesirable base for tiles. However, if it is used under tiles, it must be special moisture-resistant gypsum board, laid in two layers and several times primed. In addition, when installing gypsum board under tiles, the spacing between upright profiles should be smaller.
Experts recommend choosing GVLV instead of GKLV for such purposes. Laying tiles on installed gypsum board with sealed seams and prepared corners is done according to the standard tile-laying technology.
Tiles on Gypsum Board, VIDEO:
$ Cost of Installing Gypsum Board
Whether to do such work yourself or find out the cost and hire specialists - is up to the homeowners.
Installation cost of gypsum board:
price in Moscow - on average from 300 rubles per square meter,
gypsum board installation in Kiev - on average from 65 hryvnia per square meter.