How We Transformed an Old Apartment into a Designer Space (Before and After Photos)
We tell how we updated a secondary flat and created comfortable and functional housing for a family with a child
A young couple bought an apartment in a dilapidated brick house built in 1957 in the Lefortovo area. The couple dreamed of turning it into a modern comfortable living space and turned to designers from Loft & Home studio. The design project development was handled by Irina Minaeva — we share the details of the renovation.
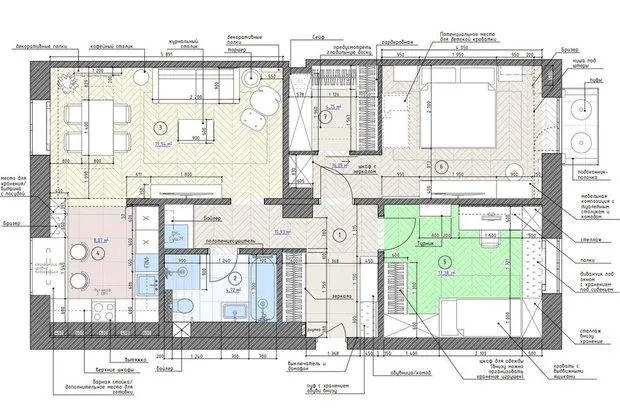
Layout
The clients decided to save money and not change the layout of the apartment. Demolition of partitions and construction of new ones were to be quite minor. The kitchen was already joined with the living room, but to ensure safety, the owners opted out of gas. One living room was turned into a bedroom, and another one — into a child's room. A relaxation zone was arranged on the balcony.
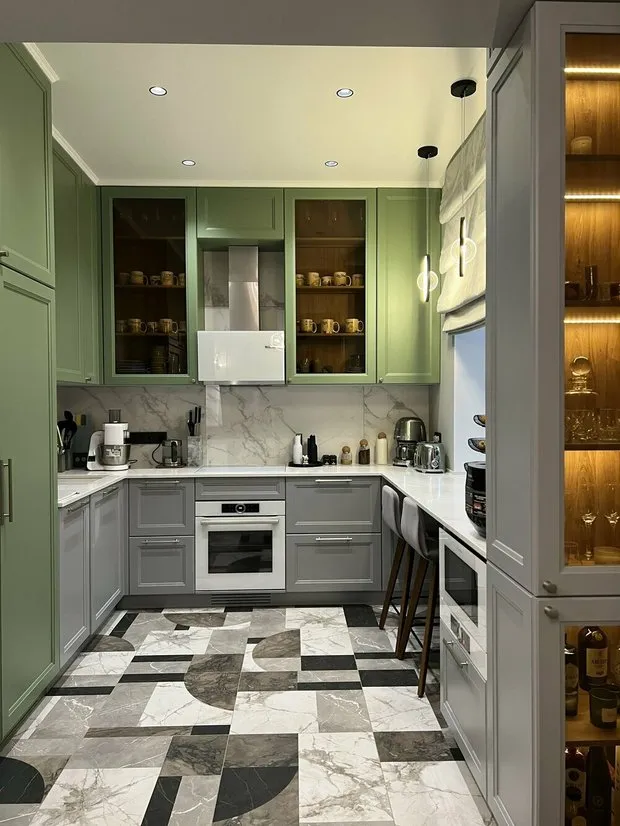
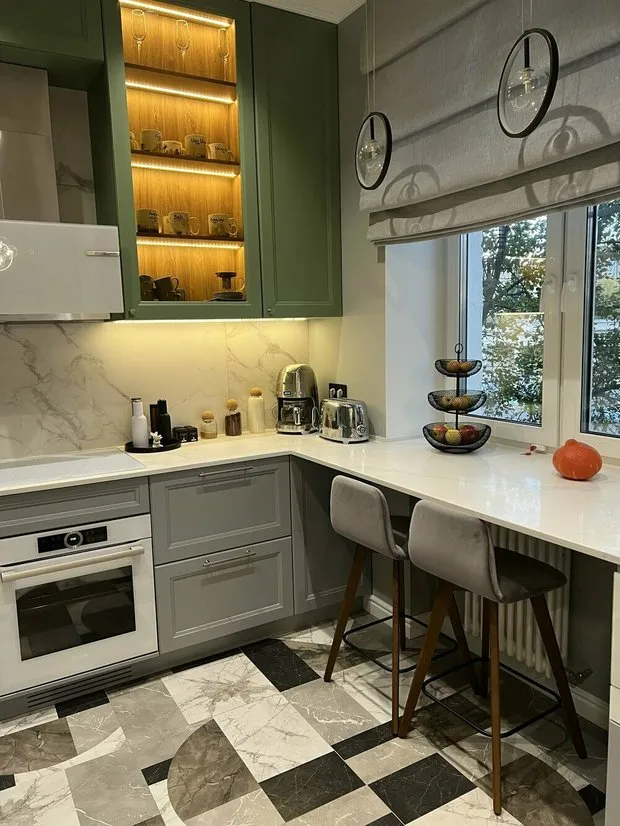
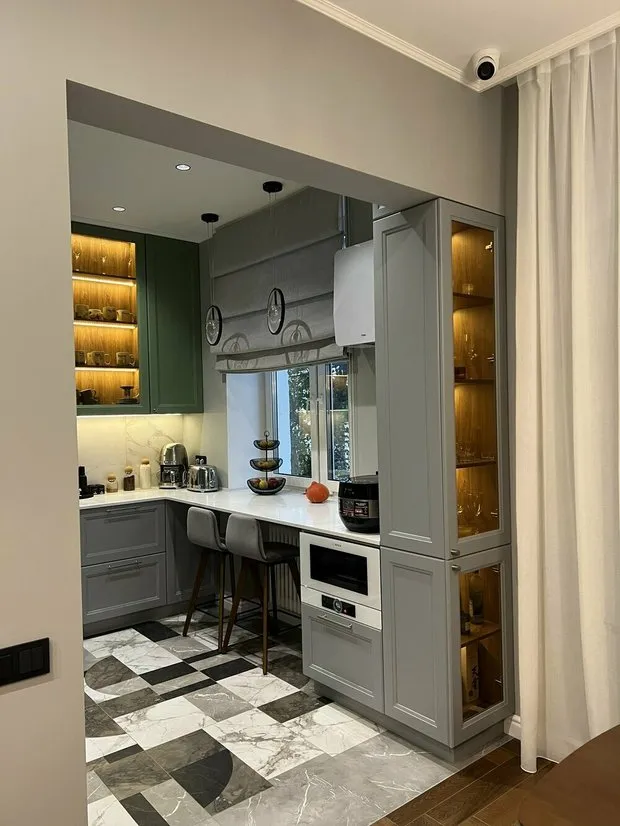
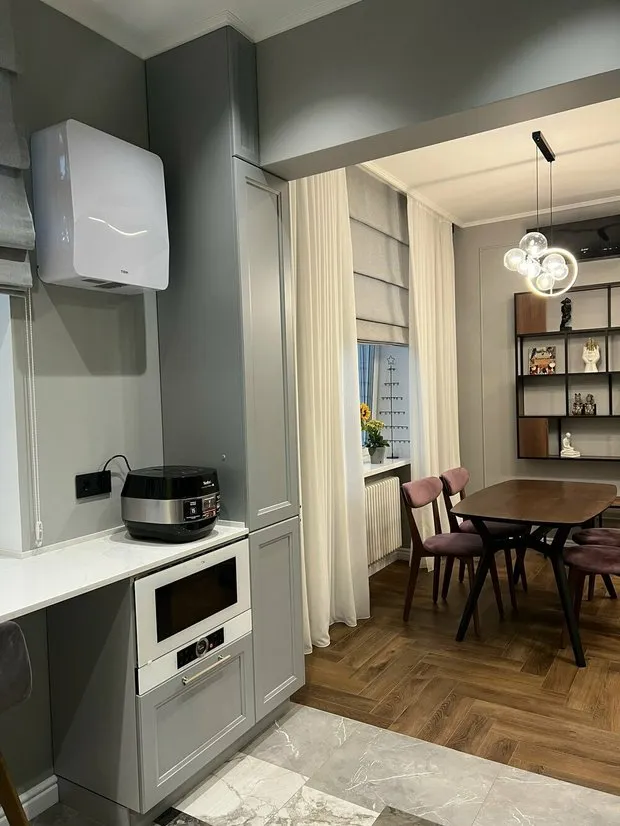
Kitchen
The kitchen cabinet was arranged in a 'P' shape, with a bar counter under the window that further transitions into another cabinet block. This setup allowed for many built-in appliances and storage spaces. The kitchen does not look bulky thanks to pleasant shades of cabinet facades and light ceramic granite on the kitchen backsplash.
During the renovation, all electrical wiring was installed anew in compliance with current building codes, ABB automation was installed. Water supply and heating risers were reworked, and the connection to radiators was made hidden in the wall for maximum aesthetics.
Before Renovation Kitchen Photos:
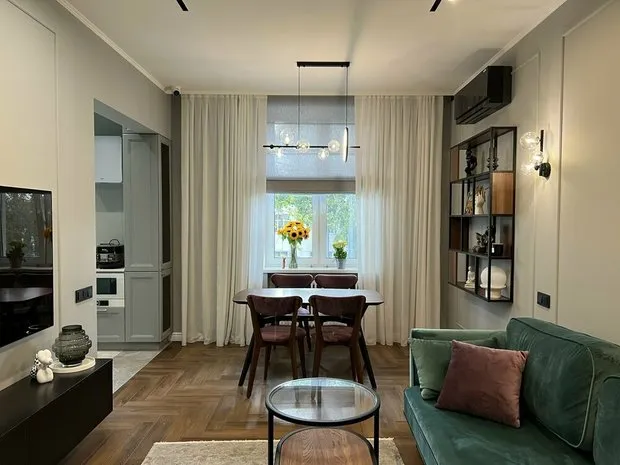
Living Room
During the design project development, the designer complicated the initial idea of Scandinavian style and added elements of neoclassicism in the form of moldings, as well as a French Christmas tree on the floor, using a color scheme dominated by dark green and olive shades. Additionally, modern accents were introduced in the form of track lights, furniture elements, gypsum panels and strips.
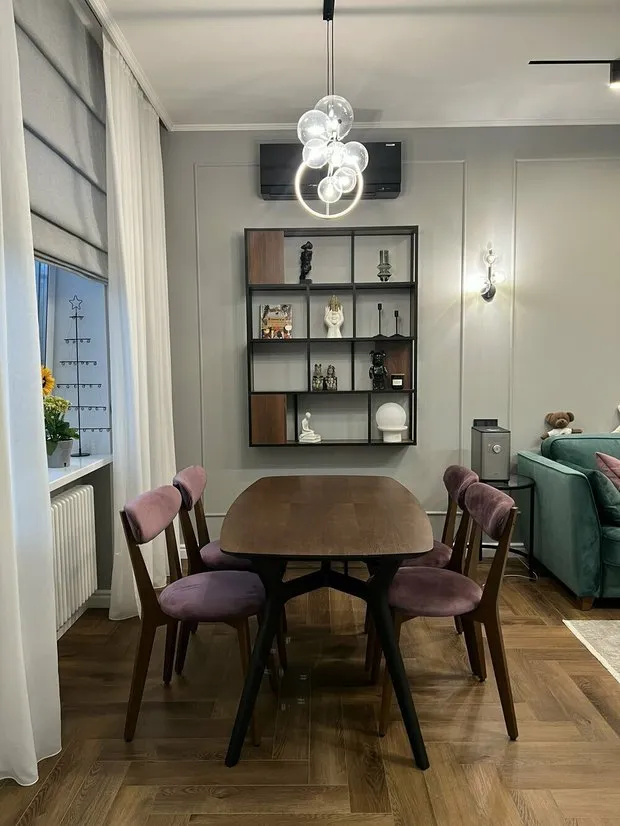
Ceilings were fitted with a three-layer sound-insulating and vibration-damping material 'Terlen Vibro-M', which is used to reduce impact and airborne noise. Roll sound insulation 'Shumanet-100Kombi' was applied on the floors to reduce impact noise and provide hydro-isolation.
Before Renovation Living Room Photos:
Bedroom
The bedroom was a long rectangular room with access to the balcony. A walk-in closet was created: this provided a hidden storage system, and the living space gained more balanced proportions.
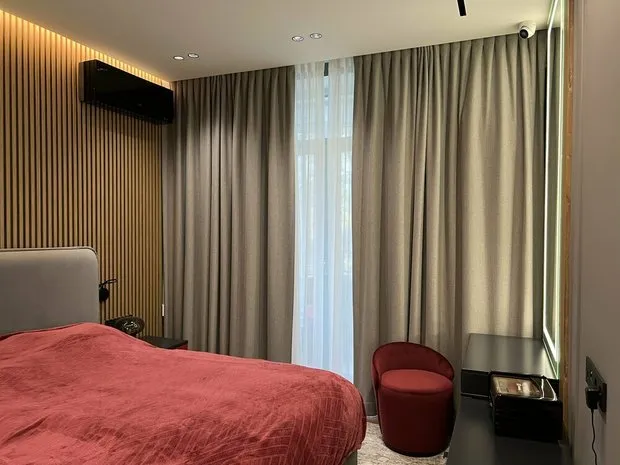
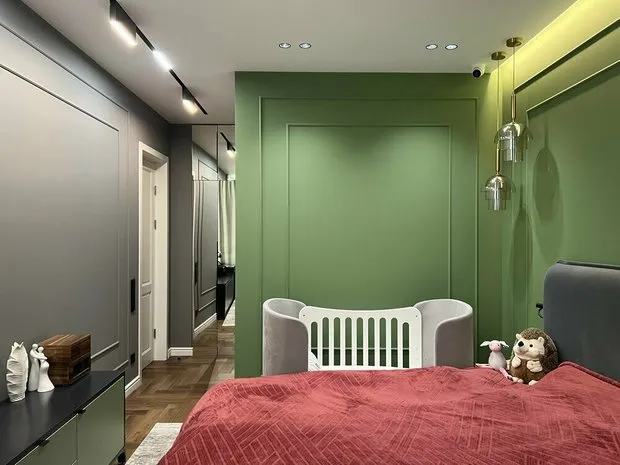
The paintwork was complicated with moldings made of practical polyurethane. When mounting wall moldings, all sizes of wall-mounted equipment such as air conditioners were taken into account. As for the ceilings, they were standard gypsum boards with recessed track lights.
Before Renovation Bedroom Photos:
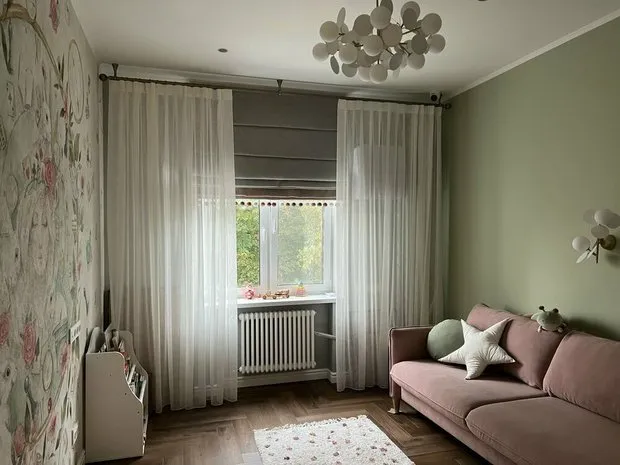
Child's Room
While the child is small, he sleeps in the parents' bedroom, and this room is used for leisure. The interior was created with the idea that it will remain relevant for many years.
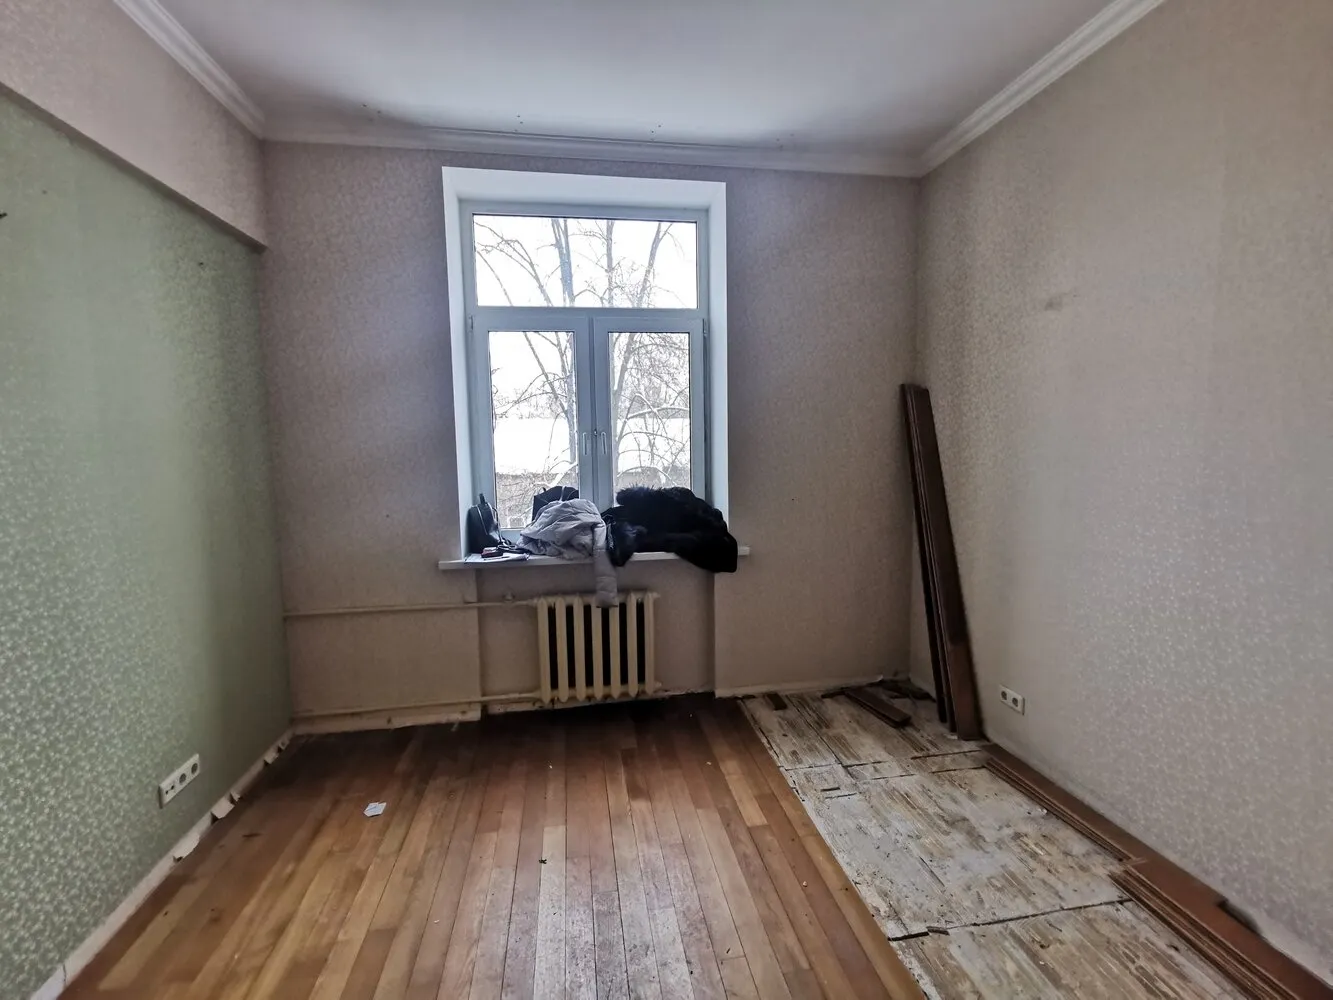
Before Renovation Child's Room Photos:
Entrance Hall and Corridor
After completing the demolition work, the floor level in the apartment became almost 20 cm lower than in the entrance hall. There were two options: either make a step at the entrance to the apartment and gain an additional 10 cm in ceiling height, or level the floor to the entrance threshold.
To reduce the weight of the screed (as the house is old and it's not advisable to overload the floors), a fill of 11 cm thick ceramic gravel was used, and a semi-dry screed 7 cm thick with reinforcement mesh and fibervolokno was installed.
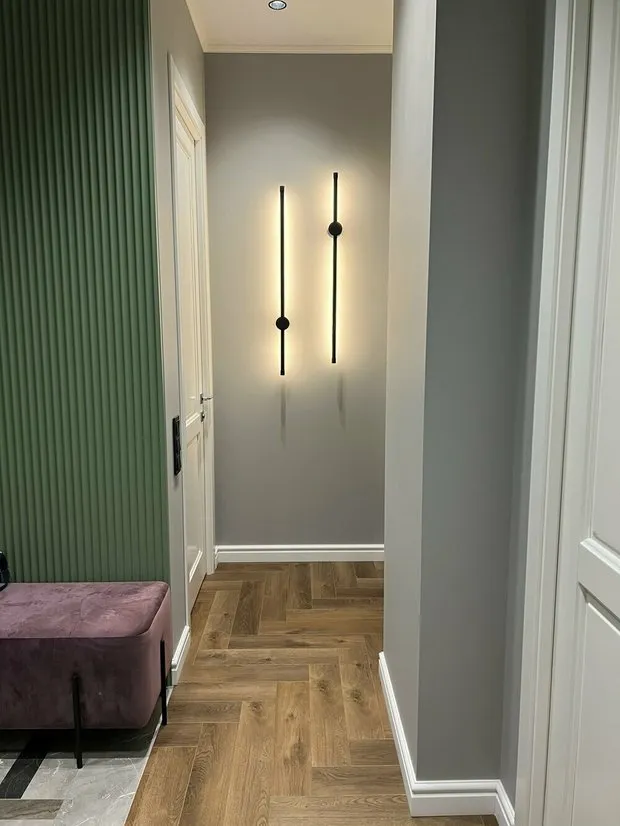
The quartz vinyl installation was done using the 'French Christmas Tree' method. It was mounted on locks over a backing, but at joints with ceramic granite, the quartz vinyl was glued to the base with adhesive for reliability, ensuring a rigid fix at the junction.
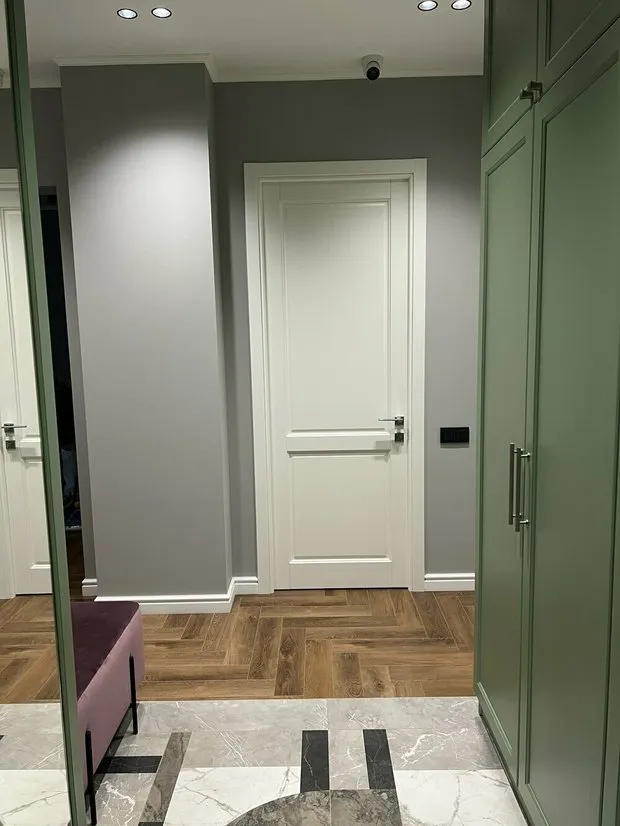
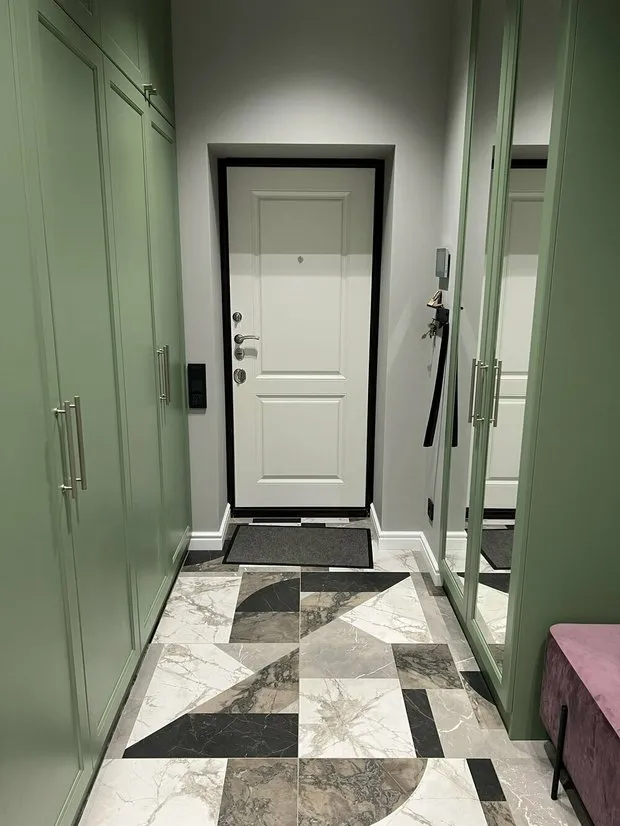
Before Renovation Corridor Photos:
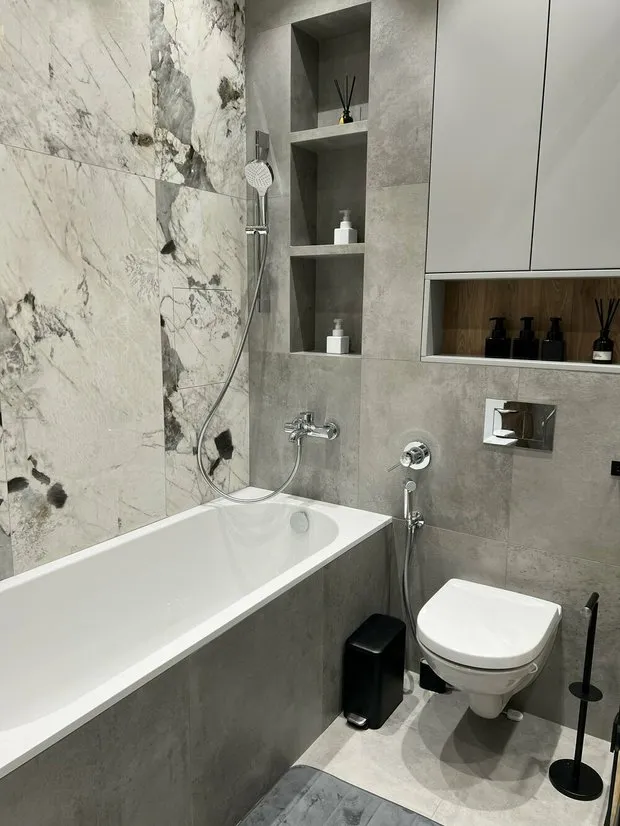
Bathroom
In the bathroom, it was possible to install not only a bathtub but also a shower — such a solution is rarely achieved in standard apartments. To install the suspended toilet in the direction specified in the project, it was necessary to modify the cast iron drainage riser.
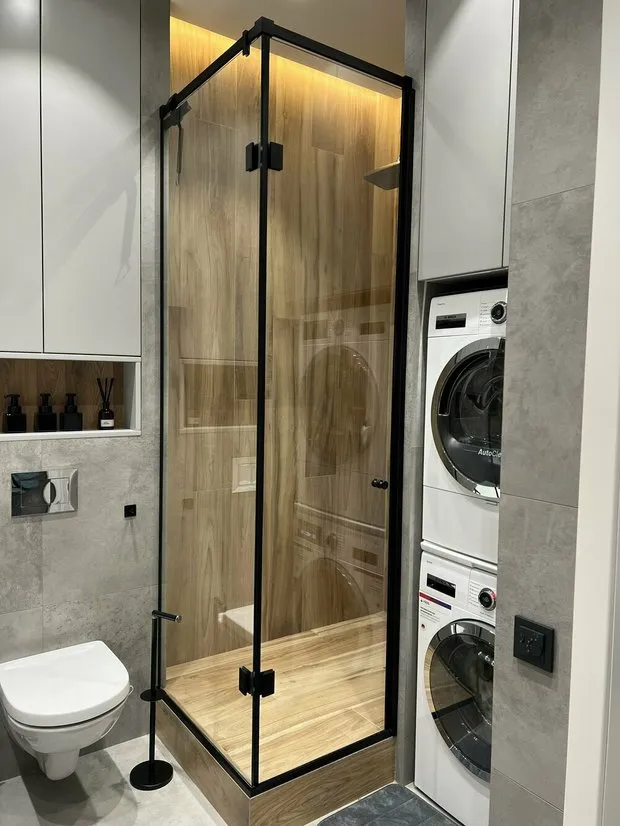
Water supply piping was done using Rehau Stabil 16 cross-linked polyethylene pipes. Specialists assembled the collector zone with leak protection systems.
Before Renovation Bathroom Photos:
The renovation was carried out by the construction company 'SM Project'.
Brands Featured in the Project
Entrance Hall
Flooring: quartz vinyl, Alpinefloor; ceramic granite, Ariana Ceramica
Finishing: paint, Derufa
Doors: Miggliore
Kitchen
Finishing: ceramic granite, Italon
Sink: Omoikiri
Faucet: Grohe
Heaters: Arbonia
Living Room
Lighting: SWG
Outlets and switches: Jung
Heaters: Arbonia
Bathroom
Finishing: ceramic granite, Italon
Plumbing fixtures: bathtub and sink, Villeroy & Boch; faucets, Grohe, Hansgrohe; toilet, Villeroy & Boch
Doors: Miggliore
Bedroom
Flooring: quartz vinyl, Alpinefloor
Furniture: bed, Ossen
Door: Miggliore
Outlets and switches: Jung
Heaters: Arbonia
Child's Room
Lighting: SWG
Heaters: Arbonia
Doors: Miggliore
Would you like your project to be published on our website? Send photos of the interior to wow@inmyroom.ru
Need a renovation specialist?
Find verified professionals for any repair or construction job. Post your request and get offers from local experts.
You may also like
More articles:
 How to Achieve Stylish Renovation in a New Building and Save Money
 How to Create a Stylish Interior in 2023: 10 Trendy Items
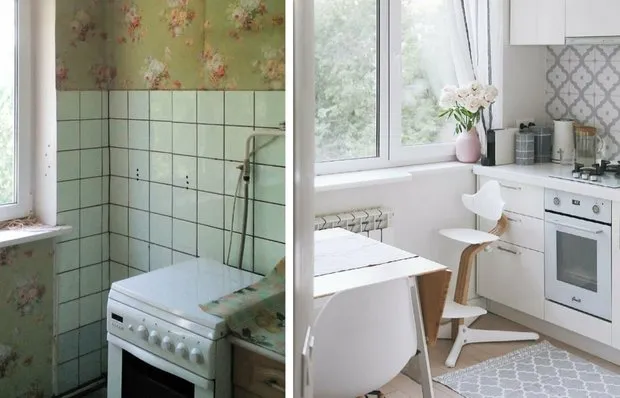 Before and After: Cool Transformations of Old Kitchens by Yourself
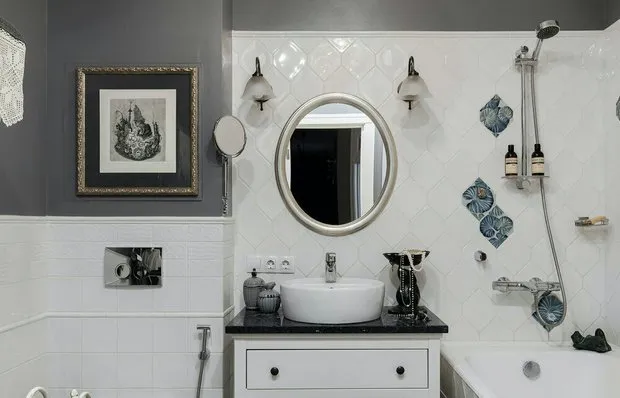 Before and After: Incredible Transformations of 'Killed' Bathrooms
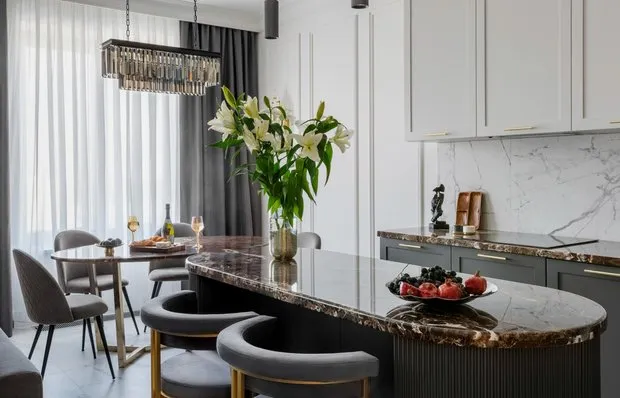 How to Decorate an Interior in Neoclassical Style
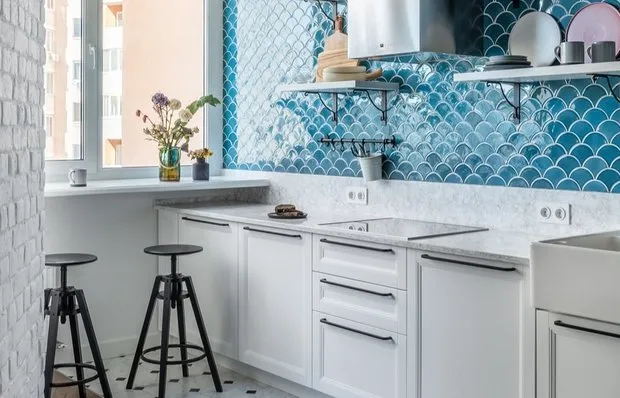 7 Decorative Techniques for a Stylish and Unusual Interior
 How to Choose Exterior Home Finishing: 7 Expert Recommendations
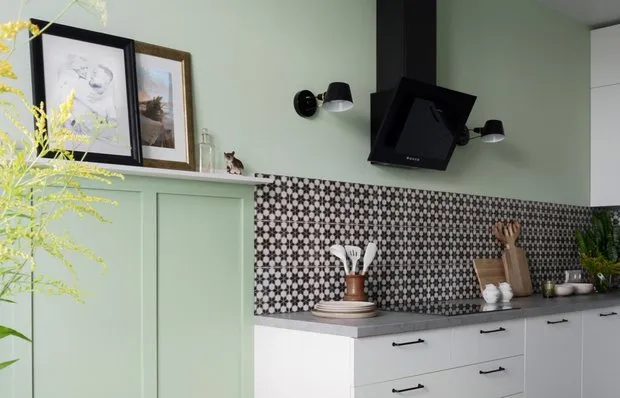 How to Create a 'Perpetual Spring' Interior and Save Money