New trend in design fashion – laminate on ceiling
- Tweet
- In blog
- By email
Previously, we all thought that installing laminate on the ceiling was a rather impractical idea, and that laminate was meant exclusively for flooring. However, times have changed, and today this durable and affordable material is already being used for ceiling decoration. What’s especially pleasing is that installing laminate on the ceiling is a straightforward task. That means you can do it yourself.
This type of finishing is highly reliable, wear-resistant, and practical. A laminate ceiling will stay in excellent condition for years and bring comfort and a calming atmosphere to your space. Notably, such a ceiling doesn’t collect dust, and it’s significantly cheaper than installing European pine boarding.
Another advantage of this material is that it provides thermal insulation, especially when you place polystyrene boards inside the framework using construction silicone and seal all joints with mounting foam. The only potential threat to such a ceiling comes from careless neighbors upstairs who forget to turn off the water.
Before starting the installation, let’s review the key steps involved.

Photo 1 — Laminate on ceiling – a creative design solution

Photo 2 — Laminate on ceiling – a creative design solution
First, the laminate used for ceilings consists of several layers:
- Bottom layer (main structural layer, made of MDF or particleboard, ensuring strength);
- Intermediate layer (thin paper with a decorative pattern, simulating various textures such as wood, stone, or geometric shapes);
- Top (outer) layer. This is a laminated film made from melamine resin or acrylic. This layer protects the laminate from sunlight, moisture, dirt, and wear.
Additionally, the laminate is treated with special compounds that prevent warping and increase rigidity.
Installing laminate on the ceiling visually expands the space and adds a stylish touch. Moreover, this material has sound-absorbing properties, so you won’t disturb neighbors watching the news on TV, and they won’t disturb you while enjoying an Rammstein album.
Now, let’s move on to the actual installation process.
What tools and materials will you need?
- Laminate sheets
- Tape measure
- Wooden strips (1 cm thick, 2 cm wide)
- Saw
- Dowels and nails
- Ladder
- Hammer
- Drill or impact driver
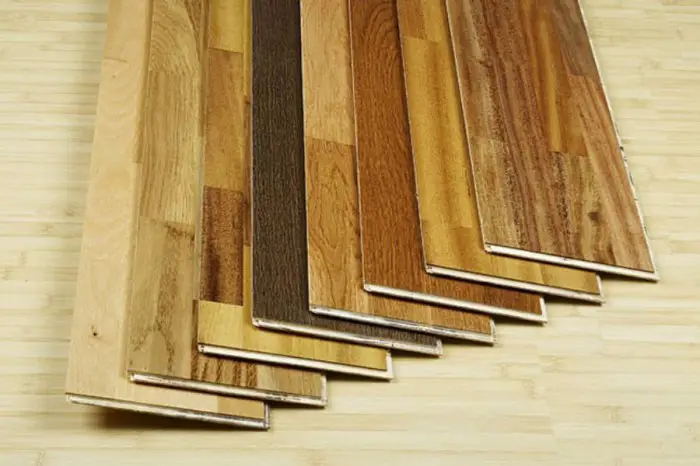
Photo 3 — Choosing laminate to suit any taste
The entire process consists of two main stages:
- Installing the ceiling frame. Experts recommend using wooden frames because they are strong and more eco-friendly.
- Installing the laminate sheets onto the finished frame
As you can see, the process isn’t as complicated as it might seem.
Now, let’s go through the steps in detail.
First, measure the width and length of your ceiling. Then calculate the number and length of wooden strips needed for the framework, placing them 0.5 meters apart. Prepare these strips accordingly.
Remove old plaster from the ceiling, especially areas that no longer hold well.
Mark the attachment points using a tape measure, then drill holes in the ceiling at the correct locations using a drill or impact driver.
When attaching the wooden strips (remember, spaced 0.5 meters apart), use dowels for secure fastening. The framework must lie flat and level during installation.
To level the ceiling, you can use strips of different thicknesses.
For hiding electrical and utility lines, use dedicated cable channels. Don’t forget to cut appropriate holes in the laminate for light fixtures and ventilation.
Begin installing the laminate panels from the farthest left corner of the ceiling. Leave a small gap (1–3 cm) between the panels and the wall.
If using a wooden frame, secure the laminate with small nails (drive two nails into each lower tongue joint). If the last sheets don’t fit perfectly in length, you can always trim the excess.
Don’t forget to buy baseboards to cover the edge where laminate meets the wall. Choose matching light fixtures and install them accordingly.
Voilà, your ceiling is ready!
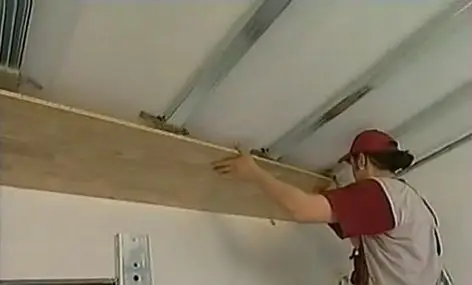
Photo 4 — Installing laminate on ceiling
Laminate on ceiling. Video
Now we’ll show you a step-by-step demonstration of how to install laminate on a ceiling. The video will help you better understand the installation process.
" "