Roof Vapor Barrier
It's been a couple of decades since individual home construction has swept across our country. The large-scale building of cottages, spacious dachas, and villas has led to an innovative approach to low-rise construction, particularly in attic design. A modern home with a warm attic floor is convenient, comfortable, energy-efficient, and aesthetically pleasing.
It's no secret that progress in construction technology and, consequently, indoor climate, owes much to Western standards in housing production. Thanks to advanced foreign companies that pioneered the development and application of new building materials, local builders now have the opportunity to apply their design and installation expertise to new structures.

In this context, innovations have particularly affected roofing systems, especially pitched roofs. The modern roofing stack, reflecting its multi-layer structure, consists of the following layers:
- vapor barrier,
- thermal insulation,
- wind and moisture protection (waterproofing),
- sheathing,
- counter-battens (create a ventilation gap),
- roof covering.
Each layer has a specific function and directly affects the performance and durability of the structure.
This article focuses on vapor barrier as a necessary component of insulated roofing systems.
Why Is a Roof Vapor Barrier Needed?
All roofing materials are designed to protect the home from external moisture. However, there's also an internal factor: water vapor generated by daily activities (cooking, laundry, bathing, etc.).
Warm, moisture-laden air from heated rooms rises due to natural convection and diffuses into the ceiling zone. Water vapor molecules, driven by kinetic energy, attempt to escape to colder, drier areas — specifically, the under-roof space. If they encounter unprotected insulation, they easily penetrate its pores and exit through the roof.
During winter, a sharp temperature drop on the external side of the insulation layer (a difference of 30–50°C) halts this moisture flow. Vapor molecules first form frost, then a solid ice layer, filling all gaps and freezing the insulation.
With spring thaws, ice melts, causing leaks and damaging internal finishes. Insulation performance deteriorates rapidly — mineral wool may fail in one winter, and polystyrene lasts only slightly longer.
The only way to prevent such damage is to install a vapor-tight barrier. Its primary purpose is to stop condensation from reaching the insulation, thus protecting it from moisture, preventing increased thermal conductivity, mold growth, wood rot, and heat loss.
What Is a Roof Vapor Barrier?
For many years, vapor barriers were equated with felt paper (pergamin). Some budget-conscious builders still use it today. However, modern standards for strength, insulation performance, lifespan, and ecological safety have rendered this outdated.
To truly say: 'My home is my fortress' — meaning it's reliable, warm, and dry — you must keep up with modern construction practices.
This means choosing high-performance materials. Modern vapor barriers include non-perforated films (membranes) with a diffusion resistance (Sd) of 40–80 meters.
Manufacturers offer various vapor barrier solutions for both flat and pitched roofs, regardless of roofing type. The most popular options include:
- reinforced polymer fabrics with double-sided lamination;
- aluminum-reinforced films, with aluminum foil attached on one side to reflect heat back into the living space.
Product lines from different brands typically include several types, differing in density (96, 110, 140, 220 g/m²), UV resistance, flammability rating, color, and more. The materials used are resistant to mold, rot, and safe for human health. However, regular ventilation remains essential.

Installation Tips for Roof Vapor Barriers
As previously mentioned, the main purpose of a vapor barrier in roofing is to prevent moisture from indoor spaces from entering the insulation. Therefore, it must be installed tightly against the insulation layer.
Proper installation requires strict sealing of joints. Overlaps must be at least 10 cm and sealed with double-sided self-adhesive tape. The same tape is used to attach the vapor barrier to the rafters. For reflective film joints, use single-sided self-adhesive aluminum tape.
In attic spaces and high-humidity areas, a 2–5 cm gap is recommended between the vapor barrier and ceiling cladding (wooden panels, gypsum board). This gap is also essential for running electrical wiring, installing lighting, and other utilities.
Modern vapor barriers have a guaranteed lifespan of 20 years.
A Word on the Human Factor
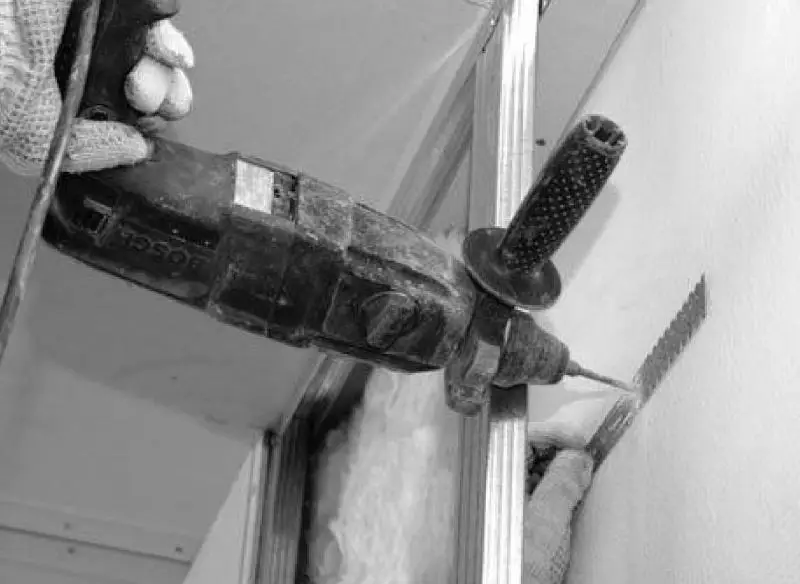
Installation must be done carefully, avoiding punctures from nails or screws during ceiling work. Local damage significantly reduces film performance and leads to frost formation on insulation. All fastener points must be sealed with aluminum tape for added durability.
A common mistake is wrapping the vapor barrier around rafter legs. This creates a gap where warm, moist air freely enters and condenses on cold surfaces when reaching the dew point.
Unfortunately, in Russian construction, it's not uncommon to use materials incorrectly — for example, buying expensive Western films but pairing them with cheap Chinese accessories. In such cases, quality cannot be guaranteed.
Need a renovation specialist?
Find verified professionals for any repair or construction job. Post your request and get offers from local experts.