Gypsum Door Openings
Arc-shaped openings: selecting design
Possible designs for interior arches made of gypsum board can be divided into several subgroups
- "classic" — using a single-radius arc;
- "modern" — increasing the radius of the arch bend vertically (ellipse shape);
- "gothic" — the highest point is formed by converging planes at an angle;
- "romantic" — the arch is formed by a complex combination of straight and curved elements.
Photo 1 — Some styles of gypsum board arches
The choice of arch style should be based on the style of interior in both rooms separated by the opening.
Arc-shaped openings: selecting design
Possible designs for interior arches made of gypsum board can be divided into several subgroups
- "classic" — using a single-radius arc;
- "modern" — increasing the radius of the arch bend vertically (ellipse shape);
- "gothic" — the highest point is formed by converging planes at an angle;
- "romantic" — the arch is formed by a complex combination of straight and curved elements.
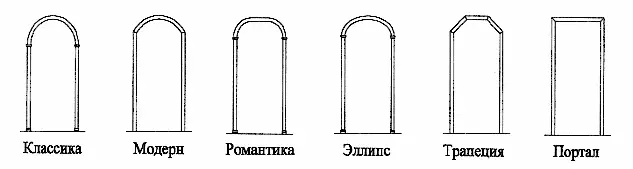
Photo 1 — Some styles of gypsum board arches
The choice of arch style should be based on the style of interior in both rooms separated by the opening.
IMPORTANT! When selecting an arch shape, also consider the ceiling height in the room. An arch with a complex shape may noticeably reduce the space in the room, whereas an arch cut not to the height of the door opening but to the full wall height will expand space and provide more light to both rooms.
Interior openings: preparing for installation
Preparation stage
In work with gypsum board finishing of door openings, the preparation stage is especially important: draw your door opening on paper at a convenient scale for you. Visualization will help finalize the style and shape of the future arch. After removing the door and cleaning the surface, take measurements of height, width of the arch, and diameter and radius of the bend (if you chose a curved structure design).
Installing metal profile
After calculation work, proceed to installing the metal profile.
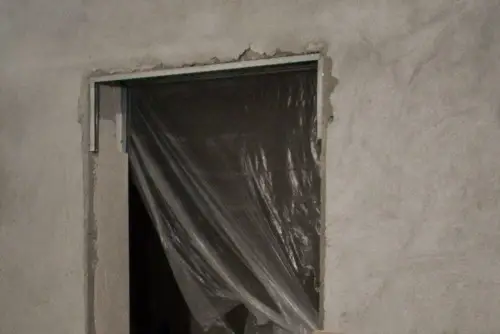
Photo 2 — Installing metal profile
IMPORTANT! It is more convenient to work with a P-shaped metal profile, as this element has sufficient stiffness.
In work with the profile, you will also use a metal hole punch and special scissors.
IMPORTANT! Many craftsmen recommend using screws for fastening elements of the structure, but working with them requires attention: screw heads will interfere with tight fit of GKL sheets to the arch frame.
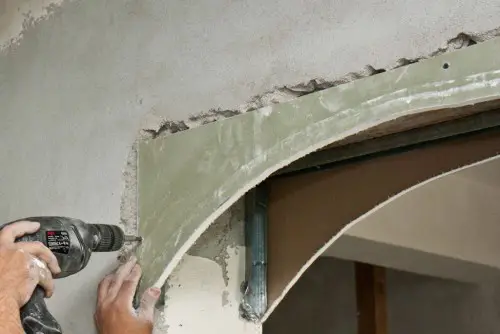
Photo 3 — Securing gypsum board arch side panels with screws
Calculate the length of the profile based on previous measurements. Measure the edge of the sheet with a flexible ruler along the template, cut grooves in the profile every 5 cm with scissors — this will help give the guide the required shape. Bend the profile according to the template. The frame for the arch is ready.
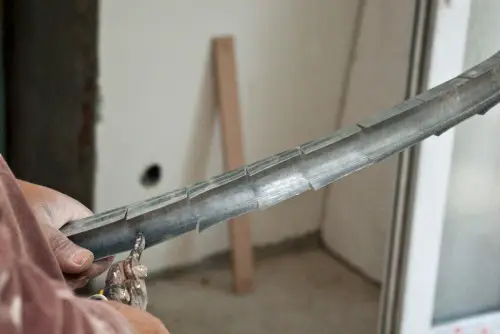
Photo 4 — Bending the profile for the arch
Preparing gypsum board
To prepare gypsum board for installation in a door opening, you can use one of the following methods
- for small depth of door opening and width of gypsum board arch not exceeding 20 cm, make continuous cuts on the paper side of the GKL sheet every 1 cm (the sheet is slightly broken along the cuts to allow bending of GKL according to the template), the side with cuts should be covered towards the ceiling in the end;
- you can bend the sheet by pre-punching it with a special roller (GKL is thoroughly soaked in water, then rolled over the entire surface of the sheet with a roller with studs).
IMPORTANT! Leave such structure to dry for at least 12 hours after bending according to the template, until GKL regains its initial stiffness.
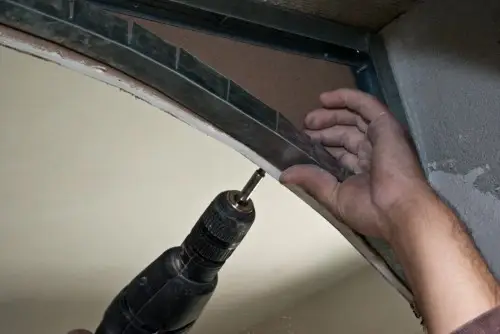
Photo 5 — Securing the profile for the arch
IMPORTANT! For finishing the horizontal part of the opening, it is best to use ceiling gypsum board, as this material is thinner and therefore much more easily bent (with it you can make any shaped elements).
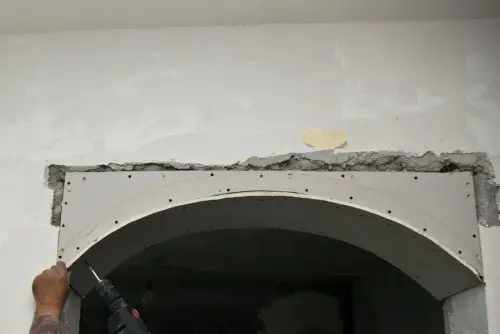
Photo 6 — Securing the bent gypsum board sheet in the opening
GKL Arch by Yourself: Installing Gypsum Board
- Uneven walls are smoothed or leveled by any other available method. Then metal profiles PN 27/28 are secured on both sides of the opening.
IMPORTANT! To make an interior arch form a single plane with the walls of adjacent rooms, the profile is recessed into the opening to a depth equal to the thickness of the GKL used.
- Using calculations and prepared templates, cut the side panels of the arch: cut the lower surface of the panel according to the template, and the upper surface is cut from a gypsum board sheet based on the height and width of the arch. Place the panel to check for accuracy of the cut. If the piece is cut correctly, mirror-cut the second side panel accordingly.
IMPORTANT! In addition to GKL, you can use MDF for creating side panels.
- Install straight profiles in the opening, followed by the curved guide. Traditional method: fasten all structural elements made of GKL (side panels and bent sheet of gypsum board) with screws.
IMPORTANT! Screw in the screws without over-tightening: metal profile can bend under excessive pressure and your constructed structure will lose its shape.
Finishing the interior arch
- After installing GKL elements, special perforated corner pieces are used to frame the protruding angles of the structure and joints between the arch and the wall or ceiling, which are then covered with serpentine tape.
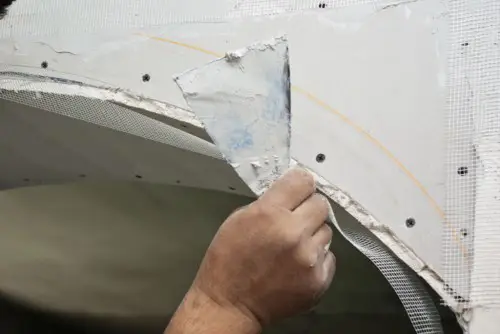
Photo 7 — Taping with serpentine tape
- All surfaces of the gypsum board sheets are spackled with primer spackle, and then, after drying and full hardening of the initial layer, treated with finishing spackle.
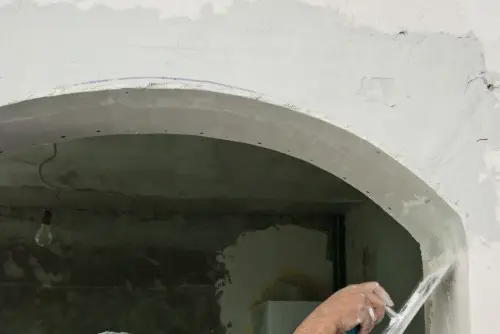
Photo 8 — Spackling the arch
IMPORTANT! Spackling all GKL, not only joints and seams of the structure, is important because uneven color of the base can affect the final appearance of the painted surface.
- After the finishing spackle dries, the surface is sanded to a smooth state.
After this, the surface is ready for painting or wallpapering.
If narrowing of the door opening is necessary, GKL can also be used: extend the arch by making a gypsum board structure throughout the height of the opening or fill the door opening with bricks to the desired width.