Two-Level Suspended Ceilings: Photos
Task: how to quickly deal with the ceiling, hide curvature, cracks, and fit all these works into a complex design. Solution:
Introduction
Task: how to quickly deal with the ceiling, hide curvature, cracks, and fit all these works into a complex design. Solution: install two-level suspended ceilings.
Earlier, designer solutions for ceilings were abundant with two-level gypsum board ceilings, but now two-tier suspended ceilings are becoming more popular.
This is related to a number of significant advantages of the suspended system. For example, suspended ceilings can be installed without removing bulky furniture: the ceiling installation technology is dust-free and does not damage furniture, unlike quite dirty work with gypsum board.
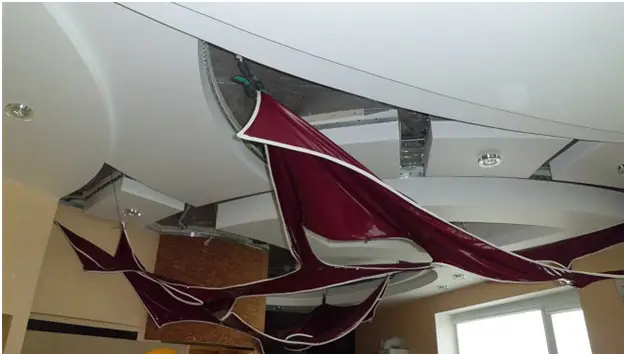
Photo 1 – Common combination: two-level gypsum structure and two-level suspended ceilings (photo). Primary fixation of the upper (film) level of the ceiling
Moreover, installation of suspended ceilings takes much less time: usually installation takes about 4-5 hours, maximum half a day (only in case of the most complex design solutions and installation of 3-4 ceiling levels - up to 5 days). For comparison, multi-level gypsum board ceilings will take at least 7-10 days (including frame installation, its sheathing with gypsum board sheets and finishing after joint filling).
Speaking of finishing. The "finishing" for suspended ceilings can only be the installation of baseboards on the room walls or installation of level lighting. All in all - a couple of hours. Especially considering that the film for stretching can be chosen not only in any color but also in any pattern (ceilings with photo printing - expensive, but effective).
Assuming you've already decided firmly: multi-level ceilings are to be! Now we divide into two columns: the first one - those who are looking for master phone numbers on yellow pages and summing up prices, the second one - those who are eager to do everything themselves. Let's leave the first group aside for now: let them work.
If you want to save money, don't rush to use a drill. We answer you: the possibility of doing the work yourself always exists, but it is complicated because multi-level suspended ceilings are installed using special equipment.
It's not so much about a drill or screwdriver as it is about a heat blower - a tool that is quite dangerous due to the need to heat the ceiling film (and thus, to some extent, the working space) up to 60°C. Heat blowers can be electric (which is much safer) or gas-powered. In any case, the tool is not among the safe ones. There is also a risk of overheating the film and yourself on the first try.
CONCLUSION: Do not undertake installation of a suspended ceiling by yourself without attending appropriate master classes or supervision of an experienced specialist - it's a waste of time and considerable money. Yes, savings on master labor look substantial (on average up to $500), but even greater will be the amount needed for redoing what you started.
Due to all these nuances, we recommend contacting specialists.
If a curious mind is still interested in how to make a two-level suspended ceiling, then the technology in general terms looks like this.
Two-Level Suspended Ceilings: Don't Do It Yourself
IMPORTANT! Before installation, good specialists must check walls with a metal detector for concealed wiring. Note that the profile forming the lower level is mounted to the lowest point of the ceiling in order to hide surface irregularities.
After turning on special heat blowers that should warm the air in the room to 40-60 degrees.
IMPORTANT! Heating should be done not just the room itself, but the ceiling film precisely! The air in the room will warm up anyway due to heat distribution from the film.
TIP: Since ceiling stretching is a hot job, we recommend beforehand evacuating all temperature-sensitive items from the room (e.g., grandmother's ficus, dad's TV and household appliances, expensive furniture, whose condition you would worry less about if they were in a neighboring room rather than in the 'steam room').
Under high temperature, the film starts to stretch, factory folds and 'wrinkles' on the piece flatten out. Once the film becomes flat and pliable for stretching, specialists can begin inserting it into the profile mounted on walls or other structures.

Photo 2 – Simplified scheme of stretching the film for a suspended ceiling
The second level is installed according to the same scheme: mounting the batten (frame of a suspended ceiling), initial fixing of the film, heating, stretching.
Gaps between walls and the new ceiling are closed by a special decorative insert made of lightweight material, which performs a masking function. In common parlance - ceiling baseboard, in some constructions the role of a decorative baseboard is played by a plug that closes the lock holding the film in the mounting bracket (see the photo below).
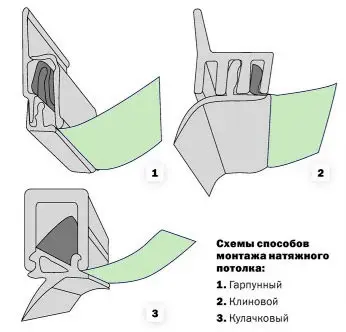
Photo 3 – Fixators for suspended ceiling
After cooling down, the film will stretch. In the end, you become the owner of perfectly flat decorative ceiling surfaces.
Another reason to find a skilled master for working with suspended ceilings: installing lighting fixtures in a multi-level structure. If you don't know the difference between a cable channel and a flexible pipe, an LED lamp and an incandescent bulb, or phase and neutral - this is not your thing to mount light fixtures.
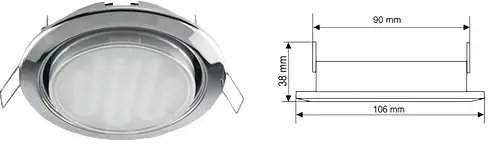
Photo 4 – GX53H4 light fixture with energy-saving bulb
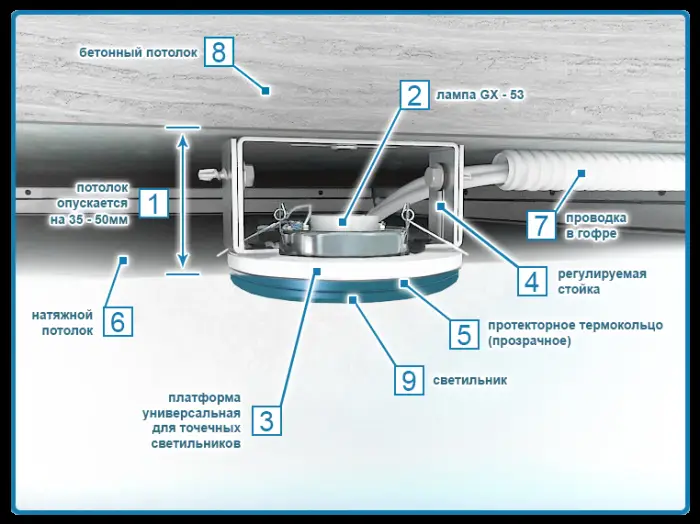
Photo 5 – Ceiling with backlight. Installation scheme of a light fixture with external bulb placement
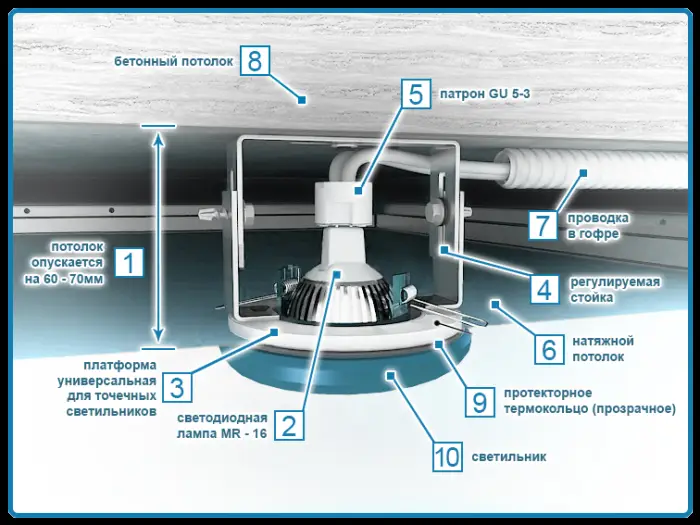
Photo 6 – Installation scheme of a light fixture with internal bulb placement
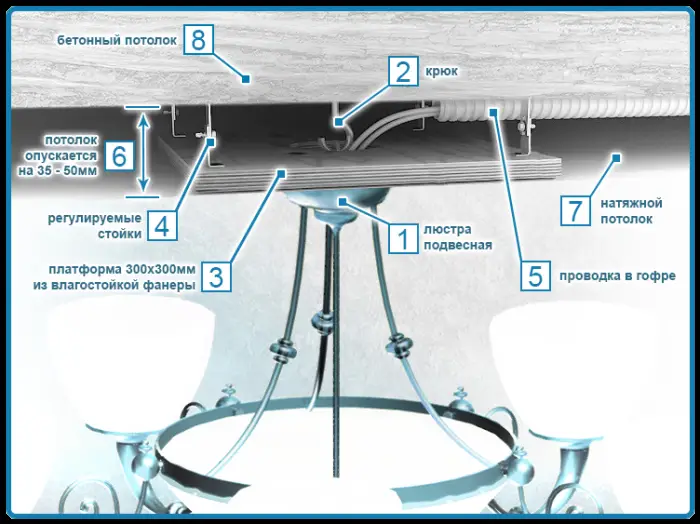
Photo 7 – Installation scheme of a chandelier in a suspended ceiling
With the installation process of suspended ceilings in two words, we've gone through.
Now let's talk about where and how you can mount suspended ceilings.
Variants of Installing Suspended Ceilings
Suspended ceilings can be used in all rooms without exception (in a living room, bedroom, kitchen, children's room, bathroom, dining room, etc.). The essence is not in what the specific space is for but rather in its parameters. Usually, suspended ceilings, especially multi-level ones, are found in spacious rooms with sufficient ceiling height.
Two-Level Suspended Ceilings for Bedroom: Photos
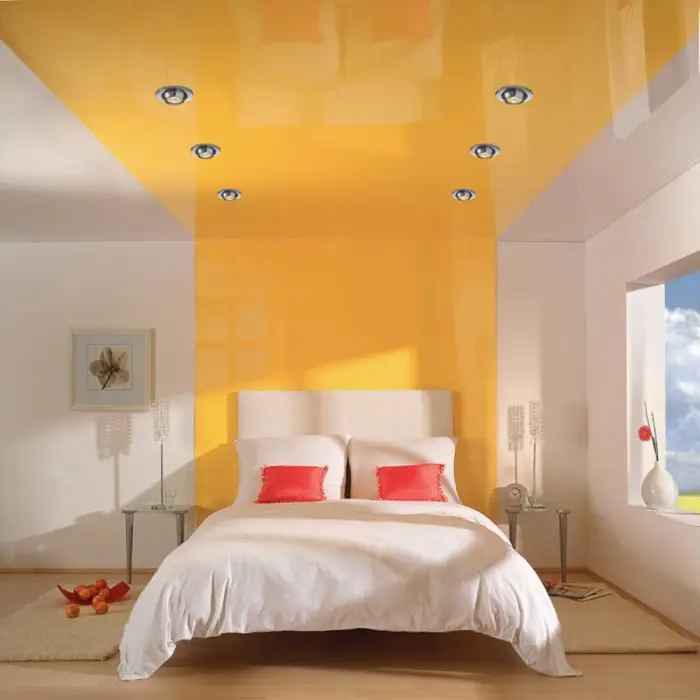
Photo 8 – Gloss makes the room look more spacious due to light refraction. Bright yellow effect looks great on white walls. Note the room zoning done using this structure
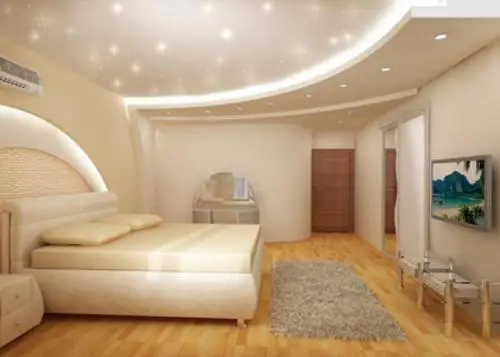
Photo 9 – "Starry Sky" type ceiling in beige tones
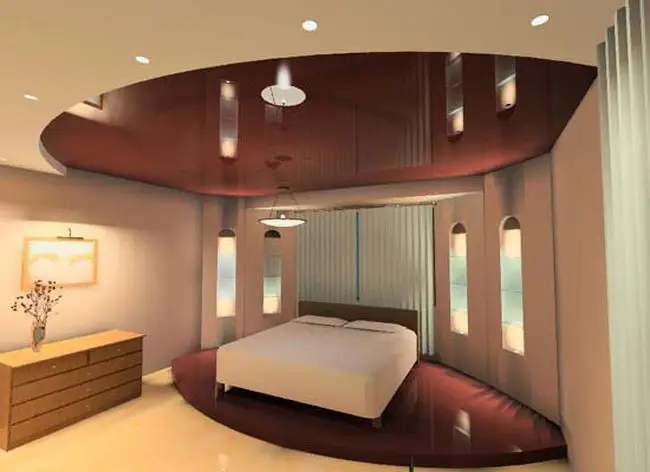
Photo 10 – The ceiling suspended structure reflects on the floor of the bedroom. In all senses. Interesting idea of "reflection" of the floor and ceiling design - a podium-like structure complements the shape and appearance of the first level of a multi-level ceiling
Two-Level Suspended Ceilings for Living Room: Photos
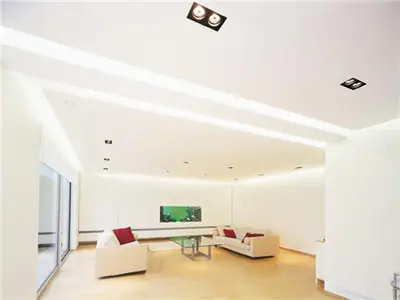
Photo 11 – Snow-white two-level suspended ceiling for living room
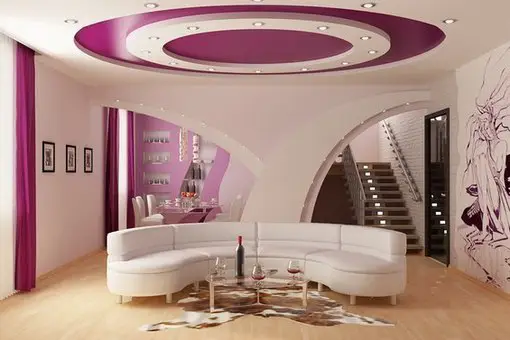
Photo 12 – Harmonious solution. Design of a two-level combined ceiling with interior matches not only in color but also in shape, carefully repeating the contours of furniture and decorative arches
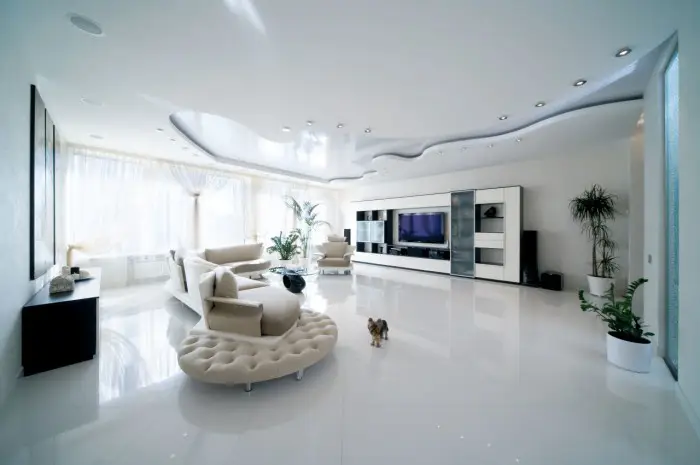
Photo 13 – Modern living room interior
Two-Level Suspended Ceilings - Kitchen: Photos
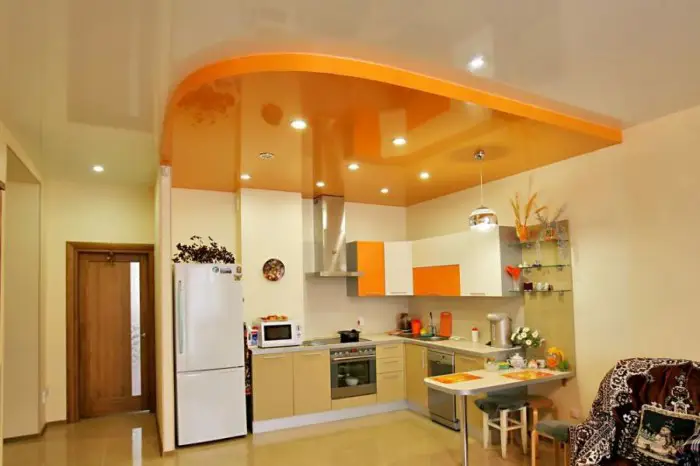
Photo 14 – Kitchen zoning adjacent to dining room using a two-level suspended ceiling
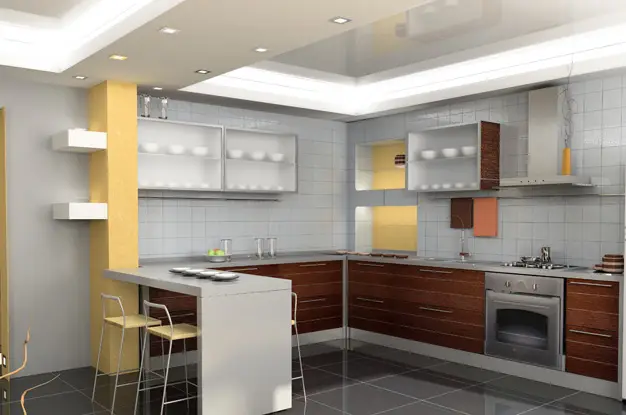
Photo 15 – In this example, the kitchen is also divided into functional zones using a two-level ceiling design. The restraint of forms and clarity of lines give the kitchen interior an atmosphere of tranquility and harmony
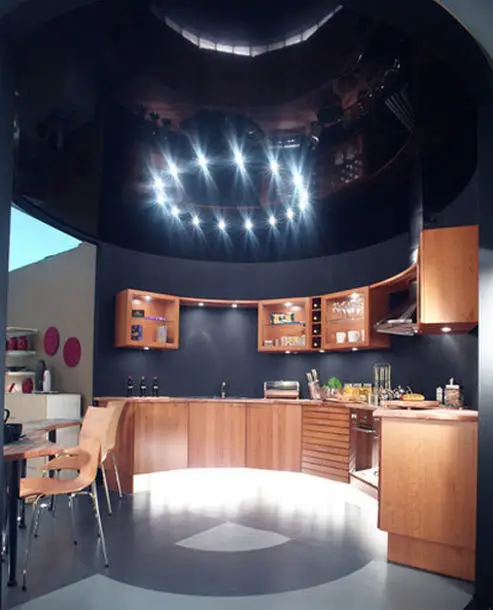
Photo 16 – Minimalist design of a semicircular kitchen with suspended ceiling
There is a classification of ceilings based on the number of levels: single-level suspended ceilings, two-level and multi-level. It's not hard to guess that single-tier ceilings are the simplest and most budget-friendly option.
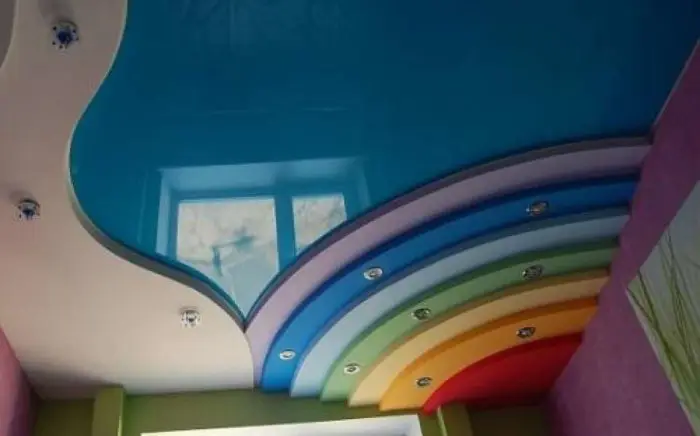
Photo 17 – Original application of a multi-level suspended ceiling in a children's room
Multi-level suspended ceilings with a good project budget - a way to let your imagination run wild (or the designer's imagination):
- different ceiling levels can visually divide a room into zones;
- add more light to specific points (not only by point lighting but also by playing reflections in a glossy ceiling, for example);
- play with colors and shades (e.g., install two-color ceilings).
Multi-level suspended ceilings are a structure consisting of a frame and 2 or more films positioned at different heights relative to the base ceiling.
Such ceilings include the following components: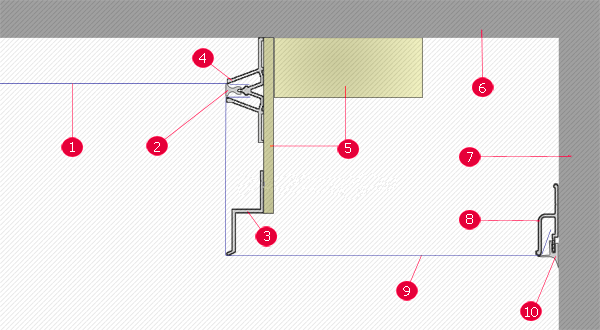
Photo 18 – Cross-section of a multi-level suspended ceiling (hook-type mounting)
Accessories for multi-level suspended ceilings:- profiles for installing suspended ceilings (battens);
- profiles for installing multi-level and curved constructions;
- masking tapes;
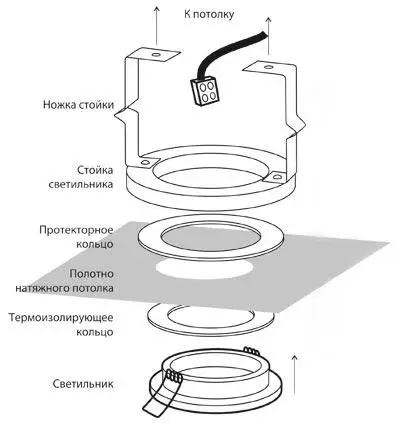
- platforms for mounting recessed light fixtures;
- protective thermal rings for mounting light fixtures;
- equipment for taking measurements and installing suspended ceilings (screwdriver, drill, straight trowel, narrow trowel, angular hanger, heat blower, laser tape measure).
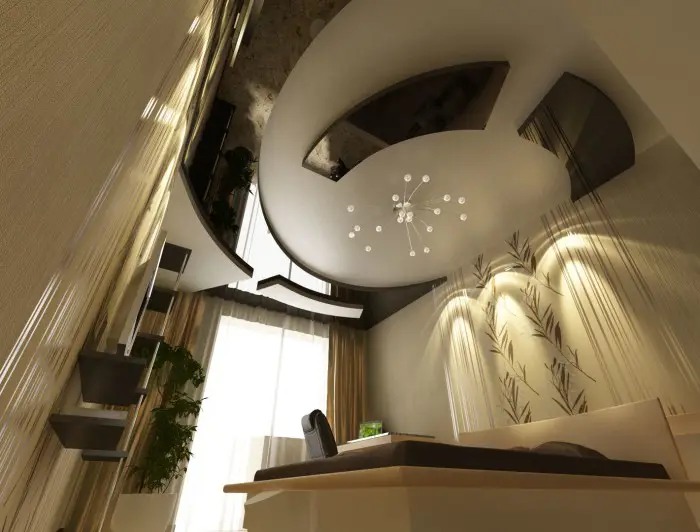
Photo 19 – Three-level suspended ceilings for bedroom
Final Thoughts on Ceiling Selection
Suspended ceilings come in:
- matte and glossy (glossy ones have a mirror effect, which allows for visually expanding the space, while matte ones perfectly suit all interiors);
- metalized and pearlized (the former are mostly used in high-tech interiors, while the latter add softness and depth to the interior, for example, can be used in bedroom interiors);
- "Starry Sky" type deserves a separate line - this is the most original ceiling with backlighting, creating the effect of a clear night sky in your home (you can choose brightness and number of "stars" according to your preference);
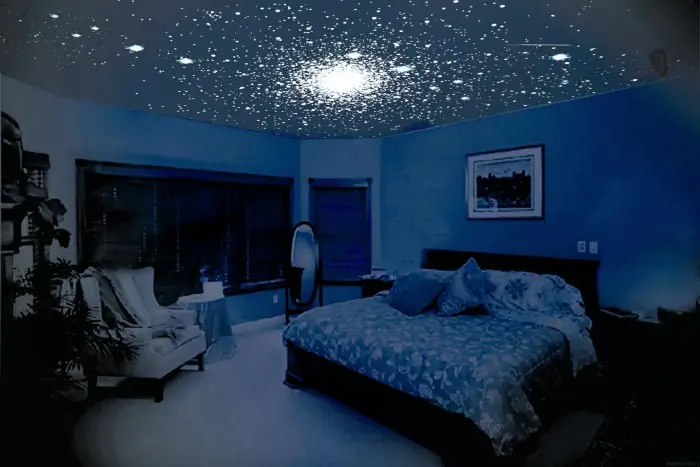
Photo 20 – Variation on the theme of "Starry Sky" type suspended ceiling
- fabric (the thinnest film is coated with a special polymer composition, giving it the ability to function as a suspended ceiling. These ceilings offer a wide choice of textures, shades, and patterns);
- with photo printing (images in any format and theme are printed on films for suspended ceilings).
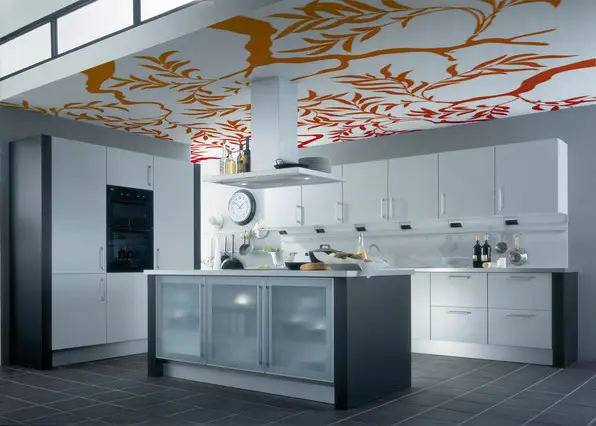
Photo 21 – Suspended ceiling with photo printing for kitchen
How to Make Two-Level Suspended Ceilings: VIDEO
Two-Level Suspended Ceilings: Cost
The cost of suspended ceilings depends on the type of material for making the film, the complexity of the structure, and the area of work.
For example, for a glossy suspended ceiling you will have to pay around $8/m², matte costs slightly less - $6.5/m². Installation of single-level constructions rarely takes more than one day.
Fabric ceilings take longer to install - up to 3 days, and the job costs approximately $12.5-14/m².
Two-level suspended ceilings are not among the cheapest pleasures. Installation of such ceilings takes approximately one week and costs around $18.5/m².
Artistic suspended ceilings cost a little less - $15.5-16/m², while masters are committed to completing the order within 6 days.
Price of multi-level suspended ceilings
in Moscow - from 580 rub/m²;
in Kiev - from 150 UAH/m².