Installing a Switch and Socket Yourself
Electrical point of the socket type is installed in places where access to the electrical power network is required. This means that installing one or more points in a specific room begins with planning the socket placement — you need to consider possible furniture locations, height above the floor, distance from other items that can interact or, on the contrary, affect the operation of the socket and so on.
Installing a Socket in a Room: What We Should Build a House For
An electrical point of the socket type is installed in places where access to the electrical power network is required. This means that installing one or more points in a specific room begins with planning the socket placement — you need to consider possible furniture locations, height above the floor, distance from other items that can interact or, on the contrary, affect the operation of the socket and so on.
If several decades ago installing a socket required using almost a sledgehammer, then modern construction and finishing materials have made this procedure comparable to installing a skirting board. Indeed, today running electrical wiring and simultaneously mounting electrical points have become ordinary procedures that do not require special efforts.
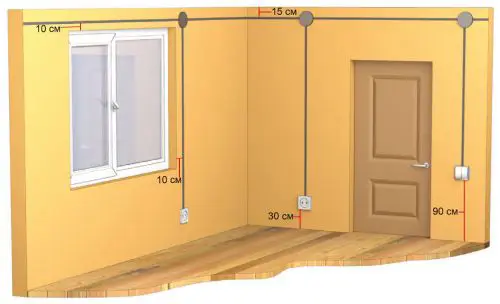
Diagram 1 — Socket and Switch Placement
However, despite the simplicity of installation, requirements for electrical safety rules remain the same.
For example, the height of installation of a switch or socket is absolutely irrelevant in this case — it should be sufficient to ensure that the socket cannot be flooded if a pipe bursts or a child crawling on all fours cannot reach it independently.
All these factors are taken into account during socket installation, which requires marking the wiring and locations for socket and switch mounting.
General rules for installing sockets include: the distance to the windowsill should be at least 10 cm, to the floor — at least 30 cm, to the door opening — at least 90 cm.
However, in some rooms, socket installation rules may deviate from general standards; for example, the height of installation of switches and sockets on a kitchen island may be equal — at least, above the surface of the table or kitchen furniture. The aesthetic aspect requires that all visible electrical points have the same height, at least within one room. Of course, this is easier to implement for open mounting, but ultimately it depends on your preference.
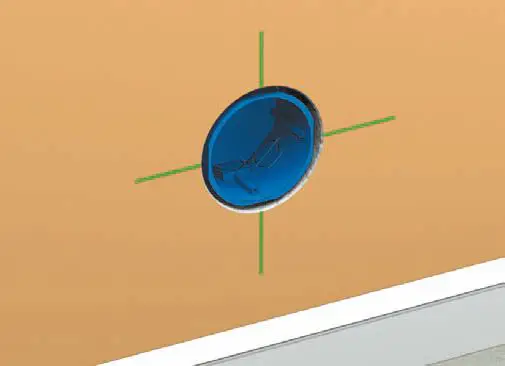
Photo 1 — Installing a Socket
At present, for concealed socket installation, round plastic boxes are used, into which holes are drilled. Even if you have to deal with a concrete wall, a coring bit for concrete is used to drill the hole, and then a chisel or hammer is used to remove the remaining wall material.
An alternative option is drilling holes according to the marked perimeter, after which wall sections are manually removed.
When there is no electric tool at all, a chisel and hammer become indispensable assistants in preparing the space for mounting the socket box. To 'sink' the box into the wall, you need to make a hole about one centimeter deeper than the box itself — after that, plaster around the box will be able to hide everything at wall level.
The box (socket outlet) is fixed inside the hole using construction plaster — it has enough irregularities, just like on a concrete wall, to be secured with a water-based plaster or mortar solution.
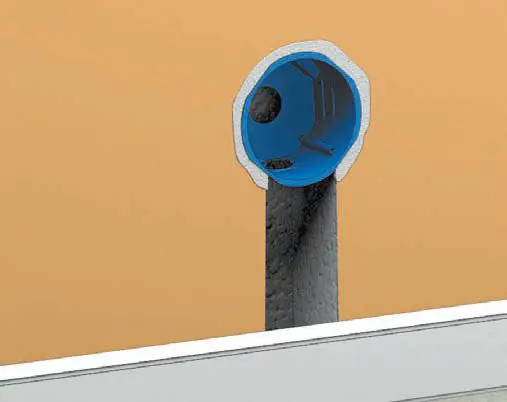
Photo 2 — Installing a Socket
The socket itself is mounted in the socket outlet either using screws or with the help of sliding clips, and the latter method is now preferred as it takes less time. After that, you only need to cover the socket with a plastic cover.
If renovation or finishing work in the room is not yet complete, it is advisable to plug the socket holes with paper and cover the socket itself with something for the time being.
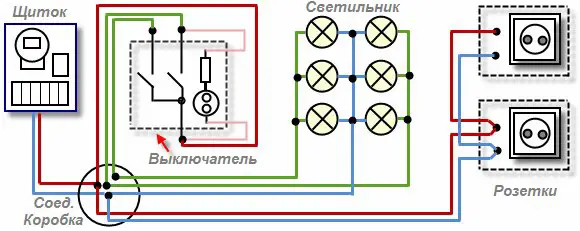
Diagram 2 — Electrical Wiring Diagram
Installing Different Types of Switches: Common Features
In general, and in detail, installing switches is similar to installing a single socket, as mentioned above. However, there are several differences, especially when it comes to installing a two-switch or even three-switch device, but that will be discussed later.
As already stated, installing switches is identical to installing sockets; the difference lies only in usability — a switch should generally be within reach of an upright person. The access to the switch should not be obstructed by anything. Additionally, installing a two-switch, three-switch or more requires placing the switch in such a way that wiring distribution does not cause any difficulties.
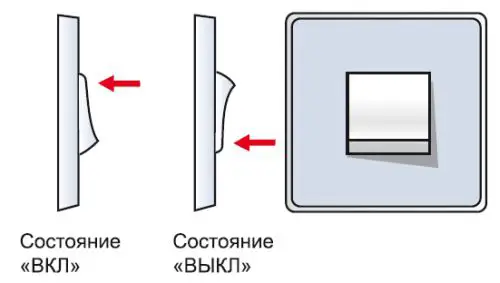
Diagram 3 — Switch Operation Diagram
Another very common problem is the arbitrary arrangement of switch installation. Rules for open and concealed switch mounting require that the switch breaks the live wire circuit.
Indeed, any professional installation guide for a switch shows that disconnecting the 'live' wire removes voltage from a specific section of the circuit and allows, for example, minor wiring repairs or replacement of incandescent bulbs without disconnecting the entire room from the electrical network.
In real life, arbitrary choice of breaking the live or neutral wire — 50/50 in all cases — makes an external switch, as well as any other type of switch, a source of danger.
For example, in multi-story buildings, water leaks from upper floors to lower ones. In such cases, electrical wiring channels become the most vulnerable point and the likelihood of water entering them is very high. As a result, a short circuit occurs in the wiring (even when it is in the 'off' position) and the entire or partial failure of the wiring.
However, the most dangerous aspect is that installing a switch without observing the specified rule can lead to electric shock for any of the residents, who may be in a bathroom and not aware of the danger.
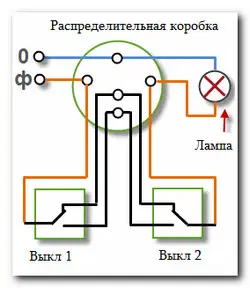
Diagram 4 — Distribution Box Wiring Diagram
Installing a Pass-Through Switch: Justified Complexity
Installing a pass-through switch is notable not only due to the potential problems mentioned above, but also because the wiring scheme for such a switch is more complex than that of a regular one.
The wiring diagram for a pass-through switch shows that the neutral wire is not interrupted by switches, but the live wire must always be interrupted.
When installing a two-switch or even three-switch device, attention to following this rule should be even greater — safety of residents and proper load distribution on different circuit sections are crucial.
For example, a three-switch open installation makes each switch independent; that is, each switch is essentially an individual single-pole open switch.
In a three-switch configuration, the central switch differs in construction from its neighbors — it also connects to more wires (the edge switches have three wires, while the center one has four).
On one hand, this imposes additional requirements on wiring channels (they must be able to accommodate more wires than usual), and on the other hand, during wiring design, the installation of such switches must be justified.
Installing an Automatic Circuit Breaker: Effective Reliability
Installing such devices is a separate topic, considering their importance. First of all, it is necessary to understand how an automatic circuit breaker works and the role of factors affecting its operation.
To correctly calculate the nominal parameters of a future automatic circuit breaker, one must consider the type of wire (in most cases either aluminum or copper), its cross-section (the larger the wire's cross-section, the higher the current it can carry without overheating), and the type of wiring (concealed or open, for outdoor installation, heat dissipation is more intense).
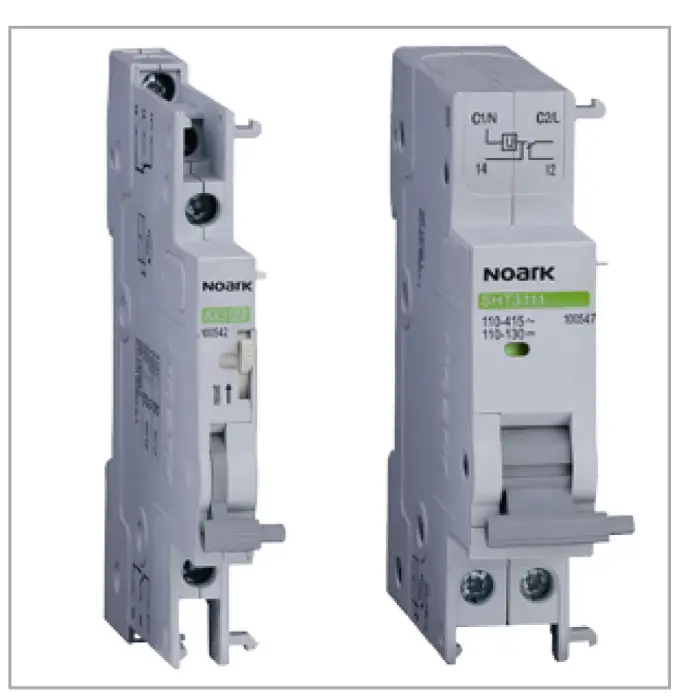
Photo 3 — Automatic Circuit Breaker
In domestic applications, i.e., where two phases and a nominal voltage of 220 V are primarily used, single-pole and double-pole circuit breakers are used. The main difference between them is the ability to switch not only the 'live' wire but also the 'neutral' wire, which is more appropriate.
The nominal current rating that a device can be rated for ranges from 2 to 63 A.
In conclusion, it should be added that using automatic circuit breakers is much more efficient than using fuses from the previous century.
Cost of Installing a Switch: Where Does Economic Efficiency End
Existing 'trendsetters' in the electrical equipment market — VIKO, SCHNEIDER, LEGRAND, MAKEL — have long anticipated many small details that are important during the installation of various switches. But even these achievements cannot reduce the set of small but necessary operations, a brief list of which along with their costs for Moscow and Kiev (in rubles and hryvnia respectively) is provided here:
- mounting a socket box — 250/45
- installing a single-pole or double-pole circuit breaker — 250/40
- installing a switch — 250/20
- installing a pass-through switch — 350/25
Of course, supplier price lists for installation services can contain dozens of items and to better understand what you're paying for, it's better to review demonstrations like 'switch installation' (video reports from specific companies will give a full picture of their service level), 'circuit breaker installation', and so on.
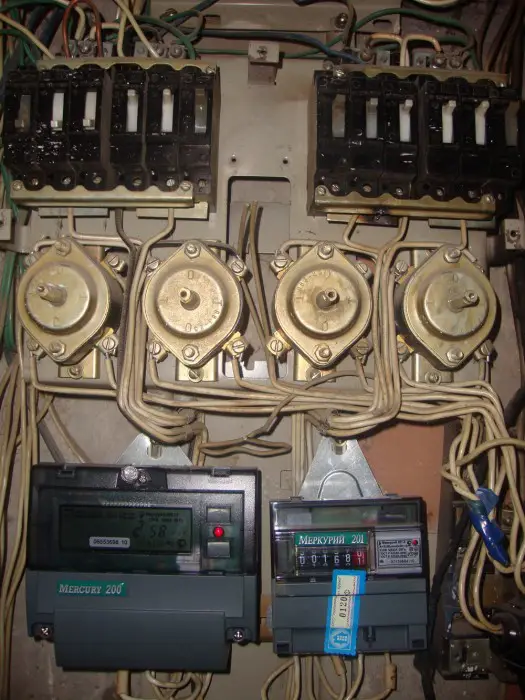
Photo 4 — Electrical Panel