Ceiling from Gypsum Board - Correct Calculation and Photos
Installing a ceiling in an apartment with gypsum board is the easiest option. The ceiling can be made in several levels, decorating not only with different colors but also with a combination of lighting fixtures and the gypsum board structures themselves.
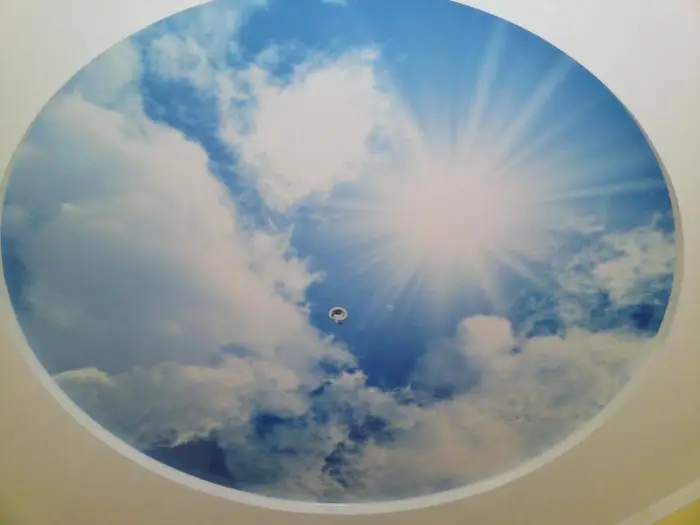
In addition, various inserts diversify the design, for example, elements of a suspended ceiling (photos are shown below).
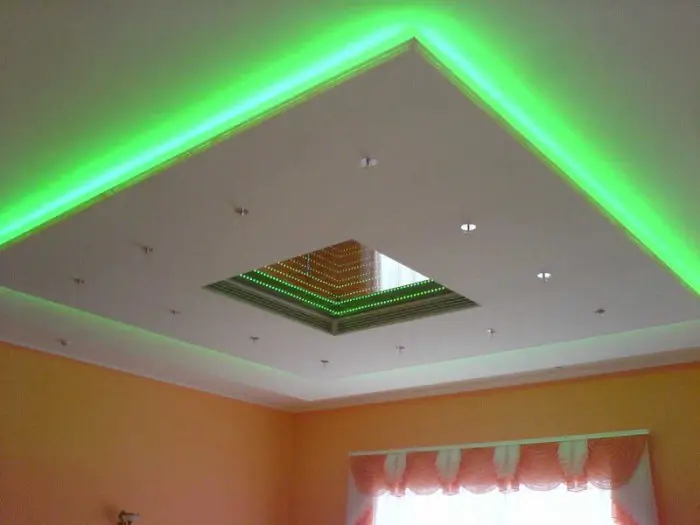
Photo 1 — Designer ceilings from gypsum board - the most convenient and simple way to create a unique design
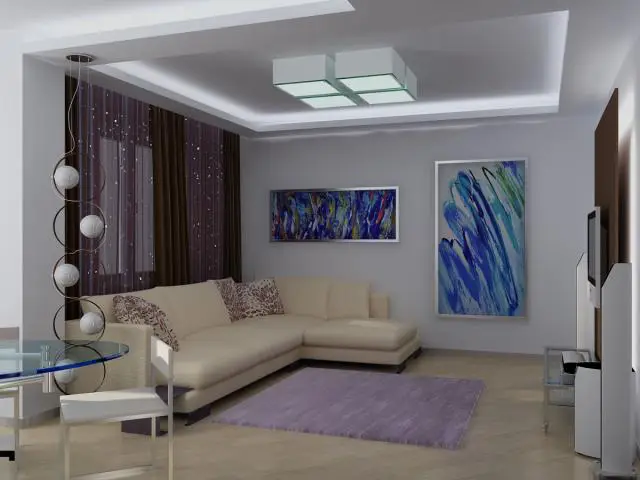
Photo 2 — Various inserts diversify the design, for example, elements of a suspended ceiling
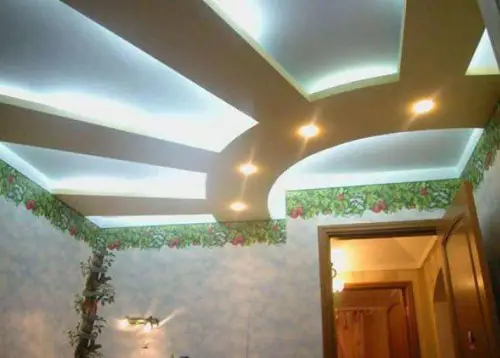
Photo 3 — The ceiling can also be decorated with gypsum board structures
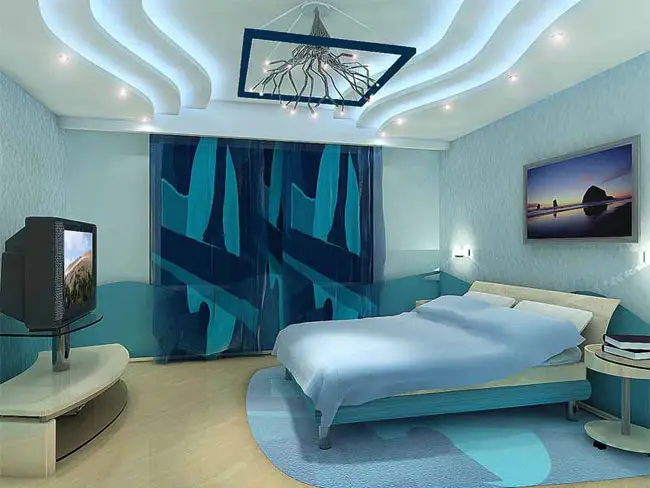
Photo 4 — The ceiling can be made in several levels, decorated with a combination of lighting fixtures
If desired, you can decorate the ceiling with running clouds from gypsum board, a sun, a fairy tale castle, or a dragon made of the same material. Or you can limit yourself to curved structures or simple geometric shapes.
With properly placed lighting, you can create a starry sky on the ceiling or make it appear to float (this effect is achieved using LED strips or lights hidden in perimeter grooves or on one of the levels).
Gypsum board ceilings have sound-insulating properties.
They allow you to diversify the lighting system in an apartment, hide defects of the actual ceiling or the same utilities (wires or pipes).
Gypsum board ceilings are not so complex to install that only a highly prepared and experienced person in renovation can handle them. But some skills are still needed, and it's worth knowing the nuances of installing such a ceiling.
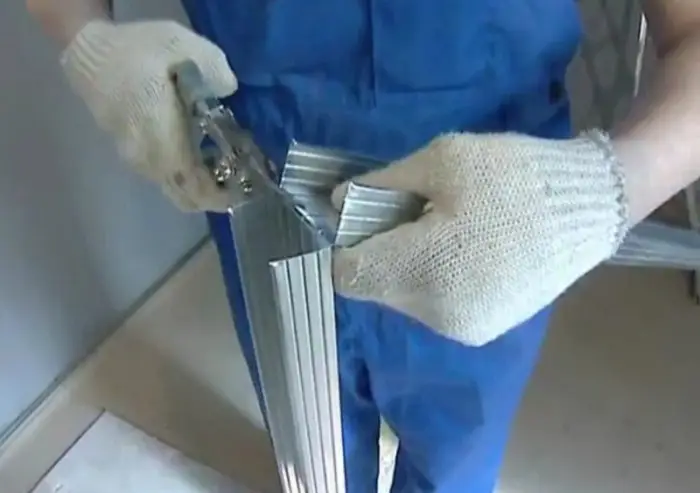
Photo 5 — If needed, metal frame profiles can be cut with metal shears
Calculation of Gypsum Board Ceiling
Before starting the work, you must calculate the gypsum board ceiling.
We start with a single-level ceiling project. It is the simplest and most accessible for novice construction workers. Later, if you wish, you can delve into more complex structures. But it's better to start with the basics, as we all agree. At the end of the article, you can view drawings and sketches of mounting options for gypsum board ceilings.
Before beginning, let's remind you of a few ceiling nuances.
Firstly, look at the ceiling height above your head. Now imagine how many centimeters you're willing to sacrifice for art? For example, at least 10 cm of space is needed for installing recessed lights. If you intend to hide ventilation ducts, electrical wiring, or pipes in the double ceiling, even more space is required.
Next, don't forget to invite a reliable friend for the frame installation. Since gypsum board sheets are much heavier than down, at least two people are needed for the work. In a pinch, you can rent a gypsum board hoist. Note that standard Knauf gypsum board sizes are 2500x1200x12.5 mm, which equals three square meters. The weight of a gypsum board sheet is approximately 29 kg.
Arm yourself with the necessary tools - an electric drill, a construction level (2-2.5 m), a hammer drill, a trowel tool, and metal shears.
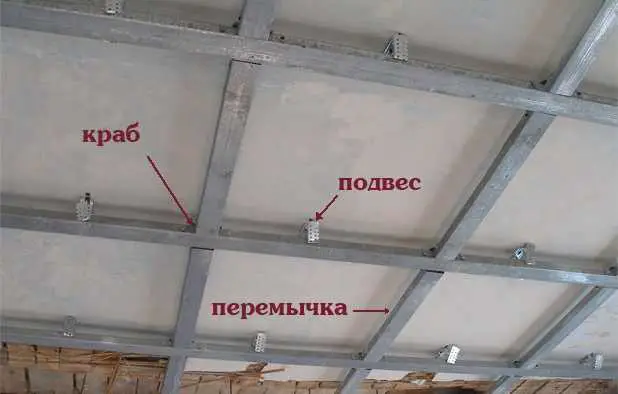
Photo 6 — Frame Installation, Component Parts
Primary CalculationsFirst, calculate the amount of materials. To do this, measure the length and width of the room where the ceiling is planned to be installed. Measure all four sides of the room carefully. If the wall dimensions, located opposite each other, are not identical, take the larger width and length as the basis.
What materials, except for the gypsum board itself, will we need? For a metal frame, we need:
- vertical profile 60*27
- guide profile 27*28
- direct suspension
- "crab" suspension (if the room width is more than 3 m)
- screws 3.5*11 (for connecting profiles to each other)
- anchors with screws 8*80 (for fixing direct suspensions on concrete ceilings) or wood screws 4*60 (if the ceiling is wooden)
Take a standard room of 3x6 meters. Calculation scheme.
Vertical profiles - divide the room length in meters by 0.6 and subtract 1 from the result. In our case: (6/0.6)-1 = 9 pieces. Additionally, we need extra profiles to strengthen the frame. Again, calculate the number of vertical profiles by dividing the room width by 0.6 and subtracting 1 from the result. Example: (3/0.6)-1 = 4. Add one to the first result (9+1 = 10), multiply by the second calculation (10*4 = 40), then multiply the result by 0.6 (40*0.6 = 24), and finally divide by 3 (the length of the profile). We get 24/3 = 8 pieces. Therefore, the total number of metal profiles 60*27 will be 9+8 = 17 pieces.
Now calculate the guide profile. Count the perimeter of the room and divide the result by the profile length (3 m). Round up to the nearest whole number. ((3+6)*2)/3 = 6 pieces - the number of profile 27*28 for suspended ceiling installation. But it's better to buy 9 profiles instead of 6, as additional profiles will be needed.
Now calculate direct suspensions. Divide the room width by 0.5 (3/0.5 = 6) and multiply the result by the number of 60*27 profiles in the first calculation, i.e., by 9. We get: 6*9 = 54 pieces.
And finally, calculate how many sheets of gypsum board will be needed for such a ceiling. The sheet size is 2.5x1.2 meters. This means that in the length of our imaginary room, exactly 5 sheets will fit (6/1.2 = 5). However, the width is half a meter more than the length of the gypsum board. Thus, we need 5 additional pieces of half a meter (one more sheet). In total, we will need 6 GKL sheets.
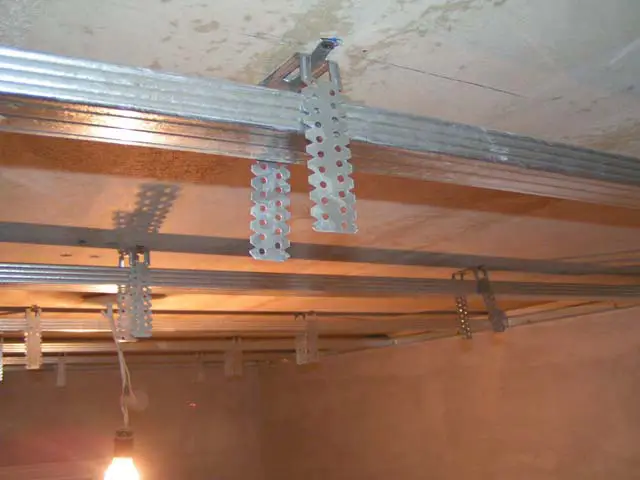
Photo 7 — Direct Suspension
Now take self-adhesive mesh serpentine for filling seams between GKL sheets and calculate how many screws and anchors with screws we need.
Installation Scheme of Gypsum Board Ceiling
We will now analyze the frame mounting scheme for our future suspended ceiling.
So, the frame:
For the frame, a preliminary layout is required. It can be done using a spirit level or construction level. Mark the walls for mounting guide profiles along the entire perimeter of the room.
Now we have a straight line along the entire perimeter of the room. Take the guide profile and fix it to the walls with anchors with screws 8*80 (if the walls are made of concrete or brick) or wood screws 3.5 (or 4)*60 (if the walls are made of wood). Secure the profile every half meter.
Now fix the 60*27 profile. Since the width of our imaginary room matches the length of the profile (3 m), the profile does not need to be cut or extended. Mark 0.6 meters from the wall and fix the vertical profile to the guide profile with screws (clamps) on both sides. Do this along the entire length of the room. Try to ensure that the distance from the wall to the center of the second 60*27 profile is exactly 1.2 meters - the edges of two adjacent gypsum board sheets should be attached to one frame profile.
Next, level the vertical profiles with direct suspensions. For this, mark the locations for mounting suspensions and bend the direct suspension to form a 'P' shape. Then make marks above the 60*27 profile at intervals of 0.4 meters where the suspension will be mounted. Using one direct suspension, mark mounting points throughout the ceiling.
Loosen the vertical profile and move it to the side (for easier mounting of suspensions). Mount the suspensions with anchors with screws (wood screws) or. On one suspension - 2 screws. Then, using a level, align the profile and mount it to the suspension on both sides with clamps. One suspension will take about 4 screws.
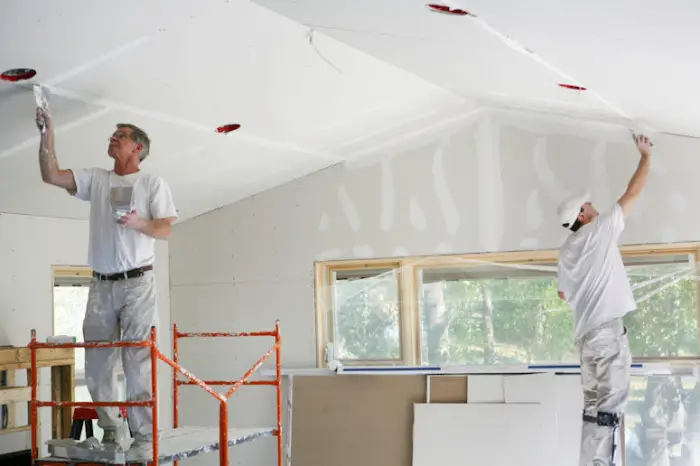
Photo 8 — Working on a suspended ceiling is better done in pairs
Now let's reinforce the suspended system. Connect two adjacent 60*27 profiles with crossbars. For the crossbars, we use the commonly used vertical profile. First, fix 0.1-meter-long segments of the guide profile opposite each other to the end of the vertical profile with clamps (2 pieces per segment). Then insert prepared crossbars into them. Crossbars are placed every 0.6 meters. The frame is ready.
Now fix the GKL sheets to the frame with screws 3.5*25 (32) with fine threads. It is recommended to use black-colored screws made of oxidized metal. Approximately 100 screws will be needed per gypsum board sheet.
After applying the ceiling, prime it with universal primer (Ceresit or Knauf). Once the primer dries, glue serpentine on the seams between gypsum board sheets and spackle the ceiling with spackle from Knauf, Uni or Starateli manufacturers.
Gypsum Board Ceilings. Prices
How much will the gypsum board ceilings cost? Prices will vary depending on the region, whether you perform the renovation yourself or hire professionals, and the selected materials.
Regarding the cost of labor itself, in Kyiv they charge 50-80 UAH per square meter, in Moscow - from 420 rubles.
What are the material costs?For the most expensive materials. Ordinary Knauf gypsum board sheets cost from 190 rubles per unit in Moscow, from 45 UAH per unit in Kyiv.
Profiles cost on average from 13-15 UAH per piece in Kyiv, and from 30 rubles per piece in Moscow.
Drawings and Sketches of Suspended Ceiling Installation
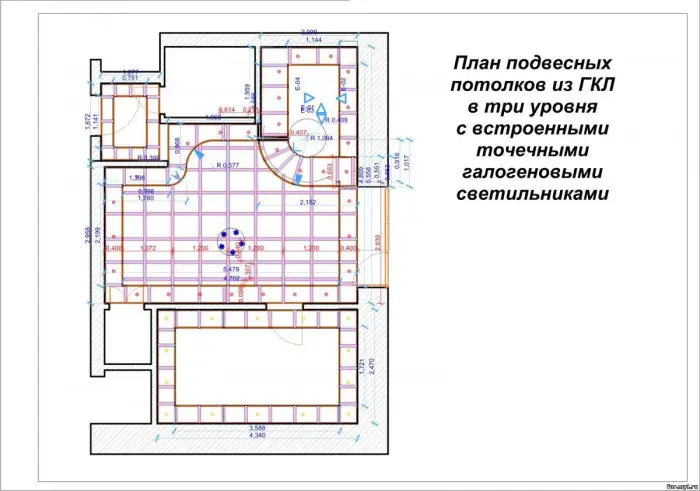
Figure 1 — Plan of Suspended Ceilings from GKL in Three Levels
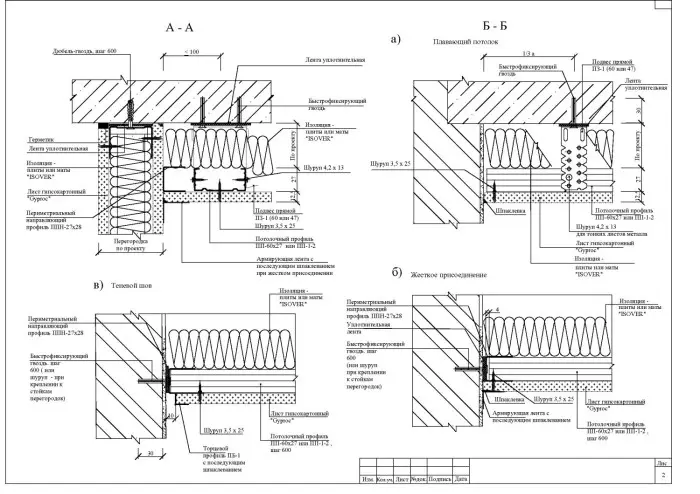
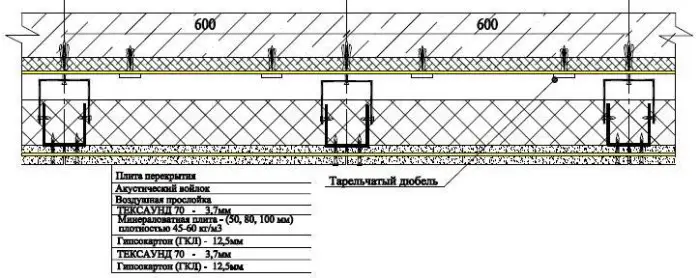
Figure 2 — Installation Scheme of Gypsum Board Ceiling
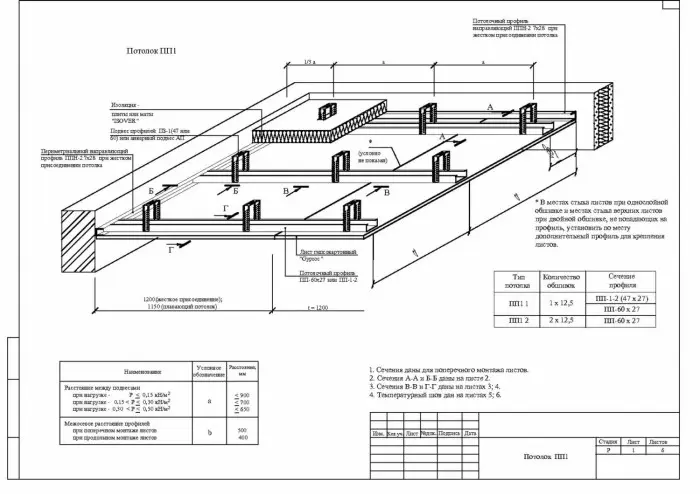
Figure 3 — Installation Scheme of Gypsum Board Ceiling PP1
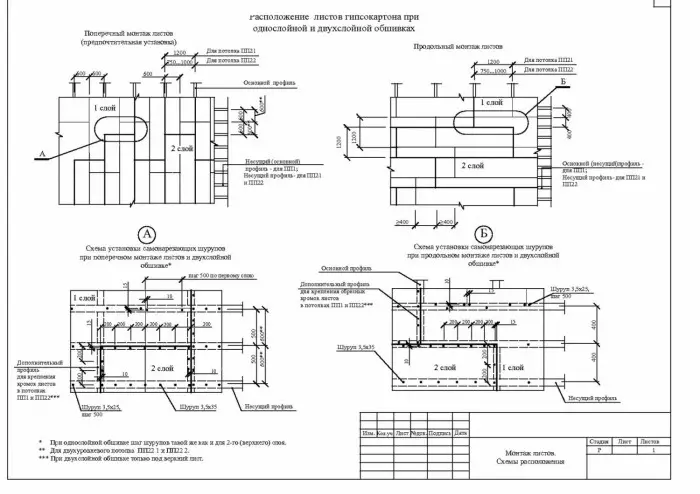
Figure 4 — Schemes of Gypsum Board Sheet Placement in Single and Double Layer Installation
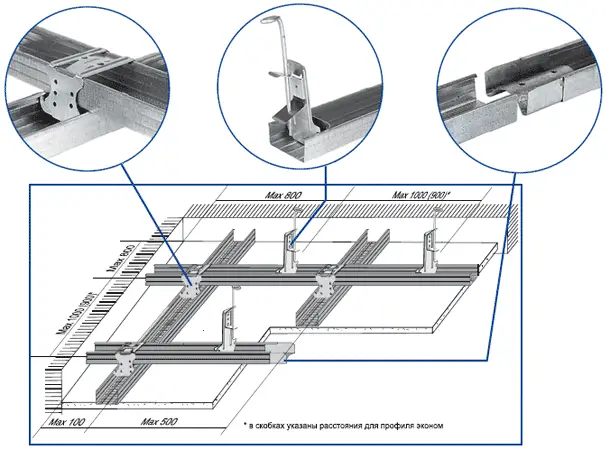
Figure 5 — Two-Level Installation of GKL Ceiling - P112
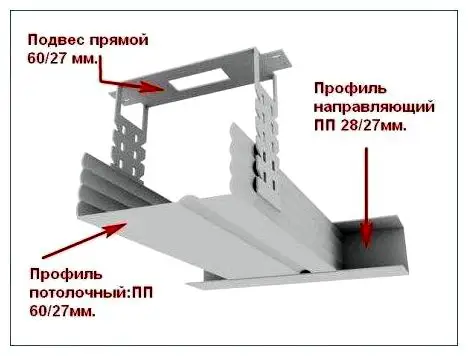
Figure 6 — Suspension Scheme of Guide Profiles
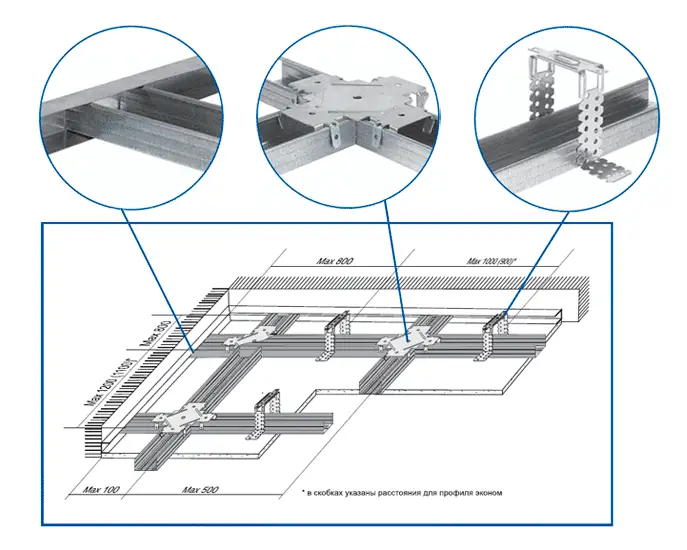
Figure 7 — Single-Level Installation of GKL Ceiling - P113