Installing Suspended Ceilings by Yourself
Materials and Tools
So, regardless of whether the learning is done independently or not, it's important to know that all ceiling options available on the market differ in materials and fastening methods.
Fabrics:
- soft polyvinyl chloride (PVC);
- polyester fabric impregnated with polyurethane.
Fasteners:
- hook-type (usually factory fasteners for expensive photo wallpapers and so on);
- hookless (a staple is a great alternative).
It's better to have quality tools for installing suspended ceilings.
In general, the list of tools includes:
- level, laser level
- tape measure
- drill with a perforator
- heat gun
- gas cylinder
- two ladders
- trowels for installation or/and spatula
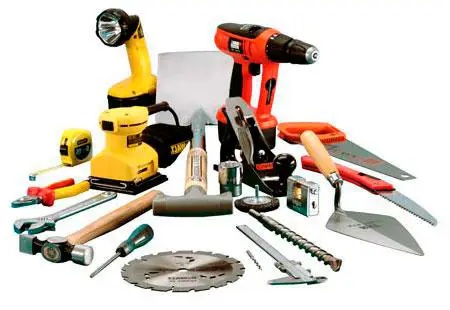
Photo 1 — Tools for Installing Suspended Ceilings
To determine what accessories are needed for installing suspended ceilings in any specific case, one should thoroughly imagine the process of preparation and installation. Below we will consider all stages in detail.
Preparation and Installation of Suspended Ceilings. Work Sequence
Measuring for a Tensioned Ceiling
It's logical that any installation guide for suspended ceilings starts with taking measurements. The accuracy of measurement is the key to successful installation. There's nothing complicated here: you need a sheet of paper, measure the perimeter of the ceiling and mark it on the drawing. Special conditions for measurements include:
- measurements at the level of ceiling attachment;
- measurement accuracy should not exceed 5 mm;
- beyond the perimeter, it's necessary to take measurements of all diagonals, including intermediate ones and so on;
- it's very useful to make measurements and mark them on the drawing with windows, doors and other elements of the room.
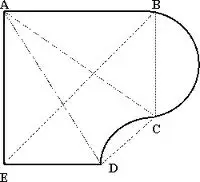
Figure 1 — Taking Measurements
Installing the Fastening Profile
The equipment for installing the fastening profile is determined by how and what is attached around the perimeter of the room. It's helpful to level and align all parts of the mounting with a level and laser level. It's important to keep in mind the following during installation:
- minimum distance to the ceiling should take into account light fixture brackets;
- joining of fasteners at corners is similar to joining baseboards, i.e., at a 45-degree angle;
- fastening step to the wall for tile and metal is 12 cm, while for gypsum board, concrete, and brick it's 8 cm.
Installing Light Fixture Brackets
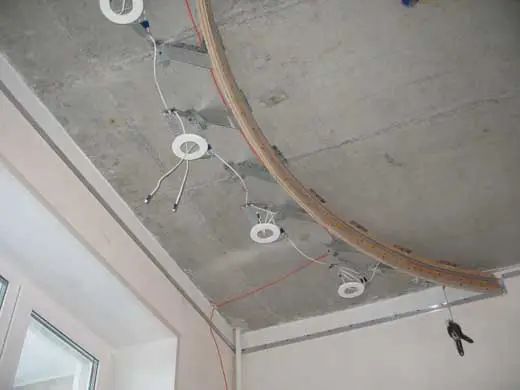
Photo 2 — Installing Light Fixture Brackets
The conditions for installing light fixture brackets depend on their construction. What should be done at this stage:
- determine the locations of light fixture brackets on the ceiling;
- do everything necessary regarding wiring;
- project the locations of brackets onto the floor using a plumb line so you can orient yourself by them later: the brackets won't be visible after the ceiling is stretched.
Installing the Tensioned Ceiling Film
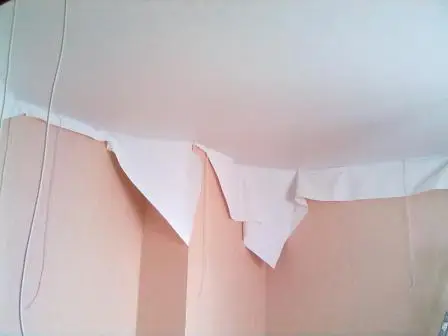
Photo 3 — Installing Tensioned Ceiling Film
Installation of tensioned ceilings without heating occurs much less frequently than with heating; thus, the installation technique described here assumes fabric heating. The detailed installation of fabric tensioned ceilings is described in the manufacturer's manual. However, some tips that may not be included in any manual should be kept in mind:
- no sharp or cutting objects near the fabric throughout the entire time of work with it;
- you must have clean hands, tools, and avoid dropping the fabric on the floor until the installation process is completed.
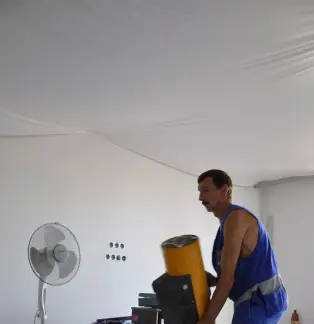
Photo 4 — Installing Seamless Tensioned Ceilings
- do not bring heating appliances or open flame close to the fabric, it should not be overheated with a heat gun;
- if wrinkles appear on the ceiling after installation, it's possible to reheat the fabric and perform its stretching again.
This part of the work is the most responsible, and following instructions precisely makes installing seamless tensioned ceilings a simple task that can be completed with one's own efforts.
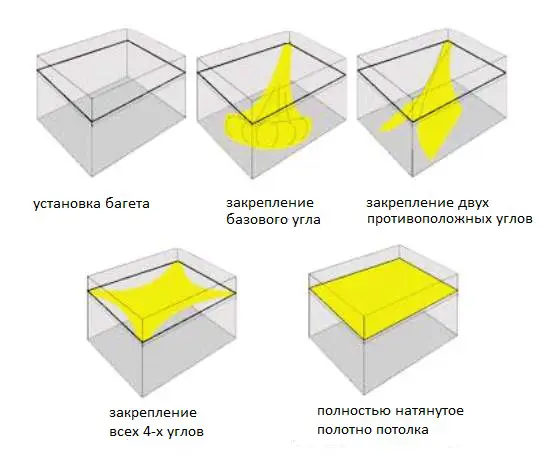
There are not many methods for stretching the fabric or film, but the essence of any of them is to evenly distribute the ceiling fabric so that there's an opportunity to adjust it by heating.
It should be remembered that heated film increases its area by 10%
As it cools, the film contracts and creates that 'miracle' that captivates the eye with its perfectly flat surface. The entire process of stretching the fabric involves heating the film for a quarter hour. After that, the room should be ventilated.
Installing Lights in Brackets
Point lights are usually used; however, it should be remembered that both point and other types of lights must not exceed 60 W if they are located directly near the surface of a tensioned ceiling.
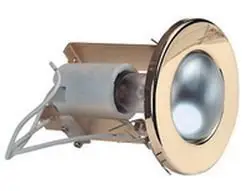
Photo 5 — Point Light
At this point, floor projections indicating the locations of brackets come in handy. Marks should be made on the fabric for holes opposite the light fixture brackets. If these are point lights, their rings should be lubricated with adhesive and glued to the ceiling fabric. The gluing must occur over the entire surface of the ring for proper fit of the fabric to the edges of the light fixture.
Only then is the hole cut out in the fabric, through which the light fixture is adjusted by height and bulbs are inserted. At this point, one can say that the installation of the suspended tensioned ceiling is complete.
What, Where, and From Whom?
Naturally, only very big enthusiasts or DIY lovers would dare to undertake such an experiment, and for them, of course, the cost of installing tensioned ceilings is decisive. For reference: the average cost of installing suspended ceilings in Moscow ranges from 250 to 3000 rubles, while in Kyiv it is from 150 to 400 UAH per square meter.
The speed of professional installation varies depending on the complexity of the 'terrain' and materials, around 15 square meters in 2-4 hours of work. Of course, it matters not only how much the professionals from a company that installs suspended ceilings charge but also what brands they work with.
Domestic manufacturers like Eline™ (Russia) are beginning to gain market share, but leaders such as those from Germany – Pongs, ECOfolie, Renolit, and France – CTN, SEF will continue to hold leadership in both quality and price for a long time.
Accordingly, attention should be paid to the brands that service providers work with, including the materials and tools they use in their work. Reviews and examples of such companies' work are the best advertisement for their quality.
Video Lessons on Professional Installation Techniques for Suspended Ceilings
Technology of performing such installation works is sometimes better understood visually, so two educational video clips of professional work are offered. It's impossible to cover all nuances in any course – practice is the best teacher.