Ceiling Installation DIY
Installing a stretched ceiling by yourself
To properly install a stretched ceiling on your own, follow the specified sequence of actions and guidelines.
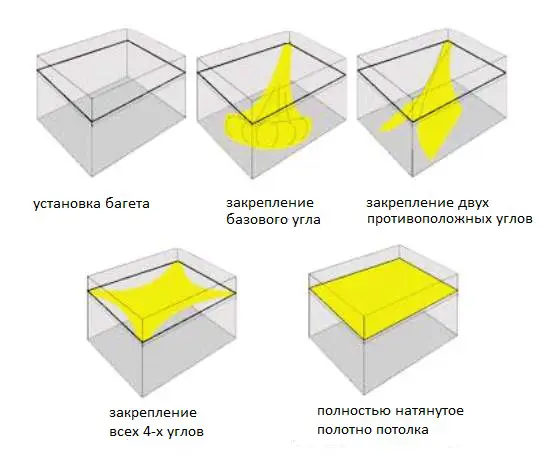
Figure 1 — Installation scheme of a stretched ceiling
Recommendations for installing a stretched ceiling:
Only those who have already worked with stretched ceilings or at least understand the technology will be able to make a stretched ceiling on their own.
If you can't distinguish the staple mounting system from the hook system and don't see the difference in using a seamless fabric ceiling versus a seam PVC ceiling, do not attempt installation. First consult with a specialist.
Before installing a new ceiling, repair the entire room and finish all renovation work.
IMPORTANT! You should not stretch PVC film ceilings in a room recently covered with wallpaper: the heat from the room will cause the ceiling to detach from the walls.
How are stretched ceilings made?
1. Installing the rail. First, a rail (profile made of rigid plastic or duralumin) is installed around the perimeter of the room. The stretched ceiling fabric will be mounted to this profile. The methods of mounting these profiles and the profiles themselves may vary depending on the manufacturer. We wrote about types of profiles and mounting methods earlier.
2. Determine the lowest level of the base ceiling using a level, and mark it 1-2 cm below. This is done for greater convenience during installation.
3. Transfer the same marks to other corners of the room using a level.
4. Take a special marking string with dye, placing one end at the mark on one corner and attaching it to the mark on another corner — draw a line for fixing the rail. The taut string should hit the wall, leaving a mark. Repeat on all walls.
5. Angles are measured using a “goniometer” — a special collapsible measuring tool or by matching the cuts. The second method is more accurate, so initially write down previously measured angles with a pencil on the base ceiling. High accuracy is required, within 0.5 angular degrees, as it’s hard to achieve more precision.
6. The rail is mounted on the wall according to the layout.
7. Prepare the rail. Measure the wall with a 5-meter tape measure to which the rail will be mounted later. The standard rail is 3-4 meters long.
ADVICE: If the wall length is shorter than the rail, cut the edges of the rail with a miter saw at angles equal to half the angles adjacent to the measured side, then mount it so that the top edge aligns with the previously marked line. If the wall is shorter than the rail, cut it at one angle and mount the second piece at a right angle.
8. The rail is secured using dowels and screws or with a pneumatic gun and special nails, clips.
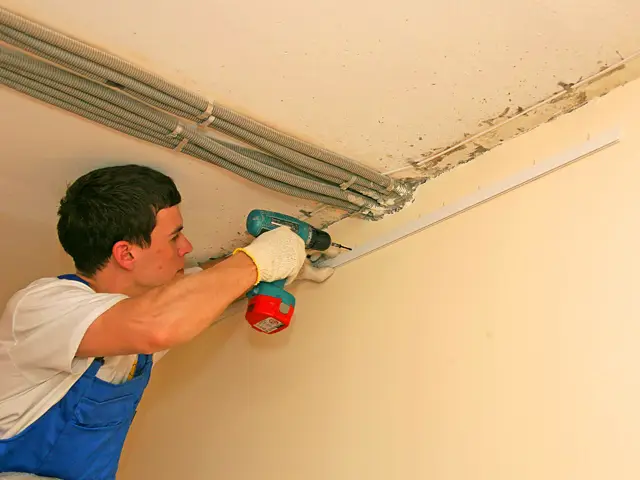
Photo 1 — Installing the rail
9. Unroll and install the fabric
Before purchasing the fabric, pay attention to the packaging quality to ensure there are no damages. Unpack the fabric in a room already heated to 40-50°C. The room is heated using a heat gun (gas cylinder for stretched ceilings – an important and dangerous device for ceiling installation). If possible, connect to electrical power at the site, use electric heating. Place it at least 1.5 meters away from the fabric and slowly unroll while evenly heating the entire surface of the film.
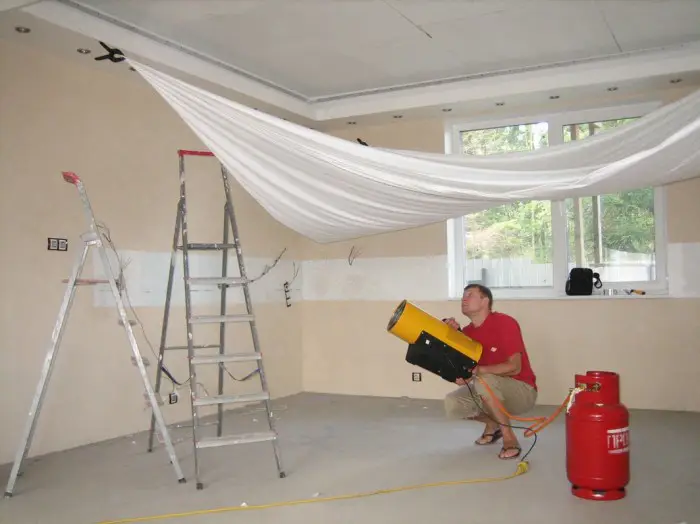
Photo 2 — Heating a stretched ceiling
Each fabric has a reference angle marked by the manufacturer in an easily accessible location from where to start unrolling the fabric. Before fully unrolling, special “crocodile” clips (clips wrapped in several layers of foam material) are attached to the corners with rope loops. Unrolling process: unroll the reference angle, heat it, and hook it to the first “crocodile” and so gradually open and hook it to the “crocodiles.” Thus, fully stretch the ceiling. It's important to verify the correct placement of the fabric.
10. Securing straight sections
This requires straight shovels and aligners. The sections are secured at the point where the seams of the fabrics end, for two or three locks.
Loose sections are divided in half and secured in the center. Do this gradually for all fabric.
11. Check the tension of the fabric. A correct result is a tautly stretched fabric on the rail. The structure must be solid and not flimsy. Let the ceiling cool down, as cooling will make the film stretch even more.
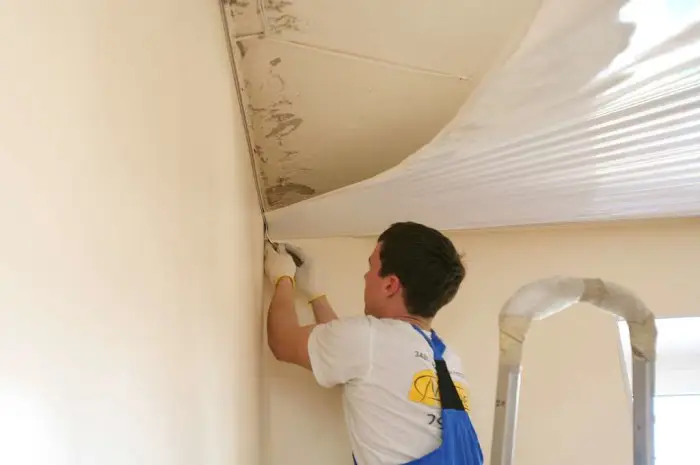
Photo 3 — Stretching the ceiling
12. Installing a light fixture (chandelier)
Prepare the reinforcing ring. These rings are made of plastic 3-4 mm thick, and the part must be strong and lightweight. The outer diameter of the ring should fit under the chandelier's shade, and the inner diameter should easily slip over the fasteners.
Feel for the point of attachment and mark it with a marker. Apply adhesive (such as cyanoacrylate) in one continuous line on the reinforcing ring (it's important to apply it as a solid layer). Completely seal the gap between the ring and ceiling. Then glue the ring to the ceiling so that the marker mark is centered, hold for several seconds until it sets.
Then cut a hole in the ceiling with a knife and pull the wire, connect it to the chandelier, and hang the chandelier on the hook.
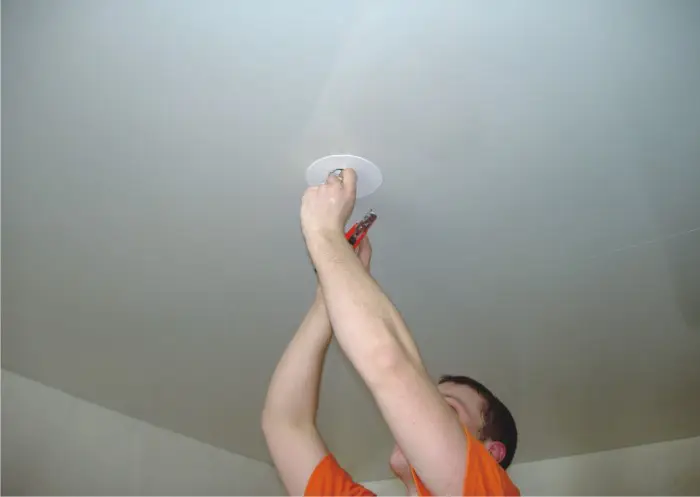
Photo 4 — Installing a ring for the chandelier
After installation, the distance from the base ceiling to the main ceiling is about 3.5 – 4 cm.
Useful Tips
How to distinguish a Chinese stretched ceiling?
It's quite difficult to do, especially for someone encountering this type of coating for the first time. Visually, it's almost impossible. It’s better to follow some recommendations:
- purchase the ceiling from a verified manufacturer;
- the supplier must have an office or order desk;
- having a contract with the manufacturer is mandatory;
The following should raise suspicion when purchasing such a product:
- communication only via mobile phone;
- an offer to install stretched ceilings made by a European manufacturer with widths over 3 meters;
- large discounts at a very low price (up to $11/m²);
How to determine the quality of a stretched ceiling?
- a quality stretched ceiling will never be sold “cheap”;
- there must be quality certificates;
- there should be official representatives and offices;
Can a stretched ceiling be installed without gas or heating?
Special stretched ceilings called CoolStretch were created for such installation methods, requiring no high temperatures.
This is a cold method of installation.
Material consumption and calculation should be left to knowledgeable people to avoid errors. Properly selected materials are key to achieving a good result.
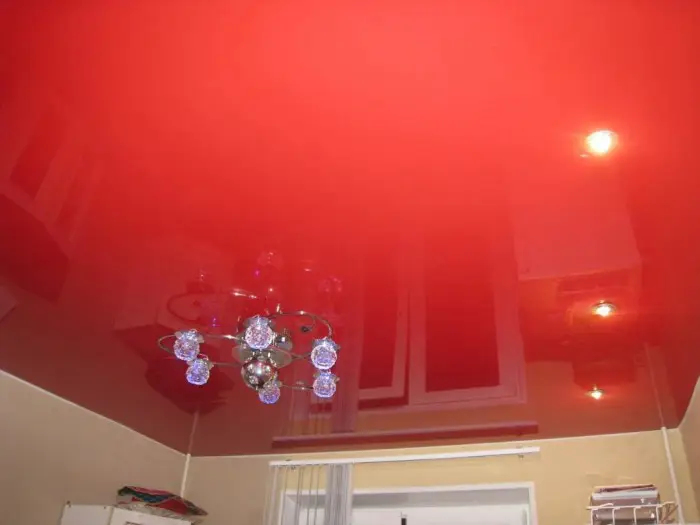
Photo 5 — Finished stretched ceiling
PVC stretched ceilings are an excellent solution for any interior. Reviews of such ceilings are mostly positive. The main thing is to choose a quality ceiling. Before choosing, better familiarize yourself with the appearance of ceilings by reviewing photos of rooms with them, read or consult with a specialist about ceiling types and brands.
Preparing the fabric
The principle of preparing a stretched ceiling for installation – preparing the room. Main requirements for such a room are completed renovation, absence of dust and dirt, and drafts.
Stretched Ceilings DIY: VIDEO
Cost of Installing a Stretched Ceiling
Often, the cost of installing a stretched ceiling is between 10 and 25% of the material cost. If we consider that the minimum price for a good stretched ceiling is about $17/m², then for a room of up to 20 m² you won’t spend more than $34–$85.