Silk, Shine, and Marble: 8 Unusual Easter Egg Dyeing Ideas
Quick and easy methods
Easter egg dyeing is a traditional and beloved custom with many variations. Did you know how many different dyeing techniques are actually used in practice? We offer you 7 creative ideas to make bright and unique Easter eggs. The key tip is to take the eggs out of the refrigerator about an hour before boiling and dyeing to achieve the best results.
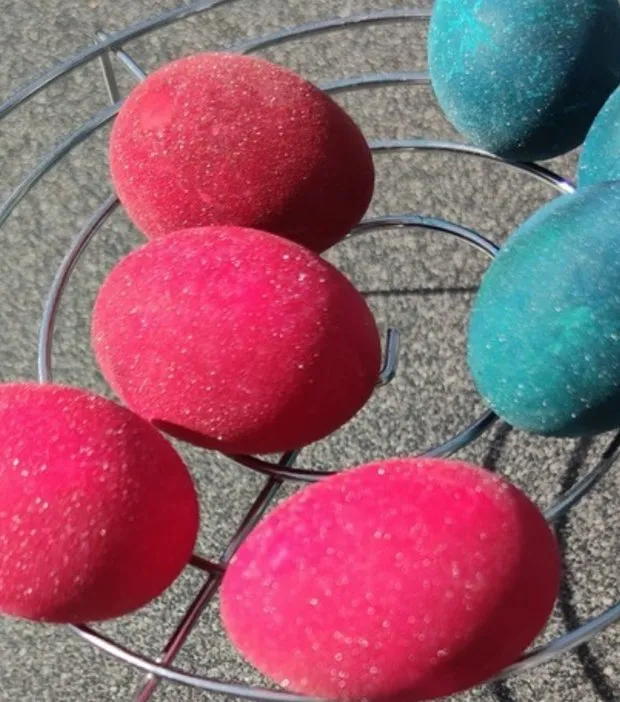
Shimmer Effect
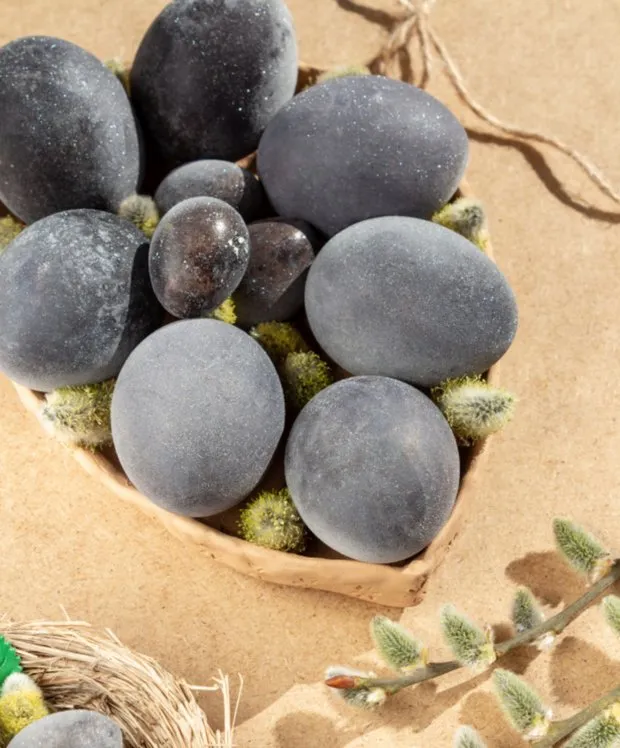
Dyeing eggs in wine is a fascinating way to give them an unusual tone and add festive mood to Easter. To make vibrant and glossy eggs in wine, you will need the following ingredients: 8 white eggs, 750 ml to 1 liter of sweet/semi-sweet white wine (you can choose the cheapest option), 3-4 tablespoons of sugar, and food coloring in any color. Start by washing the eggs, optionally using baking soda to create a more vivid shimmer effect. Then combine wine, sugar, and eggs, and boil them together for about 10 minutes until done. After that, add food coloring in any color and mix well. Leave the eggs in wine for 12-14 hours, then carefully remove and place on a plate or rack to dry completely. If you use red wine, the eggs will acquire a dark gray-violet color; with white wine, you can experiment and create eggs in any color. Choose the cheapest wines as their taste won't affect the eggs.
Silk Patterns
To dye eggs this way, you'll need small pieces of silk fabric to wrap the egg. Also prepare white cotton fabric pieces slightly larger in size, rubber bands, and vinegar. Wash the eggs, wrap them in silk fabric with the right side facing inward, and secure with rubber bands. Then wrap the egg in white cotton fabric and secure again with rubber bands. Boil the eggs for 10 minutes with 2 tablespoons of vinegar added. Remove the fabric only after cooling the eggs.

With Lace
If you have lace fabric, it can be used to create an elegant pattern for Easter. You'll need to secure the lace on the eggs and dip them in dye so that the pattern becomes visible.

Rainbow Tones
Making rainbow eggs is simple. Boil them and dye them in a light tone. Once it dries, dye them in a darker shade about halfway. Continue this process until the eggs are dyed in your desired colors. The key is not to fully submerge the egg into dye.

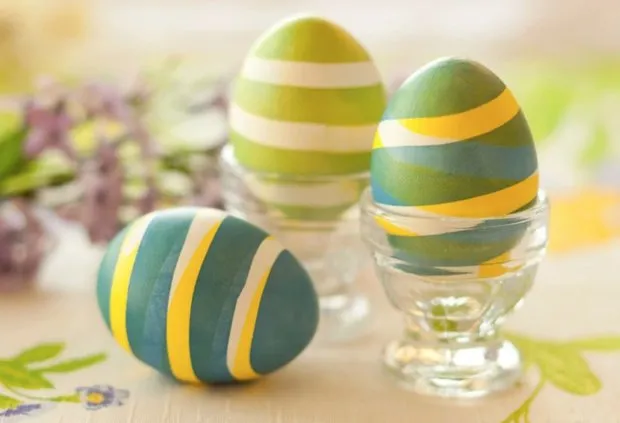
Striped
This method involves a bit more work than the previous ones. First, dye a boiled egg in a light color. Then cut several strips of tape or masking tape and apply them to the shell in any order. Next, dip the egg into dark dye for 5 minutes, wait for it to dry, and remove the tape.
You can repeat these steps several times. Just add new tape strips after each dyeing session. In the end, you’ll get a beautiful multi-layered dye effect.
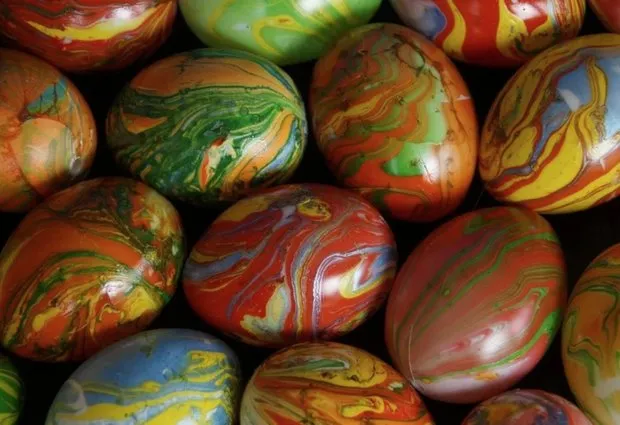
Marble Pattern
To achieve marble-like combinations, coat the eggs with a bright warm tone—like yellow, red, or orange. Once they dry, dilute cold tones such as blue and violet with water, then add 1 teaspoon of vegetable oil. Mix everything well, and dip the eggs into dark color for just a second.
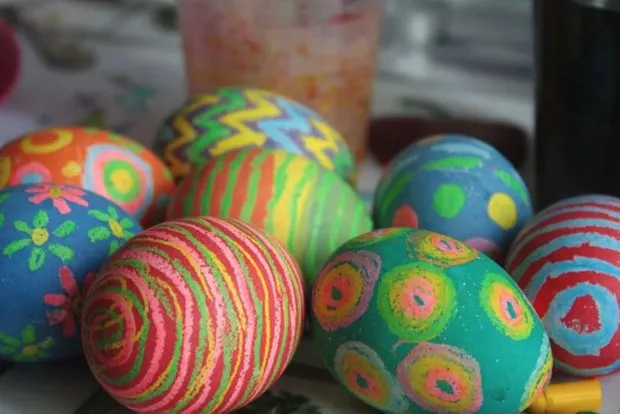
Wax Crayons
You can also dye eggs using wax crayons. For this, place the boiled egg on a stable surface and draw a pattern on it. Under heat, the colors will spread into whimsical combinations. This method is perfect for dyeing eggs with children.
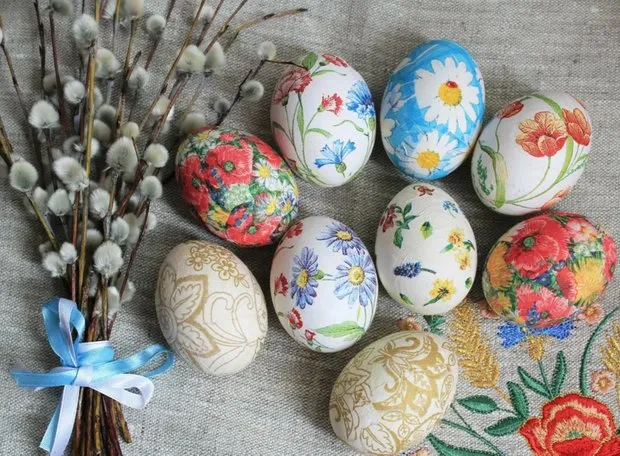
Decoupage
Gather beautiful napkins and gelatin—soak it according to instructions, drain the water, and warm it (do not bring to a boil). Cut a fragment from the napkin and remove the top layer. Then place it on the egg and brush it with a gelatin adhesive—from the center to the edges. When everything dries, the eggs will be covered with unique patterns.
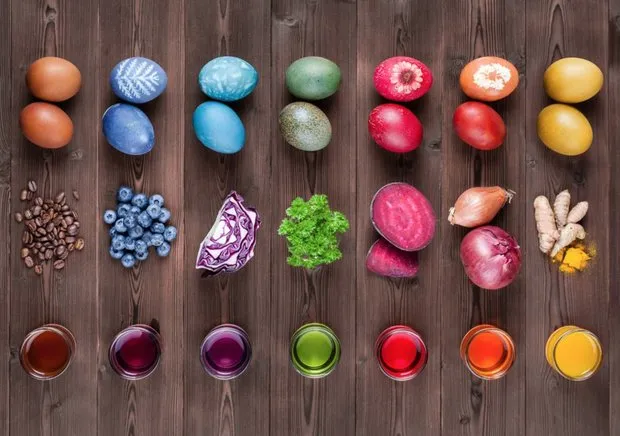
And also grab natural dyes for Easter eggs:
Need a renovation specialist?
Find verified professionals for any repair or construction job. Post your request and get offers from local experts.
You may also like
More articles:
 How to Decorate a Balcony: 6 Great Ideas from Designers
 Before and After: Redesigning a 38 m² Studio in a Panel House
 European Studio 46 m² with Trendy Finish
 Family Apartment with Light Finish and Wooden Accents
 Cozy Kitchen with High Ceilings in Peterhof
 Top-12 Finds for Your Bedroom
 How to Create a Cool Interior on a Small Budget: 5 Life Hacks
 Children's Dreams: 10 Products of Russian Production