DIY Starry Ceiling: If the Stars Are Lighting Up, Someone Needs It
Stickers
Star-shaped stickers are the easiest way to create a starry ceiling. Phosphorescent stars of various sizes are attached to any surface using double-sided tape. They are most commonly used for decorating children's rooms.
Reviews indicate that many people are confused by the term "phosphorescent": phosphorus is harmful to health, so some are afraid to buy these stickers. However, they are actually made from plastic with added luminescent materials – safe alternatives to phosphorus, producing the same glowing effect in the dark after exposure to light.
Luminescent Paint
The next most complex method for creating a starry ceiling is applying stars using luminescent or fluorescent paint. There are many ways to do this, but the ceiling must be properly leveled beforehand.
You can draw glowing stars on any suspended, tensioned, or plastered and painted ceiling. The ceiling can be solid-colored or patterned. You can apply a starry sky, galaxies, nebulae, comets, etc., onto PVC film or Oracal, and then, after installing the tensioned ceiling or applying it to a flat surface, begin painting with glowing paint. A wide variety of such paints are available, made for different surfaces.
To make the stars look more realistic, you can use a starry sky projector: apply paint where stars appear on the screen.
During the day, this ceiling can look like a simple solid color, but at night it becomes a 3D starry sky.
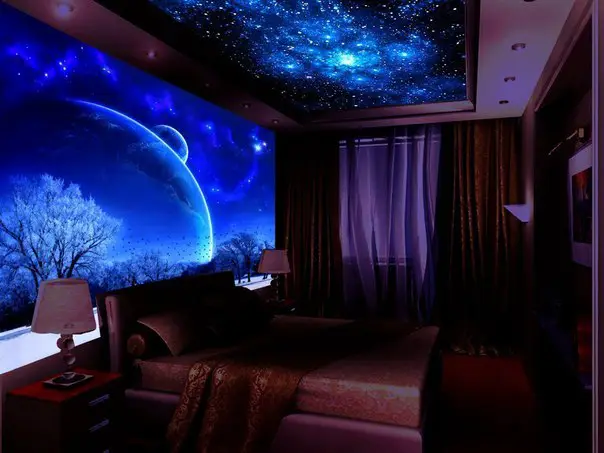
Photo 2 – Artistic painting of ceiling and walls using light-capturing AcmeLight paints
LED Lamps
A starry sky made with LED lamps is very bright, vivid, and even blinding. To create it, the ceiling must be sheathed with gypsum board. Holes must be cut into the gypsum board, LEDs installed, and wires attached before fixing the sheets to the frame. You must also choose a location in the ceiling structure for the power supply and controller, to which wires are connected after installing the GKB sheets with lamps.
Projector
The projector is one of the most realistic ways to decorate a ceiling with scattered stars. However, installing a starry ceiling using a projector requires the most effort among all methods described. You’ll need to install a suspended or tensioned ceiling, optical fiber threads, and the projector itself.
First, select a location for the light generator and run the electrical wiring. The light generator or projector is a device with an LED or halogen lamp and filters that allow changing color, brightness, and lighting effects. A controller is used to manage the LED projector’s effects.
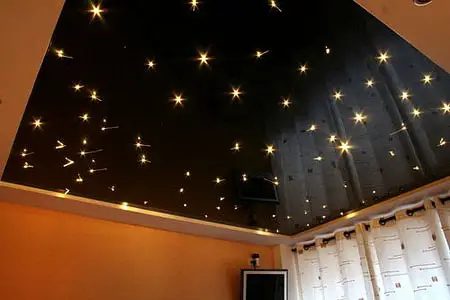
Photo 3 – Tensioned ceiling with starry sky using Swarovski diffusers
Then, install the main and, if needed, the preliminary ceiling frame. Most often, PVC tensioned ceilings or gypsum board constructions are used for creating a starry sky with optical fiber. Installation follows standard procedures.
If installing a tensioned ceiling, you must first stretch a mesh or build a support frame from plywood to hold the optical fiber and prevent it from touching the film.
Drill holes in the ceiling material and insert optical fiber threads into each hole. Use transparent adhesive to secure the thread in place. If the thread extends beyond the surface, trim it, as this would look unattractive in light. The opposite ends of the threads, bundled together, are connected to a special port on the projector.
Alternative options exist: in a semi-transparent tensioned ceiling, you don’t need to drill holes. Instead, attach LED lamps to the threads and leave them behind the film, creating a softer glow for distant stars. Or, conversely, extend the bright LED-lit threads from ceiling holes to different lengths to create a unique effect of falling stars. After securing the threads in the ceiling material, complete the installation.
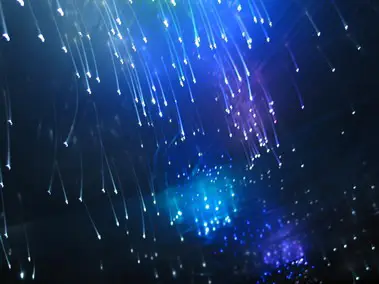
Photo 4 – Tensioned ceiling with starry sky using optical fiber threads
You can create a starry ceiling using any of the above methods, a combination, or your own unique approach. If you have the skills and resources, it’s worth trying to build your own starry ceiling.
The price for a tensioned ceiling with a starry sky including installation starts from 10,000 rubles per square meter.
You can buy all components and try doing it yourself. On the other hand, creating a starry sky with optical fiber or LED lighting is not simple. Therefore, if you lack confidence in your abilities, it’s better to start with a simpler method, such as luminescent paint.