Concrete Floor Screed
Concrete Floor Screed: What Is It?
The base for finish flooring can be prepared in several ways: this may be dry (screed with expanded clay), semi-dry, and wet screed. Wet screed is the pouring of floor concrete directly onto the floor base. In addition to the above-mentioned functions, screed also provides additional strength to the floor structure in an apartment.
Concrete screed is classified as a wet type because it uses a liquid mixture for its creation. Materials used for concrete screed include cement-sand mixtures, various leveling mixes, and cellular concrete.
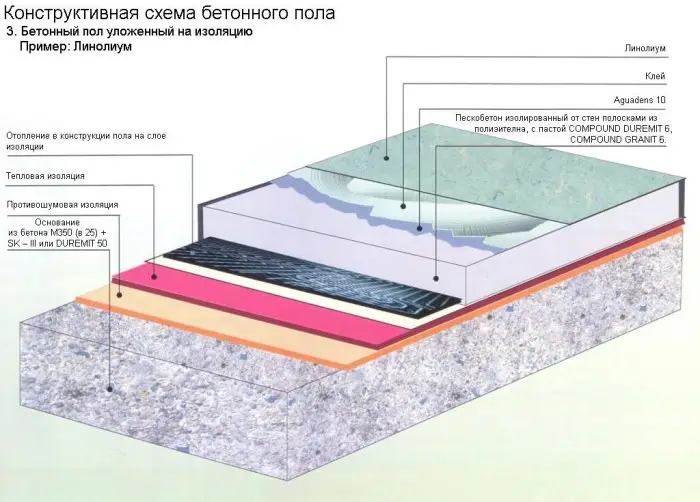
Diagram 1 — Concrete Floor Screed Installation
"Heavyweight" screed is a mandatory requirement during major floor renovation: cement-sand mixture is preferred over cellular concrete because the mixture in work is simple and does not require special knowledge or specialized equipment for concrete production.
For simple floor repair, a self-leveling mixture can be used: pouring lightweight concrete mix does not take much time.
Concrete Screed: Types
Concrete screed is a solid surface that can be bonded or have separating, insulating layers:
Bonded Screed
This type of screed installation is carried out by pouring the mixture onto the floor base without underlayment. The base must be treated with deep-penetration primer. Only this type of screed will have the best adhesion to the base and can withstand high loads.
Screed with Separation Layer
When installing this type of screed, hydro-isolation materials (on floors, the overlap should be at least 15-20 cm) are laid on the floor base first, and then concrete is poured on top. Hydro-isolation materials can be coating, roll, or paint materials.
The minimum thickness of screed in this case is 30 mm (for comparison, the standard thickness of concrete floor screed for residential apartments ranges from 30 to 50 mm) - this is sufficient to ensure the strength of the floor covering.
Hydro-isolation of screed is mandatory in humid rooms (e.g., bathroom). The strength indicators of this type of screed are slightly reduced.
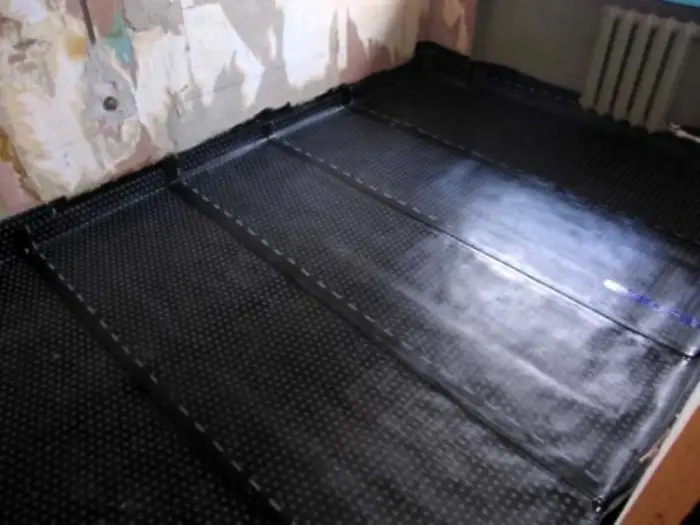
Photo 1 — Screed with Separation Layer
Screed with Insulation Layer
An insulating layer is laid under the screed when it is important to create a floor with high thermal insulation properties.
For example, without an insulating layer when organizing a screed under a warm floor, up to 25% of heat would be lost into the floor. This type of screed is also called "floating." Its advantage is high thermal, hydro, and sound insulation properties. However, the strength threshold of "floating" screed is significantly lower than that of the other two types, making it unsuitable for rooms with high mechanical loads.
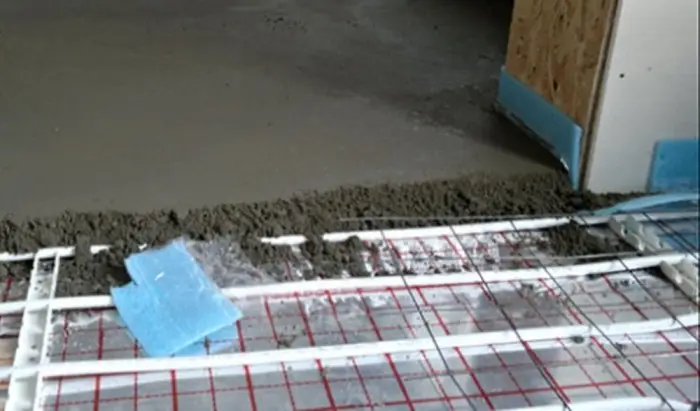
Photo 2 — Screed with Insulation Layer
Concrete for Screed: Types
Reinforcement of concrete screed provides strength - using metal mesh or fibrous reinforcement:
Screed with Reinforcement.
This is one of the most common types of reinforced floor screed. The installation principle: mesh with 40-50 mm cells is laid on supports across the entire floor.
Among the obvious disadvantages of this method, the following can be listed:
- the mesh does not prevent cracking in the concrete screed during shrinkage;
- metal may oxidize over time, thus there is a risk of delamination of the screed.
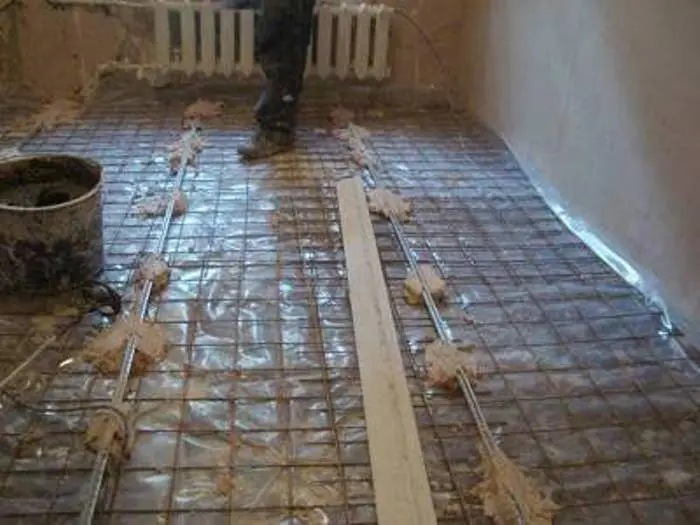
Photo 3 — Concrete Screed with Reinforcing Mesh
Screed with Fibre Reinforcement.
Fiber reinforcement is an additive to standard cement mixtures designed to increase the adhesion of the screed and slightly reduce the costs of floor covering installation.
Fiber reinforcement can be added to the screed instead of metal mesh. This is a very fine fiber - microfiber, obtained from polymer granules, which in addition to the reinforcing effect makes the concrete screed more plastic and thus more resistant to cracking.
Undeniable advantage of microfiber in the screed - material cost: the price of reinforcing mesh, for example, is on average $1.65/m², whereas fiber costs only $0.26 per square meter of screed. There is also a disadvantage to this type of screed: if too much fiber reinforcement is added, the concrete will crumble.
Based on density, concrete types include:
- Very light concrete (density 500 kg/m³). Light concrete is used to produce cellular blocks - foam concrete and gas concrete.
- Light concrete (density from 500 to 1,800 kg/m³). Fillers for light concrete include expanded clay and pumice.
- Heavy concrete (density from 1,800 kg/m³ to 2,500 kg/m³). Heavy concrete contains mountain rocks - granite, limestone (in different proportions).
- Very heavy concrete (density 2,500 kg/m³ and higher). Fillers are made from steel shavings or iron ore.
Concrete Bag Marking
When purchasing concrete, it is also necessary to understand the bag marking:
F - indication of frost resistance, the digit next to this letter is the value of how many full cycles of freezing and thawing this concrete grade can withstand.
W - indication of water tightness, i.e., what pressure of water this grade can withstand.
P - indicator of mobility and slump.
M-100 - low grade concrete, suitable for laying curbs.
M-150 - grade most suitable for laying floor screeds, aprons, driveways in the yard, poured on soil. Concrete M-200 strength meets almost all tasks of individual construction: foundation pouring, staircase manufacturing, outdoor platforms, etc.
M-250 - concrete grade used for manufacturing monolithic foundations.
There are also grades M 300, M 350, M 400, M 450, M 500 and M 550, but they are rarely used or not used at all in individual construction.
How to Make a Concrete Screed by Yourself
Preparatory works before installing screed include: surface preparation, purchasing necessary materials and tools.
You will need the following tools:
- rules up to 2 m long (one rule with a level, the second one is a regular one for smoothing the mixture);
- levels (laser and spirit levels);
- impact drill;
- measuring tape;
- shovel.
You will need the following materials:
- deep-penetration primer;
- primer for increasing adhesion;
- a range of hydro-isolation materials (mastic, polyethylene film);
- if necessary - thermal insulation materials;
- cement-sand mixture;
- shores and their fasteners.
Concrete floor screed in an apartment: VIDEO
Steps for laying concrete screed
Clean the base of dust and debris.
Mark the perimeter of the room using a zero or laser level. Indicate the placement of shores and the upper level of the screed.
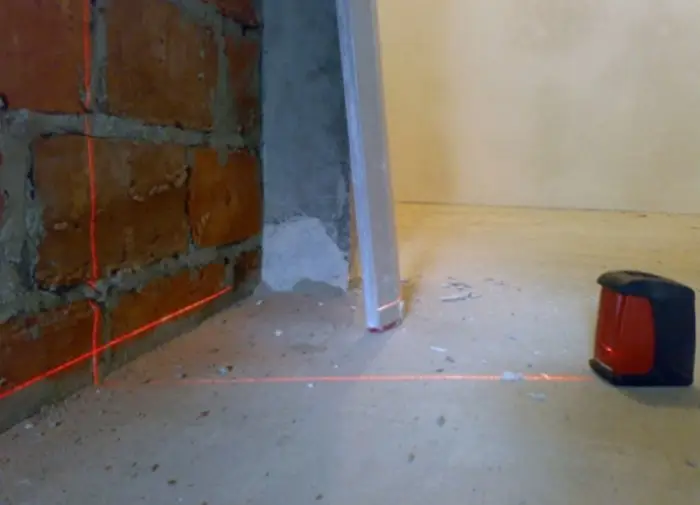
Photo 4 — Marking - Zero Level
Install guide shores, securing them either with screws or plaster.
The distance between the shores should not exceed 1.5-2 m. The shores are secured at the location of laying. After checking the horizontal alignment of the shores and their match with the screed level, proceed to the next stage.
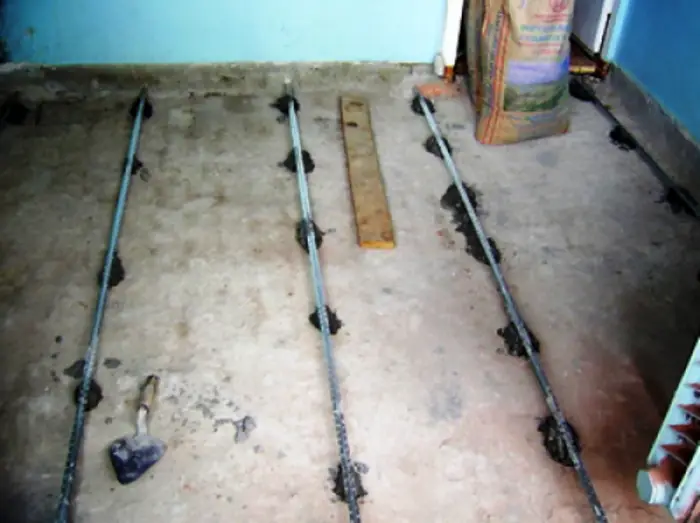
Photo 5 — Installation of Guide Shores
After marking and securing the guide, proceed to priming the floor surface, laying hydro or thermal insulation.
Before pouring the concrete, treat the floor surface with deep-penetration primer, and also coat the wall-floor joints and room corners with hydro-isolating mastic. A better bond can be achieved by coating the entire floor surface with an adhesive primer. Allow the materials to dry.
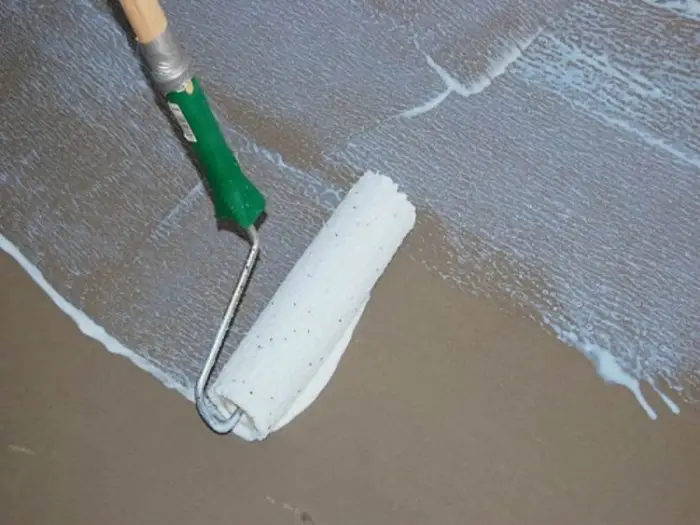
Photo 6 — Application of Insulation Materials and Priming
Pour the concrete screed. The mixture can be prepared using an impact drill with a special attachment like a "mixer".
Portion the mixture onto the floor surface and smooth it using a metal rule along the guide shores. Start laying from the wall opposite the entrance door.
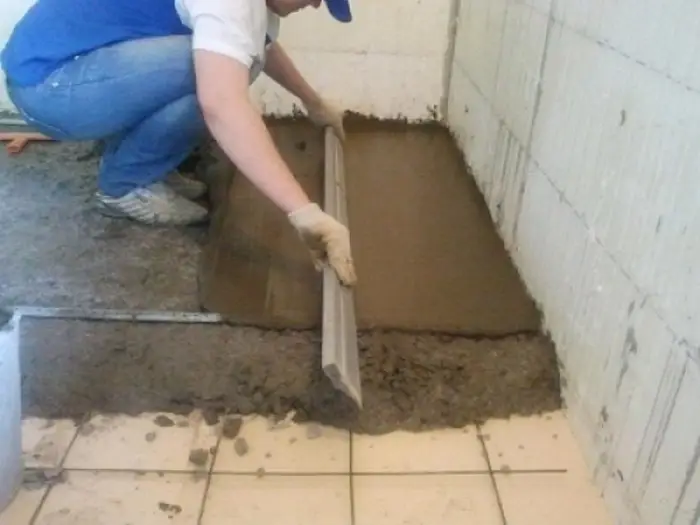
Photo 7 — Pouring Concrete Screed
In short, this is the entire technology of concrete floor screed (on concrete floors). It will take at least 14-28 days for the surface to fully cure.
How long it takes for the screed to dry in a room depends on its strength. It is not recommended to start finishing work just 2-3 days after pouring the concrete.
After the surface dries, it can be processed: concrete screed for troweling (a floor sander) makes the surface smooth, leveling out irregularities.
Warmth in Your Home
Concrete screed is quite a cold base with low thermal retention properties. Therefore, when laying floor screed, it is recommended to use insulation. Screed can be laid on insulation: Penoplex or Isover (with polystyrene, just like laying on expanded polystyrene should not cause any problems).
Concrete Screed on Wooden Floors: How to Properly Install Screed?
Demolition is not necessary! In case of necessity to pour concrete over wooden beams, more attention is paid to the preparation stage: gaps between boards are sealed (you can use construction foam or epoxy resin), wall-floor joints are treated with sealant.
The floor is covered with polyethylene film, and then the standard concrete screed is laid. If this is not enough to level the floor surface, the concrete can be poured onto plywood securely screwed to the wooden floor boards.
If discussing an old house, before installing the screed check whether the floorboards creak and secure the boards to the joists with self-tapping screws in case of deflection.
Screed laid on a wooden floor must be heavy and immovable. Note that the screed thickness in this case should not be less than 30 mm.
Before leveling a wooden floor with concrete, consult with specialists: will the load-bearing structures withstand the additional weight? If necessary, obtain permits for renovation works from local authorities.
IMPORTANT! In rooms with wooden floors, this type of floor installation is undesirable in case of frequent changes in humidity and temperature levels (e.g., in a sauna).
Concrete Floor Screed: VIDEO
$ Concrete Screed: Material Costs
Cost calculations for material procurement can be based on the following prices:
- plasticizer (BETAPLAST) - $16 (5 l);
- fiber reinforcement (basaltic) - $5.1;
- concrete M-150 - $75/m³ (concrete consumption is approximately 0.15-0.2 m³ per 12 m² area at a screed thickness of 5 cm);
- shores - from $1/piece (length 3 m);
- deep-penetration primer (Ceresit Moment) - from $4 (5 l);
- mastic (HYDROPLAN) - from $4/kg.
$ Cost of Concrete Floor Screed: DIY vs Professional Installation
- cost per square meter of professional work in Moscow - 450-530 rubles/m²;
- cost per square meter of professional work in Kiev - 45-70 UAH/m².