Wall Paneling with Gypsum Board by Yourself
Paneling Pipes/Wall Paneling with Gypsum Board in the Bathroom
To panel pipes, you will need:
- gypsum board sheets;
- metal profiles (guide and studding);
- suspension brackets;
- notcher;
- metal shears;
- drill;
- screws.
To hide pipes behind gypsum board, build a frame that completely covers the communications. The distance between the frame and the wall must take into account not only the placement of the communications behind it, but also a small gap for free installation of GKLV boards.
IMPORTANT! When working in humid environments (in this case, in the bathroom) or near water supply communications, only moisture-resistant gypsum board should be used.
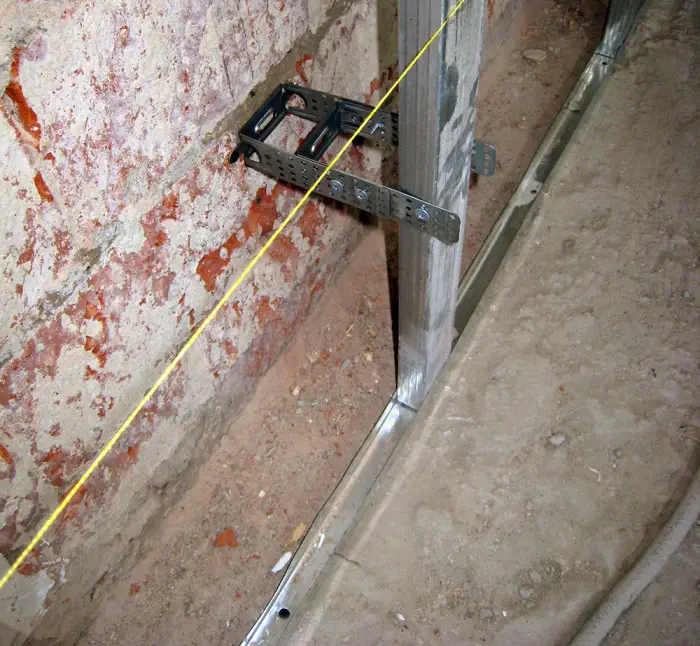
Photo 1 — First, install the guide profile. Secure it to load-bearing surfaces
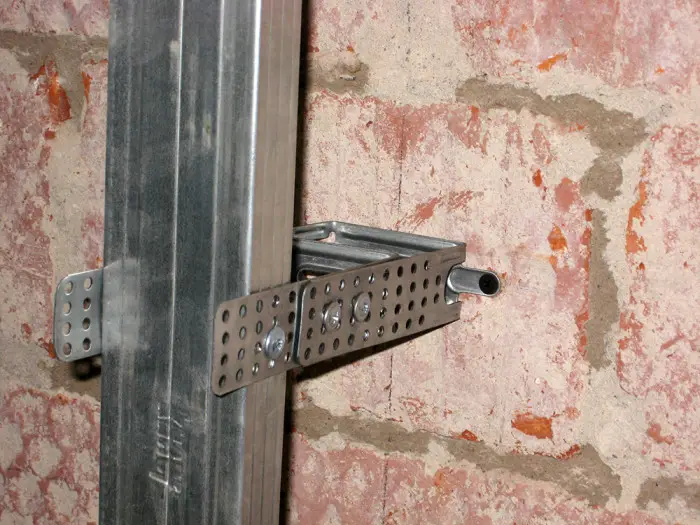
Photo 2 — Suspension brackets are secured to the walls using expansion anchors, then connected to the gypsum board profile with screws
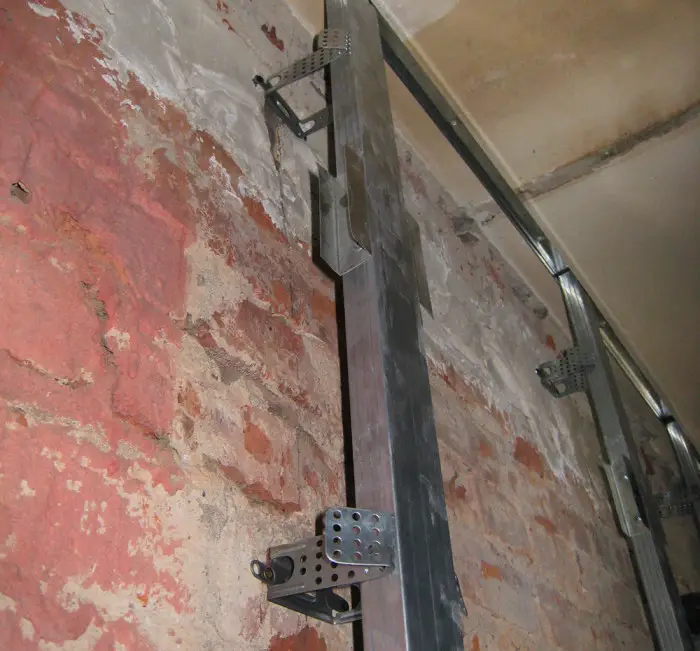
Photo 3 — Studding profiles must be installed strictly vertically
Pay attention that the uprights are placed no more than 40-60 cm apart. The spacing between studding profiles is reduced if the gypsum board will be clad with tiles.
The protruding parts of the suspension brackets should be bent in "ears".
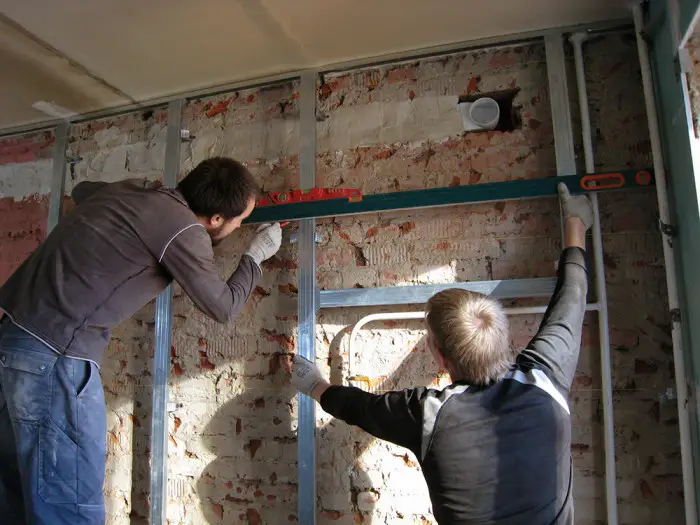
Photo 4 — Before installing horizontal profiles on the frame, marks must be made on vertical profiles, aligned by level
In order to save costs, the usual method of joining frame elements using fixators-"crabs" can be replaced with this: attach rectangular sections of the profile to the vertical frame elements, which act as grooves for horizontal profiles.
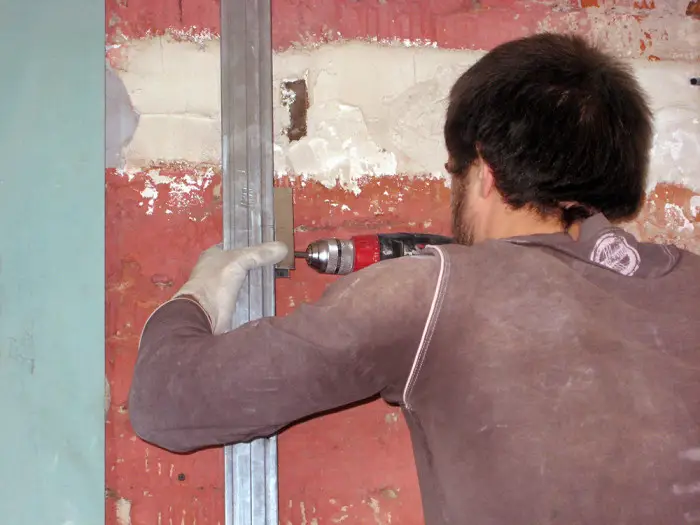
Photo 5 — Attaching sections to vertical profiles
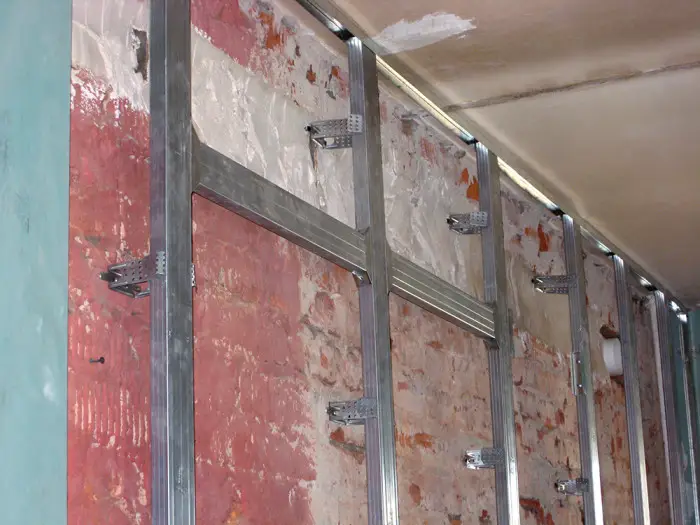
Photo 6 — Installing longitudinal profiles for gypsum board in the grooves. Bending angle brackets
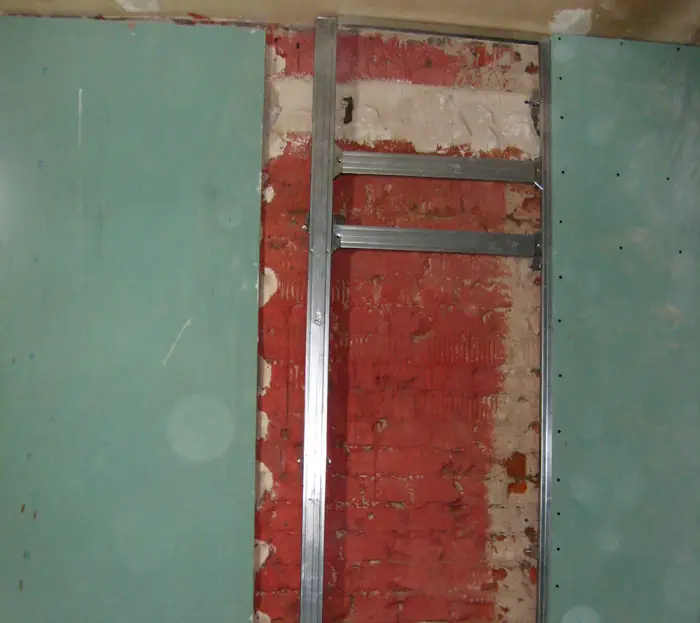
Photo 7 — Securing gypsum board sheets to the frame with screws
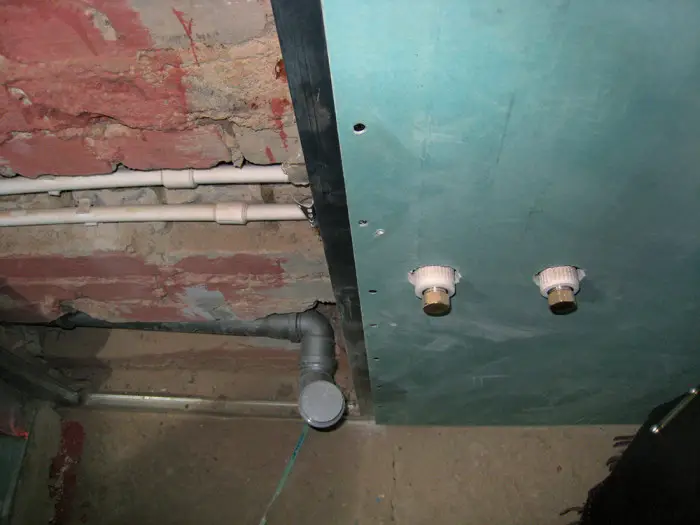
Photo 8 — Routing pipes through the gypsum board sheets
IMPORTANT! If it is necessary to route pipes through the gypsum board paneling, special corona drill bits should be used to drill holes according to layout before installing GKLV boards on the frame.
In humid environments, it is important to additionally isolate gypsum board from moisture or steam — clad with tiles or paint.
The described method of paneling with gypsum board on a frame inside a bathroom is similar to many other works: it is performed in the same way, for example, wall paneling with gypsum board, radiator paneling, paneling of garage vertical surfaces, paneling of rooms with door openings or false walls, etc.
Regarding the last type of work, gypsum board should be mounted on both sides of a metal frame that can withstand greater load.
Paneling Wooden Walls with Gypsum Board: Short Instruction
Paneling wooden walls with gypsum board by yourself also involves a framed method. However, for these works, wooden strips are better suited than metal profiles.
The strip should be at least 20-25 cm thick and secured to the wall with anchors. The distance between strips should not exceed 1 meter.
Gypsum board on such a frame is secured with a step of 25 cm.
IMPORTANT! To increase fire protection of wooden structures, it is recommended to use fire-resistant gypsum board (GKLO) instead of regular (GKL).
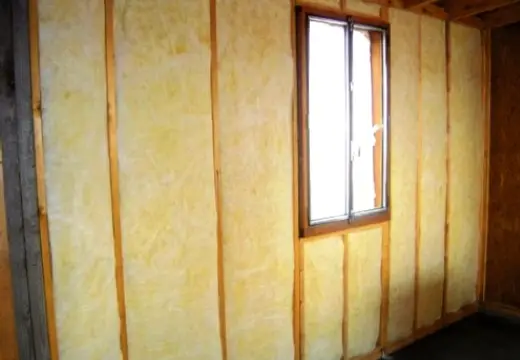
Photo 9 — Setting up a frame for paneling wooden walls with insulation
Following this method, balcony and attic insulation is also performed.
Paneling Door Frames with Gypsum Board
After window replacement, it is recommended to panel door frames with gypsum board for a simple reason: damage to the surface of the frame, caused by mechanical impact, is easier to eliminate on gypsum board (spackle) rather than replace the plastic element entirely.
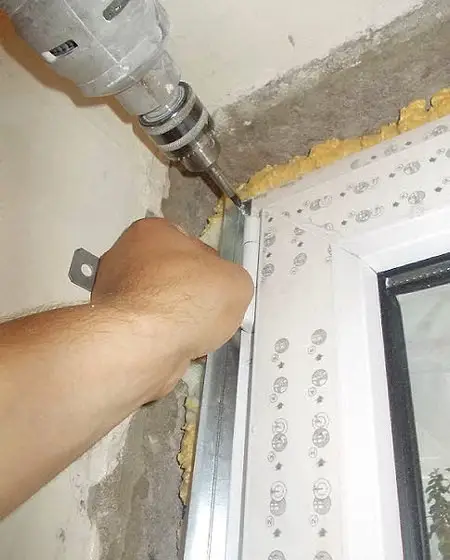
Photo 10 — Mounting profiles for gypsum board on PVC window frame
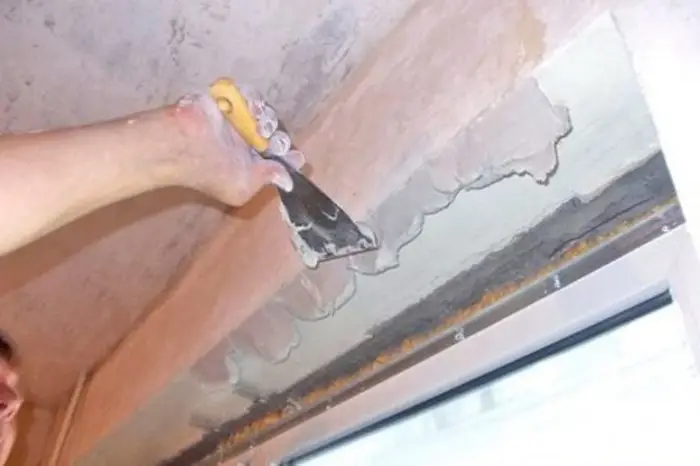
Photo 11 — Filling gaps with adhesive compound (it is recommended to use 'Perlfix' glue)
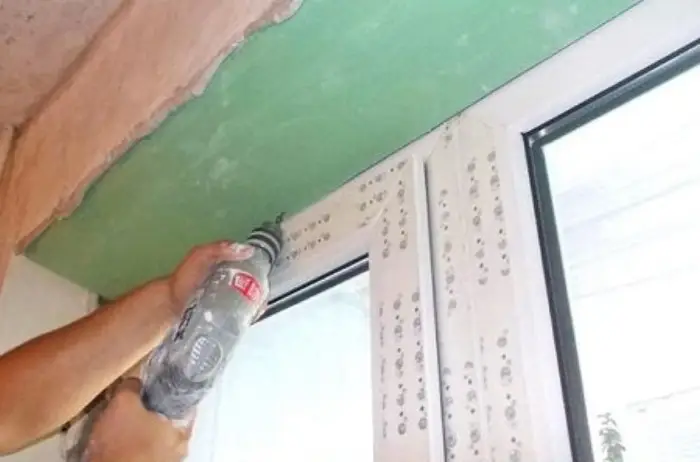
Photo 12 — Securing moisture-resistant gypsum board sheets to profiles (step of 15-25 cm)
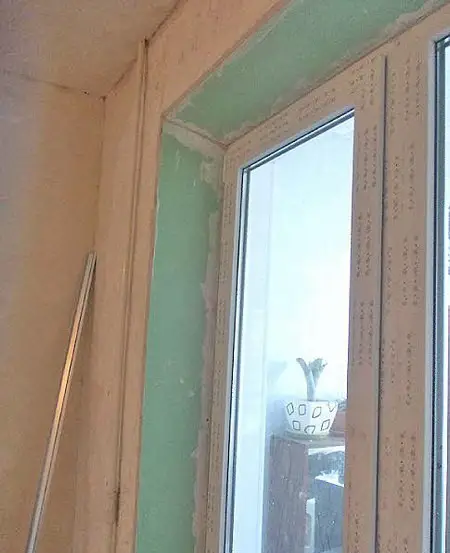
Photo 13 — Door frame after grouting joints
Other Cases of Gypsum Board Paneling Installation on a Framed Basis
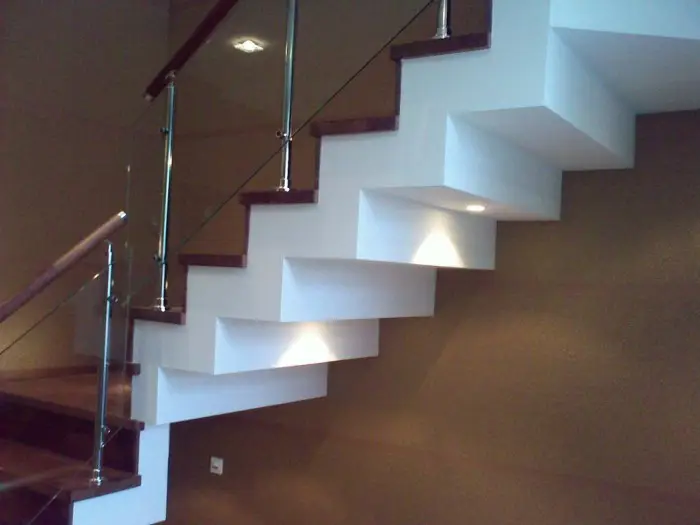
Photo 14 — Example of paneling a staircase with gypsum board, with lighting installation
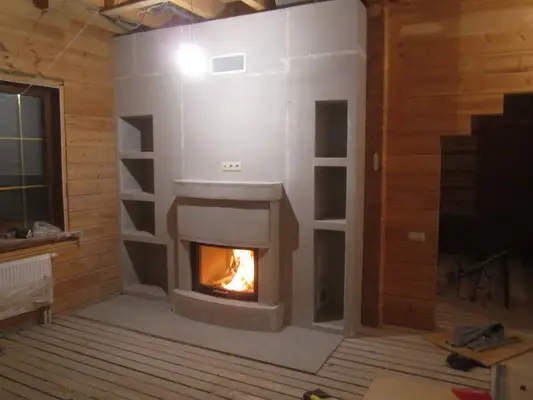
Photo 15 — Paneling a fireplace with gypsum board in a country house. For such works, fire-resistant gypsum board is also recommended
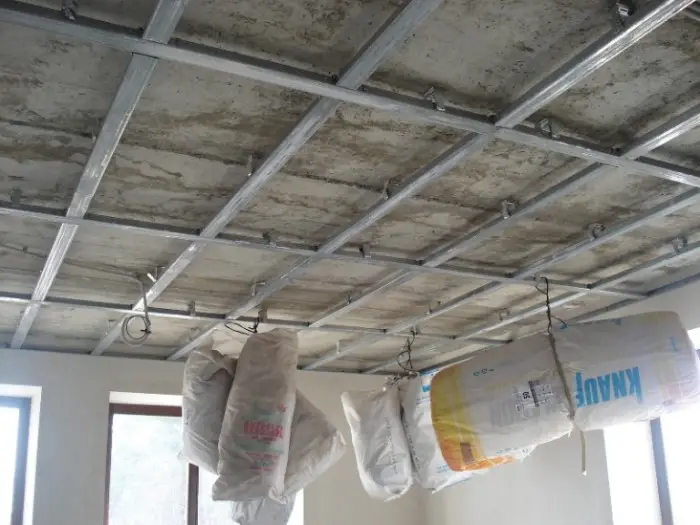
Photo 16 — Paneling a ceiling with gypsum board. Example of testing the frame structure for strength
IMPORTANT! Except for special facia gypsum board panels from KNAUF, house paneling with gypsum board is done only inside the building.
Material consumption should be calculated individually for each type of work. Below is an example of material consumption calculation for organizing gypsum board ceilings.
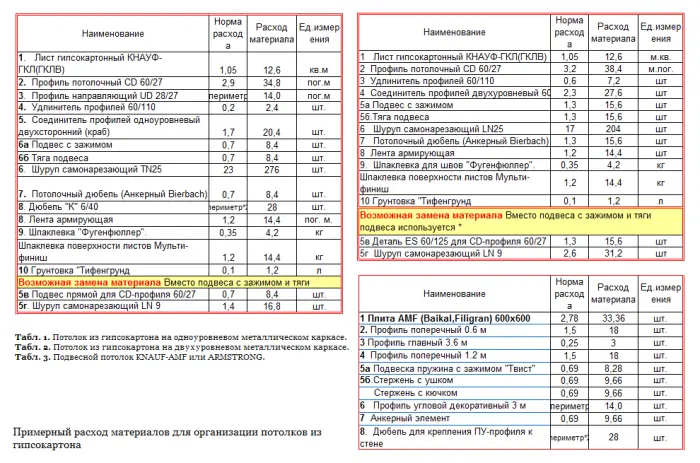
Figure 1 — Sample tables of material consumption for organizing gypsum board ceilings
Gypsum Board Paneling: VIDEO
$ Gypsum Board Paneling: Cost
Gypsum board wall paneling: priceThe cost of the work will depend on the complexity of the project, the materials used, and the area of the working surface. On average, craftsmen charge from 6-8$/m² for wall works.
How much does it cost to panel with gypsum board?- in Moscow: ceiling works - from 280 rub./m², wall works - from 190 rub./m², partition installation - from 300 rub./m².
- in Kiev: ceiling works - from 65 UAH/m², wall works - from 45 UAH/m², partition installation - from 80 UAH/m².