How to Paint Pumpkins for Autumn Decoration: Simple Ideas + Instructions
Invite kids to join in the painting — they'll definitely love this idea
Melissa Epifanov, editor at The Spruce, explains how you can paint pumpkins yourself. It turns out that it's easy and much harder to choose a design — for that, we have a separate photo collection. Set aside some free time and enjoy the process!
Pumpkins with simple designs
What you'll need:
- Pumpkins of various sizes (including mini ones).
- Chalk (or graphite) paint (in several shades).
- Waxed paper.
- Cloth, craft paper, or newspaper.
- A small piece of cloth or a damp towel.
- Brushes of various thicknesses.
- Baking rack.
Cover your workspace with cloth or paper and lay out everything you need. Select pumpkins of the right type and size in advance (small ones will be hard to work with) and wipe them with a damp cloth. For example, the photo below shows sugar pumpkins.
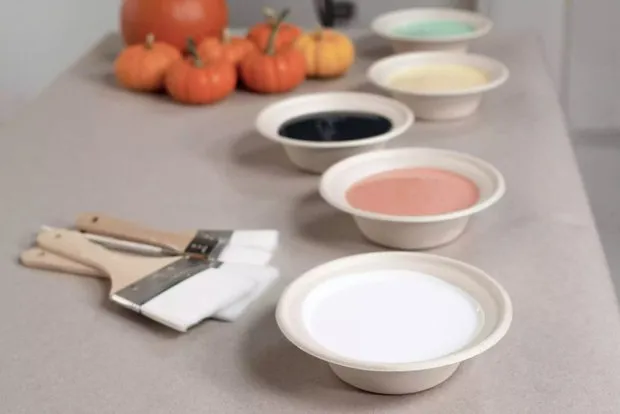 Photo source: thespruce.com
1. Apply the first layers of paint
Choose a 'base' color for your pumpkin — you can then draw prints on top of it. Then apply paint to the entire surface and let it dry (you'll have to wait for at least an hour). When the surface becomes matte, apply another layer and let the pumpkin dry again.
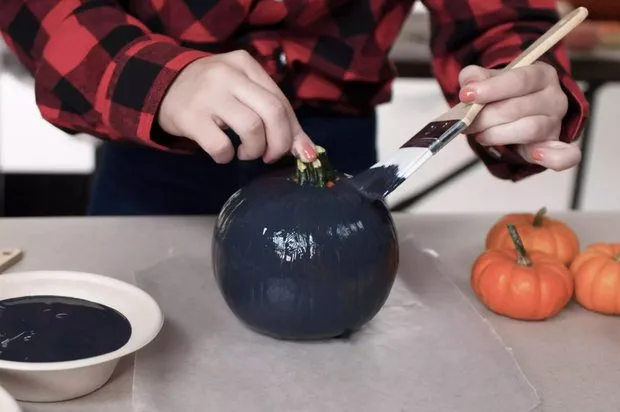 Photo source: thespruce.com
2. Add the design
Take a thinner brush and dip it into paint. Place the tip of the brush on the surface and pull down to create a small neat stroke (as shown in the photo). You can also draw dots, stars, or any other patterns.
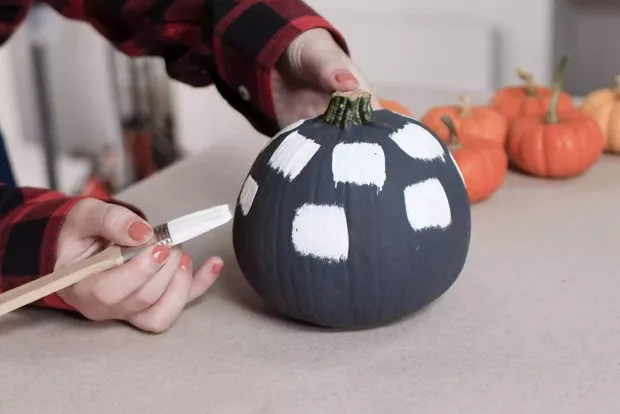 Photo source: thespruce.com
3. Dry the pumpkins
Once you're done, let the pumpkins dry thoroughly.
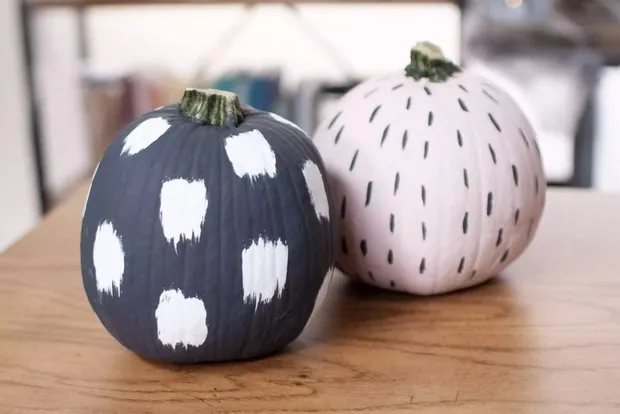 Photo source: thespruce.com
Multi-colored mini pumpkins
If you never liked art classes and adding patterns seems too complicated, try this method :)
1. Prepare the paint
It's better to pour them into containers with wide openings (like bowls). Take the pumpkin by its stem and dip it halfway into the paint. Then let excess paint drip back into the bowl.
You don’t have to dip the pumpkin halfway — you can coat it with one color almost entirely or paint just one side. Try different variations — it’s fun!
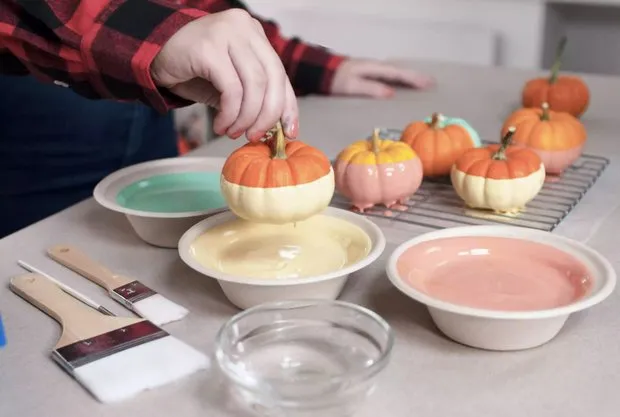 Photo source: thespruce.com
2. Dry the pumpkins
Place a piece of cloth or craft paper under the drying rack so that paint drips onto it. Wait at least an hour for the pumpkin's surface to become matte. Only then proceed to the next layer.
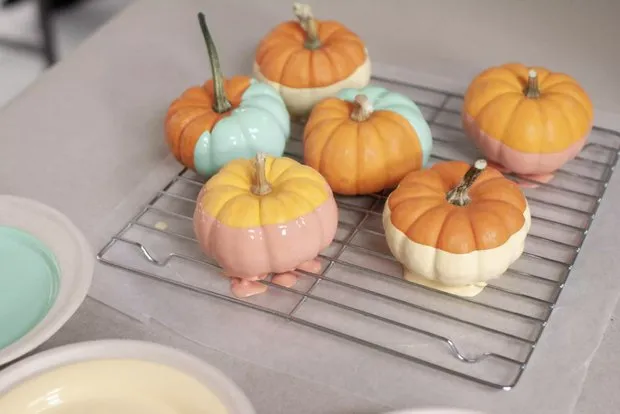 Photo source: thespruce.com
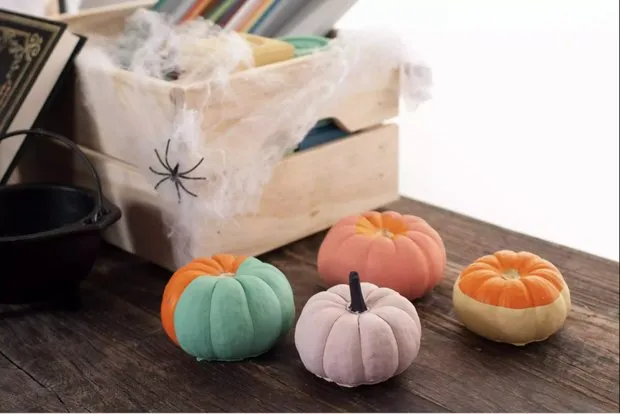 Photo source: thespruce.com
Pumpkins in the Style of Jackson Pollock
They look like paint was randomly splattered on them. But of course, it's not random :)
1. Apply the first layer of paint
Choose a neutral shade that will make splatters stand out well.
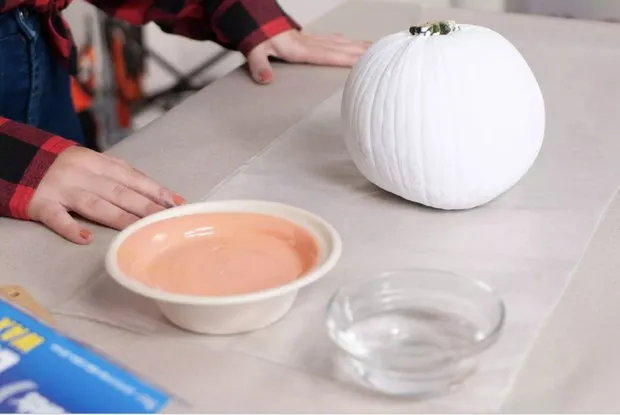 Photo source: thespruce.com
2. Create splatters
Mix paint with water so it’s not too thick. Start by adding a couple of tablespoons to avoid overdoing it.
Place the pumpkin on waxed paper or newspaper (or in a bag or box to avoid staining everything around). Dip the brush into the paint and start splattering. Rotate the pumpkin to paint all sides. Then leave it to dry (at least for an hour).
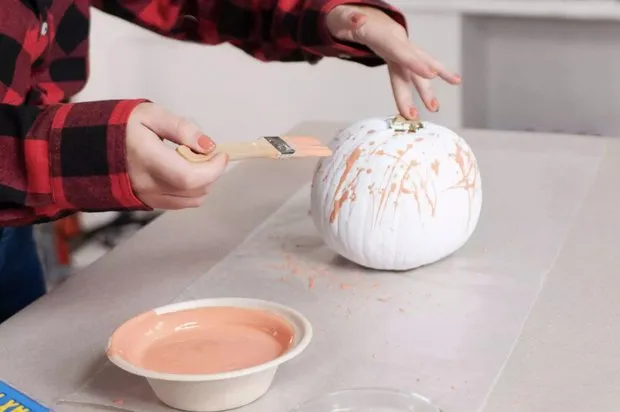 Photo source: thespruce.com
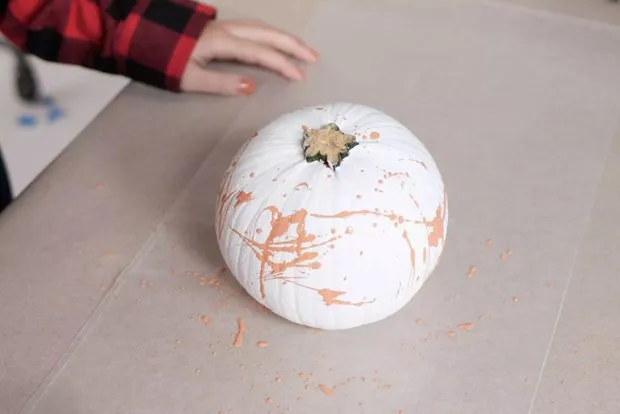 Photo source: thespruce.com
 Photo source: thespruce.com
DIY Idea: Handmade Pumpkin Candle Holders for Autumn
Detailed tutorial
Need a renovation specialist?
Find verified professionals for any repair or construction job. Post your request and get offers from local experts.
You may also like
More articles:
 Photography in Interior: 7 Tips Used by Designers
 How We Designed a 5 m² Kitchen with Complex Layout in a Stalin-era Apartment
 How to Plan and Start a Renovation: 5 Insights from an Interior Designer-Architect
 8 Very Beautiful Bathroom Designs Where the Vanity Sets the Mood
 How to Improve the Interior of a Rental Apartment: 8 Budget-Friendly Ideas from Professionals
 How to Make Roman Shades by Yourself: Detailed Instruction
 11 Super Deals at IKEA Under 1500 Rubles
 Top 10 Most Low-Maintenance Plants for the Garden