How to Make Roman Shades by Yourself: Detailed Instruction
It is not difficult to make Roman shades yourself: you just need to set aside some time, prepare all the necessary materials in advance, and follow our instruction.
- fabric and lining for the shades;
- metal or wooden rods that are 3 cm shorter than the width of the shades, 8 pieces;
- velcro strip as wide as the shades;
- drill and screws;
- chalk or soap for markings;
- thread and needle;
- sewing machine;
- three pieces of cord, each twice as long as the shade, and their width should be at least equal to the length of the shade;
- plastic rings;
- weighting batten and wooden batten for hanging the shades;
- nails and hooks.
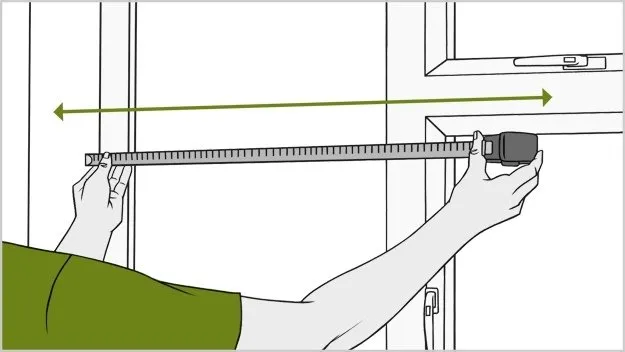
 Step One
Measure the window opening, add 15 centimeters to the results for hemming at the top and bottom of the Roman shade, plus 5 centimeters for side seams.
 Step Two
On the wrong side of the fabric, mark the positions for rings, fold lines, and hem using chalk or a piece of dry soap.
Make sure the spacing between folds is even, otherwise the shades will look unattractive.
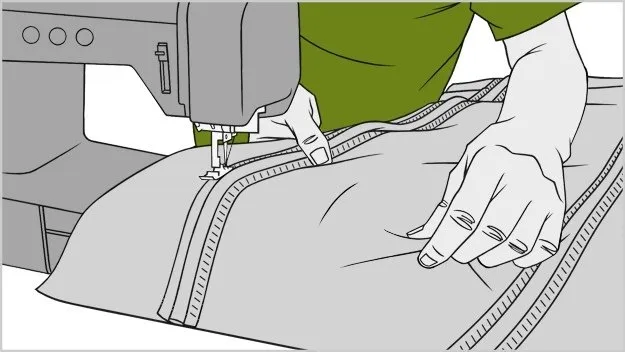
 Step Three
First, finish the side edges and top edge of the fabric. Sew on the velcro strip to the top edge, which will be used to hang the shades. Velcro is the most convenient option: easy to remove for washing and hang back up.
 Step Four
Turn up the bottom part of the shades to form space for the weighting batten. Then, on the wrong side of the shade, sew an edging trim. Insert the battens into the formed pockets.
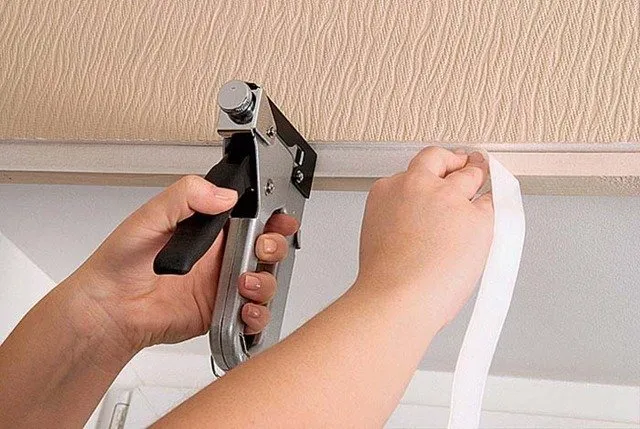
 Step Five
Attach the velcro to the lower part of the wooden batten using nails or a furniture stapler. This is where the shades will be mounted later.
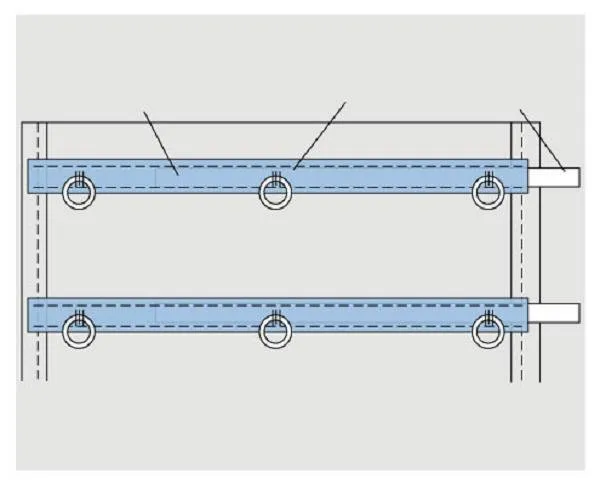
 Step Six
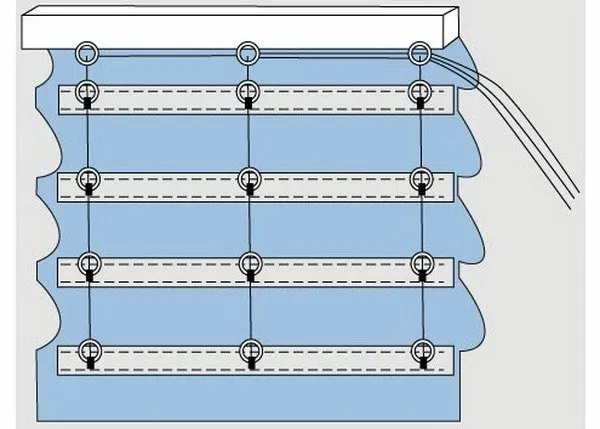
Proceed to mark the positions for rings. Then sew them by hand. The wooden batten is secured with nails to ensure the lifting mechanism is well fixed.
 Step Seven
Secure the shades to the wooden batten using velcro. Then thread the cords through all rings up to the top edge of the shades. Repeat with all rows of rings. Ensure that all cords exit on one side of the shades.
Tighten all cords as much as possible so that the folds are evenly distributed across the width of the shades. Then secure the cords using ribbons.
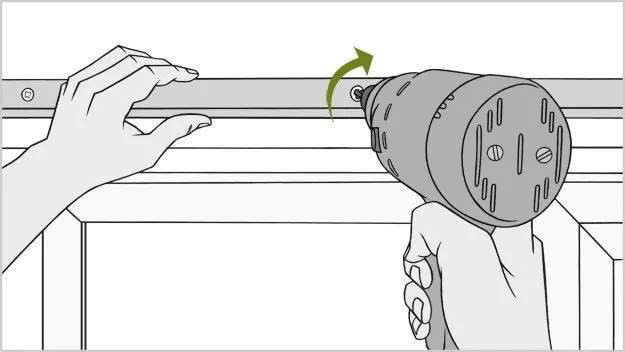
 Step Eight
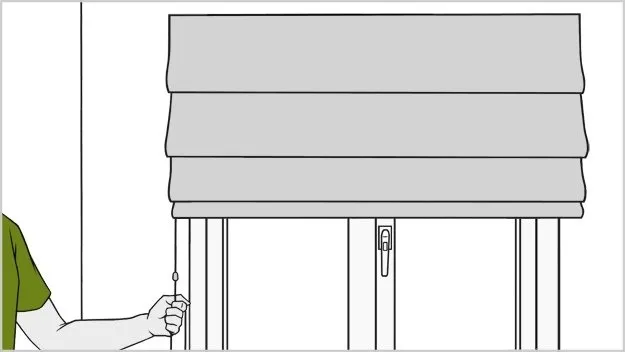
Mount the wooden batten onto the window frame. For this, you will need a drill and screws.
Then remove the ribbons that were used to fix the folds. When the shades are lowered, adjust the tension of all cords.
On the cover: design project by Anna Bagrova
Need a renovation specialist?
Find verified professionals for any repair or construction job. Post your request and get offers from local experts.
You may also like
More articles:
 Breathing Freely: 7 Effective Ways to Clean the Air in Your Home
 6 "killed" Stalin apartments that were transformed beyond recognition
 4 Design Tips for Small Apartments from the Most Expensive Architect
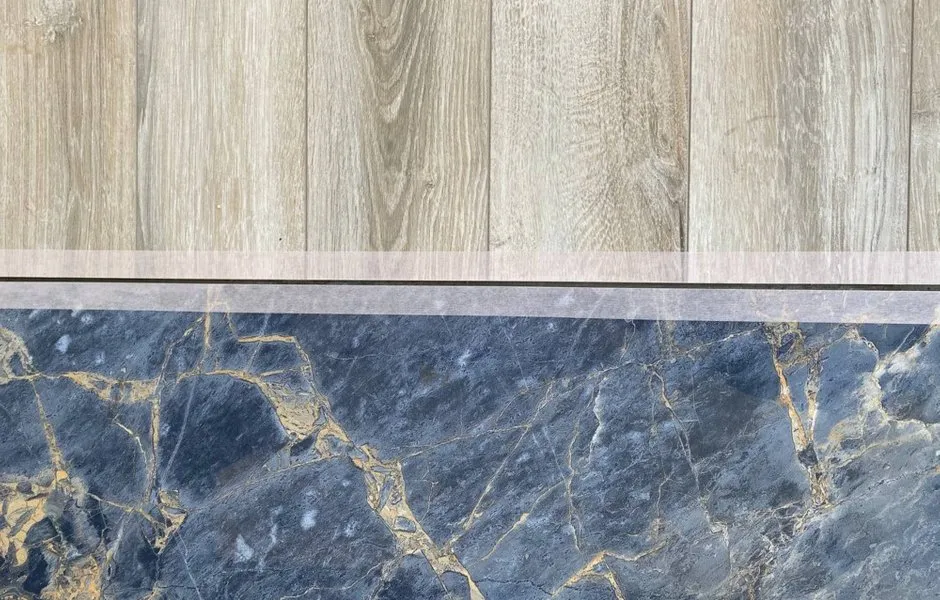 How to Properly Join Different Floor Coverings: Expert Tips
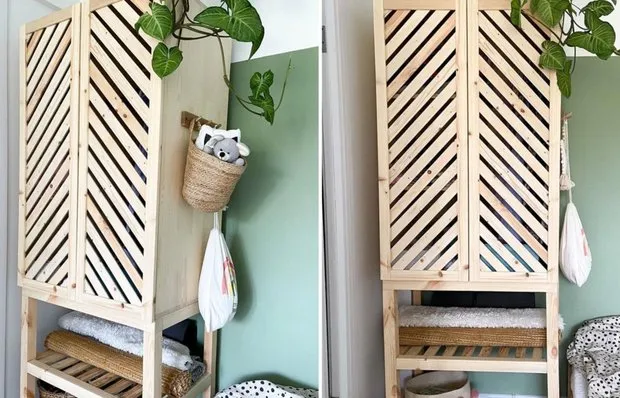 DIY Idea: Affordable Scandinavian Wardrobe Made by Hand
 How to Decorate Living Room Walls: 7 Trends of 2021
 9 Ideas to Easily and Beautifully Decorate Garden Beds
 7 Design Tricks Professionals Use in Their Apartments