Dry Floor Screed: DIY Guide and Technology
Leveling the floor with dry screed is a technology suitable for both new construction and renovation of floors in older homes. In mass housing construction, it appeared relatively recently - no more than two decades ago. However, the active development of dry floor screed technology has mostly occurred in recent years.
Dry screed: advantages and disadvantages
Leveling the floor with dry screed is a technology suitable for both new construction and renovation of floors in older homes. In mass housing construction, it appeared relatively recently - no more than two decades ago. However, the active development of dry floor screed technology has mostly occurred in recent years.
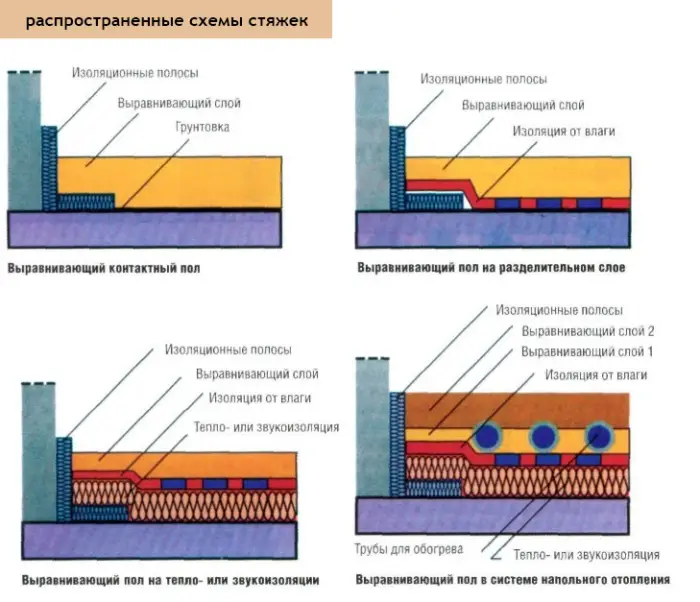
Figure 1 - Floor screed scheme
Advantages- Compared to "wet" - concrete or cement-sand, or semi-dry method (with fiber reinforcement) - this is a fast way: both in terms of floor leveling speed and readiness for use after installation (while concrete screed needs time to cure, dry floor is ready for use in just two days!);
- A fairly simple technology, described on manufacturers' websites for dry screed materials (e.g., KNAUF);
- Easy installation of utilities under the screed;
- Dry screed is lighter than concrete, so it can be safely used on balconies and loggias, as well as for roofing;
- Dry screed provides better thermal insulation and soundproofing compared to "concrete".
- Dry screed is a dusty job, so at least without a respirator and protective gloves, it's better not to start the work;
- With this method, you can raise the floor by no more than 8-10 cm;
- In case of severe flooding in the apartment, floor panels will likely become unusable and a new floor installation will be needed;
- With improper installation technique, the floor may "move" - it's better to hire professionals for floor repairs.
Dry floor screed technology
In two words, the installation of dry screed is performed according to this technology:
Clean the floor surface from old flooring.
Fill cracks with self-leveling compound for floors.
At the junction of floor and walls, apply special mounting tape.
Lay polyethylene film (at least 8 microns) over the floor with a 8-10 cm excess on walls.
Fill the floor with keramzit of different fractions and level it using stakes and a rule.
Lay durable GVL sheets on top of keramzit, secured with self-tapping screws. These can be used as a finish floor surface.
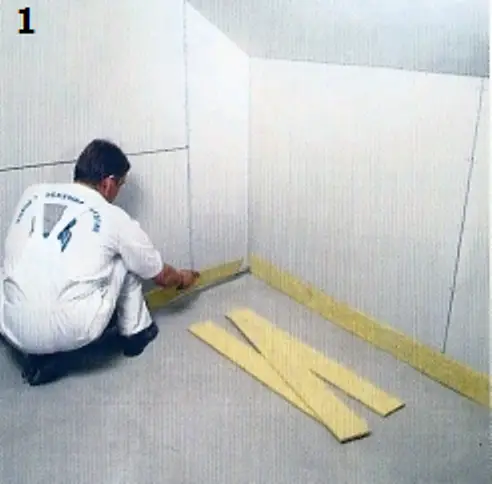
Photo 1 - After laying the hydro-isolation layer, apply edge tape at the perimeter
IMPORTANT! The dry assembled floor system can also be used for bathroom renovations. When installing dry screed in rooms with high humidity, lay hydro-isolation tape at the junctions of floor and walls, and cover the floor surface with a special hydro-isolation layer.
Dry screed installation: materials
To install a dry screed, you will need:
- dry screed sheets (or GVL);
- adhesive mastics;
- polyethylene film;
- spackle;
- screws for super sheets;
- edge tape;
- dry filling material;
- thermal and moisture-resistant insulation plates;
- guides;
- rule.
Before describing the installation process step-by-step, let's look at a few more details. We've described above the advantages and disadvantages of dry versus wet screed, and now we'll focus on material selection for dry screed.
Dry screed with keramzit from the manufacturer vs. third-party: what's the difference?
The two most well-known manufacturers of all components for organizing dry floors in our country are KNAUF and OPTIROCK. For example, the filling material Compevit from KNAUF: for a 40-liter bag of keramzit in different fractions, you will have to pay approximately $5.75-$7.10.
At the same time, you can be sure that the dry screed mixture in the bag corresponds to the installation technology. The price of an un-certified product is not much higher, but the quality is significantly inferior. Buying keramzit for dry screed from an unverified supplier, you risk getting a bag - a mixture of dust and overly large stones. A calculator is not needed to understand: the penny-wise, pound-foolish approach.
DIY dry floor screed
Prepare the surface. The dry assembled floor can be mounted on any surface: the covering can be installed over concrete or wooden floors. The main criteria are that the surface must be solid, flat, and dry!
To prepare the floor base for installing a dry screed, close gaps between tiles, along walls, recesses, and all kinds of installation voids with cement-sand mortar. Remove debris.
IMPORTANT! For floor leveling, do not use additional structures that raise the floor level (if this is undesirable). Keramzit can handle even complex irregularities: it levels height differences up to 3 cm.
On a clean floor, lay the hydro-isolation layer (for ordinary rooms - balconies, living rooms - one layer of regular polyethylene film will be sufficient, the film thickness should be at least 8 microns).
If you lay the film in overlap, leave about 15 cm or more of material for the overlap. The film should extend onto the wall by approximately 10 cm (if you plan to install dry screed more than 5-8 cm in height, increase the film allowance by another 10 cm, based on the final floor level). At the wall perimeter, secure the film with painter's tape or a construction stapler.
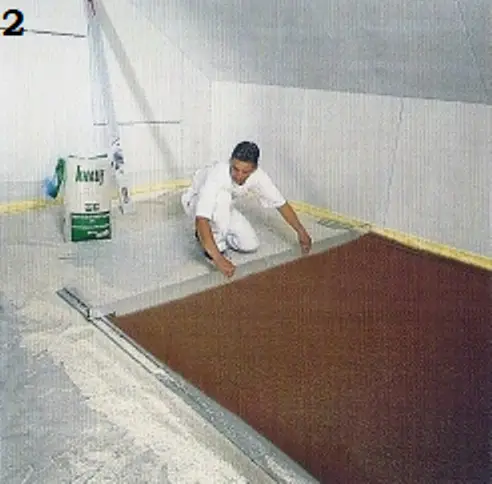
Photo 2 - When leveling the filling on large areas, it's better to do it in stages, filling sectors according to stakes
To avoid sound bridges and ensure thermal expansion of the floor material, gaps of 8-10 mm thickness should be created along the walls at the room perimeter. These gaps must contain soundproof edge tape (usually made from glass or mineral wool, or polyethylene foam).
At the room perimeter, mark the filling level and set stakes. You can use an L-shaped profile (with sharp edges) to install stakes. Place stakes in the room so that the distance between them is slightly less than the length of the rule you're using (you'll use the rule to level the filling).
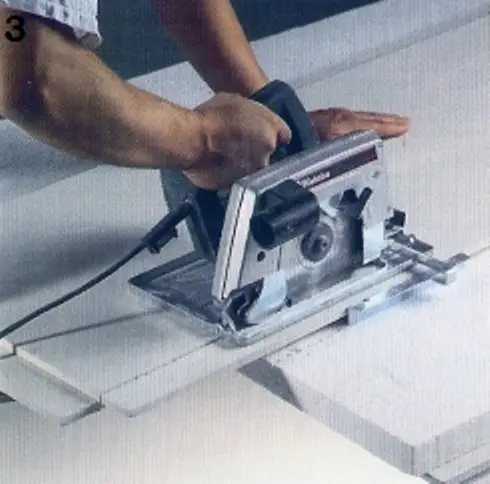
Photo 3 - GVL edge plates should not have gaps in the fastening - they will better fit the walls
IMPORTANT! When choosing stakes, consider the minimum height limitations. For example, dry filling must be laid at least 3 cm thick, so stake profiles often used in concrete screed work cannot be used.
Pour granular keramzit over the hydro-isolation layer. This is a material with minimal shrinkage, good flowability, and low moisture absorption.
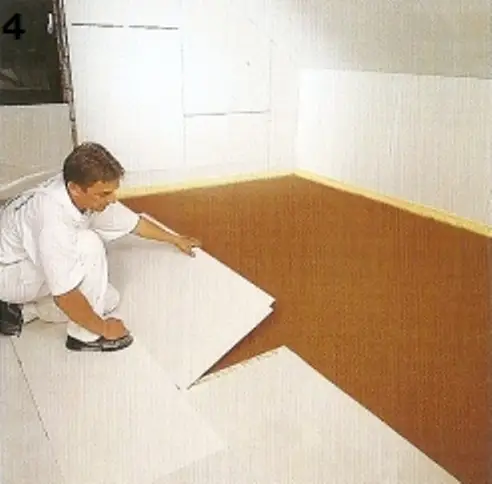
Photo 4 - When laying GVL sheets, move from the entrance to the far corners carefully, stepping gently on the laid sheets to avoid damaging the leveled filling surface
After leveling the filling with a rule on stakes (to move on the leveled surface, use a support made of small flat wooden planks), you can proceed to laying the sheets (dry screed on large areas is usually installed by a special machine).
Dry screed can also be installed using GVL - moisture-resistant gypsum fiber sheets. Other options include moisture-resistant plywood, particleboard (DSP), OSB boards, GSP panels, and asbestos cement sheets.
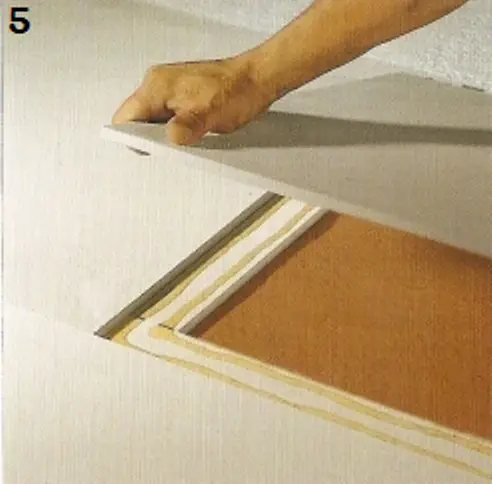
Photo 5 - Joints of the sheets must be sealed for better adhesion between floor elements
Lay sheets from the door of the room, gradually moving toward the far corners. Lay the sheets carefully on the keramzit surface, trying not to shift them on the filling surface.
IMPORTANT! These works are better done with a partner due to the weight of GVL sheets.
When laying sheets that abut against walls, cut the edge. GVL sheets must be laid with a staggered pattern (like bricklaying). At the room perimeter, after laying GVL sheets, seal and secure them with screws every 30 cm.
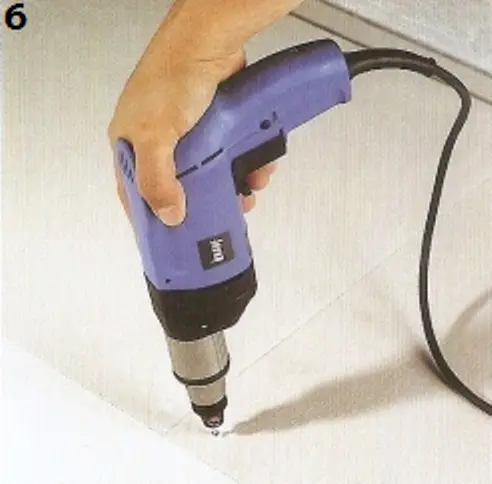
Photo 6 - GVL sheet joints are secured with screws every 15-30 cm, ensuring the joints at the corners are also fastened
Dry screed will be ready for use by the next day after completing the works!
IMPORTANT! To secure GVL, use special screws with conical heads that can be "sunken" into the sheet.
Dry floor screed: VIDEO
$ DIY dry screed: cost considerations
To organize a dry screed, you won't need special equipment, and all required tools are a drill and rule. What is the cost of materials?
- moisture-resistant sheets - $9/m²;
- filing - from $6.5/40 liters;
- adhesive mastics (5 kg) - from $7;
- additional hydro-isolation (5 kg) - $40;
- spackle (25 kg) - $10;
- polyethylene film for hydro-isolation - from $0.8/meter;
- screws for GVL - from $7/pack;
- edge tape - from $5.7/motif.
Using a calculator, for organizing dry screed in a typical room of 12 m², you will need approximately $180-224 on materials. For self-performed works, you save about $135 (based on the rates provided below).
IMPORTANT! You can buy most of the listed materials at any construction market. However, we recommend purchasing all necessary materials - from screws to filling - from one and the same manufacturer.
$ Dry screed labor costs
How much does it cost to hire professionals:
- In Moscow - up to 50 m² of work area - $350/m², over 50 m² - $320/m²;
- In Kiev - up to 50 m² of work area - $90/м², over 50 m² - $70/м².