How to Make a Shelf from Boards and Pipes
Making beautiful things by yourself is always interesting and pleasant. American craftswoman Ana White shared a detailed instruction with drawings, which you can use to make a stylish and practical wooden shelf by yourself in just a few hours.
Preparation
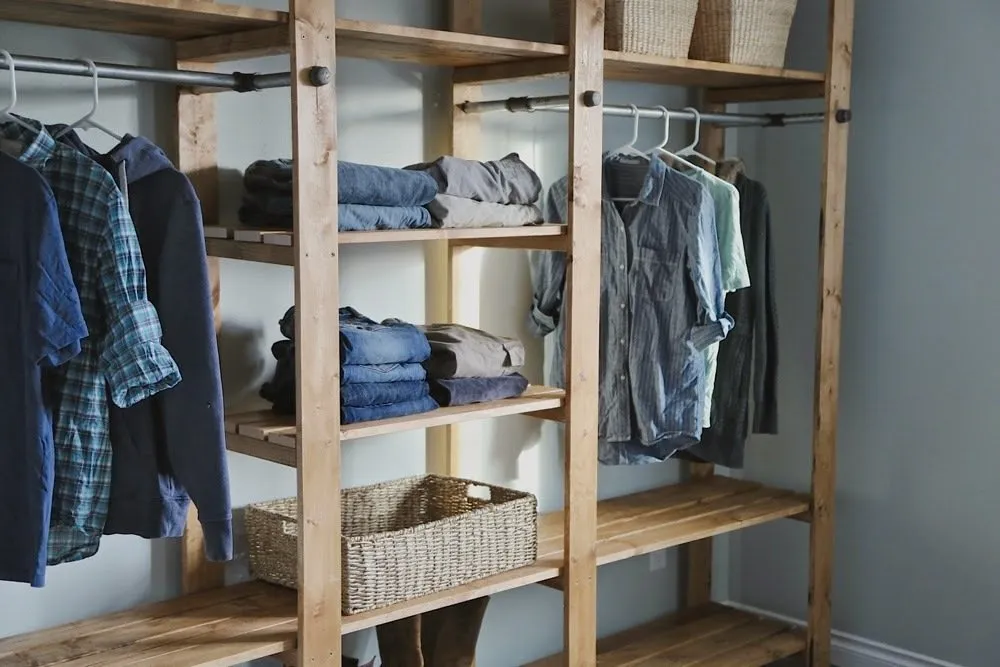
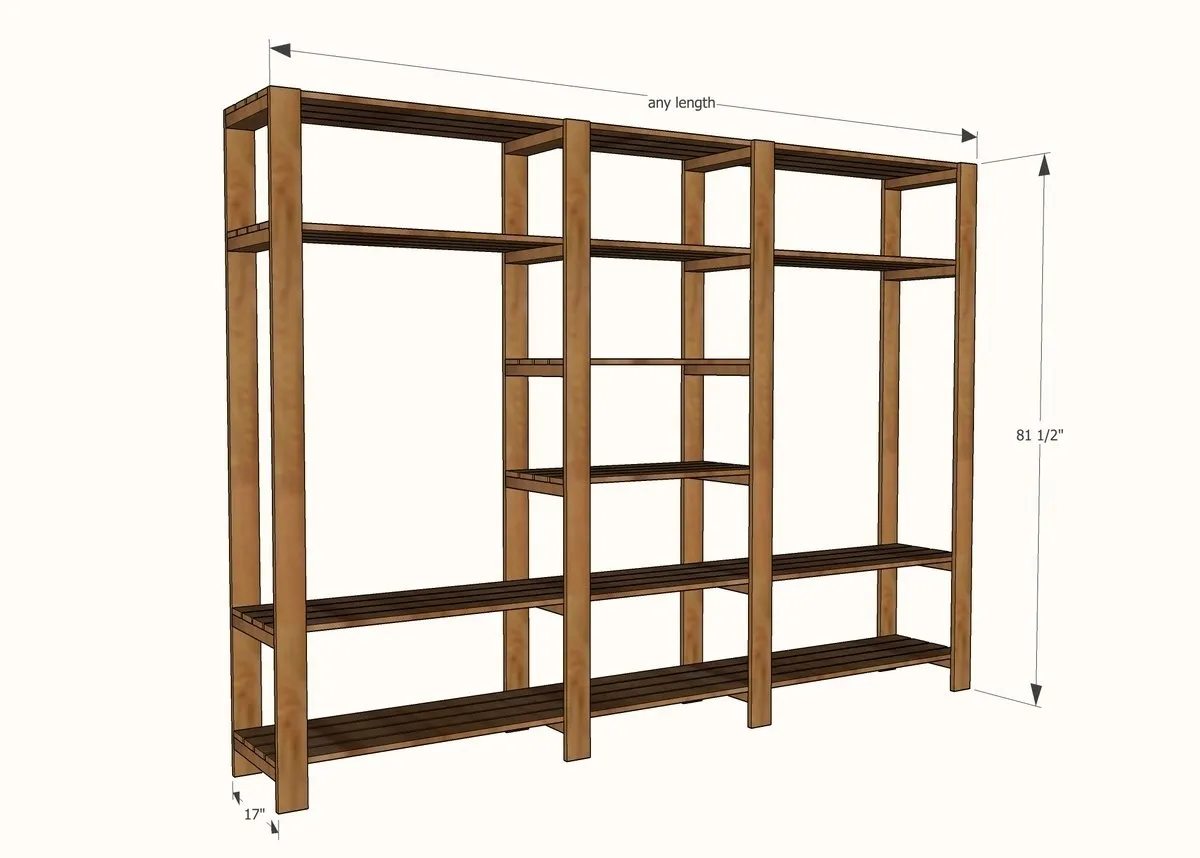
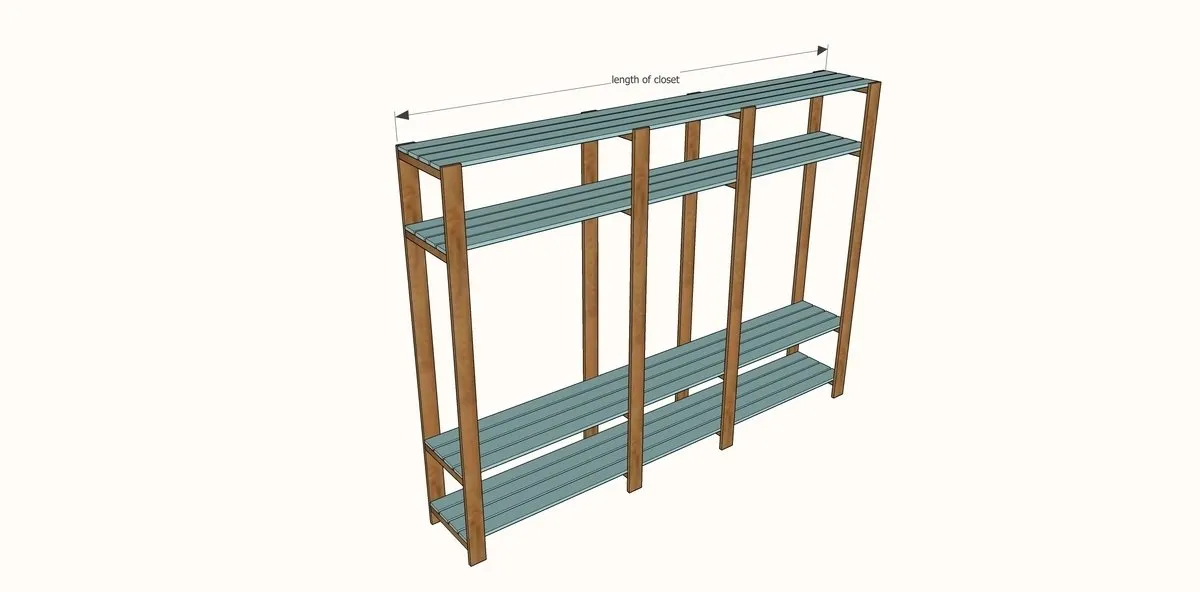
The instruction is ridiculously simple: you need to assemble the frame with supports for shelves, install the bars, and then place the wooden shelves in their designated spots.
The length of the shelves, as well as the distance between the legs of the frame should not exceed 90–92 cm, otherwise the shelves will sag.
Materials:
- wooden boards;
- wood glue;
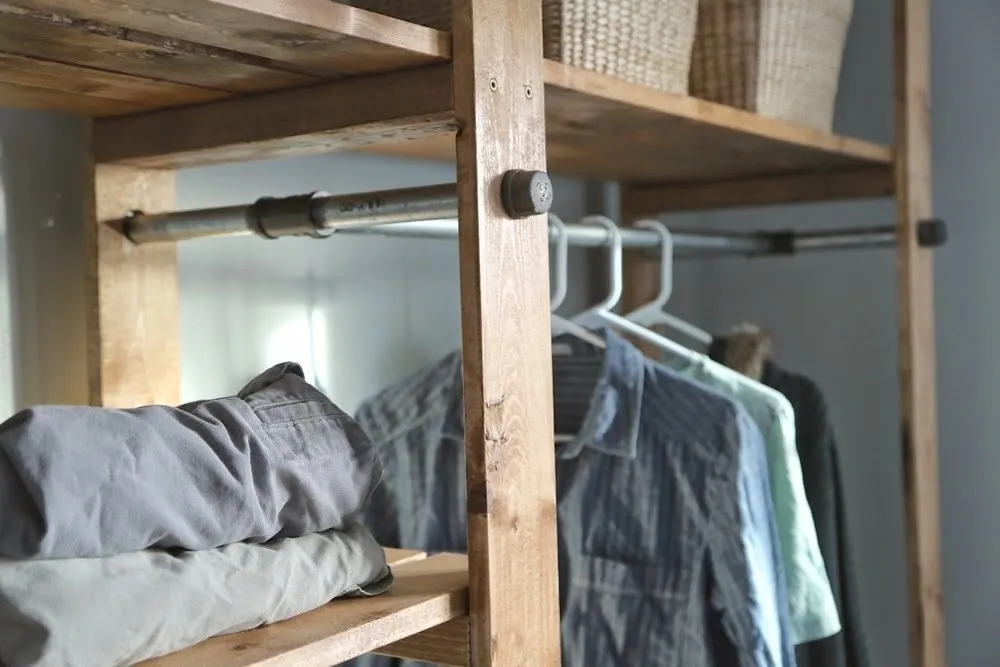
- metal pipes ¾ — 2 long, 8 short;
- 8 nipples, 4 fittings, and 8 plugs;
- wood lacquer;
- screws;
- tools.
You will need:
Planed board 20 x 96 x 2000 mm
Wood glue Wood max
Wood screws 3,5 x 41 mm
Aluminum pipe 1000 x 25 mm
Tools:
- measuring tape;
- square for marking right angles;
- protective glasses and headphones;
- drill and bit set;
- circular saw;
- sander.
You will need:
Network cordless drill Dewalt DW217
Circular saw Dewalt DCS391N
Drill bits and bits set Stanley Family
Eccentric sander Makita M9204
Let's start
Work on a flat clean surface. Use smooth, even boards. After each step, check with the square that the angles are 90°. Always pre-drill holes before screwing in screws. Use glue for strength, and remove excess from clean wood before applying lacquer to avoid stains.
You will need:
Ventilated protective glasses Krafter 1
Strong measuring tape with auto-stop, 5 m
Anti-noise headphones Krafter 2
Aluminum square Matrix 300 mm
Step 1
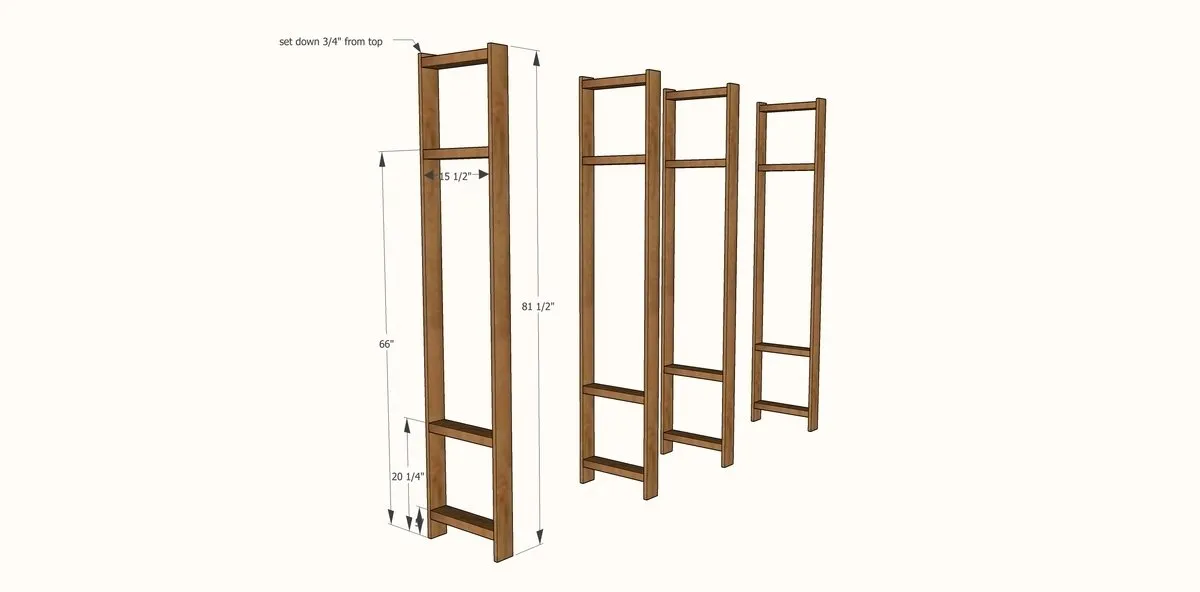
- Build four supports for the future shelf using wooden boards, wood glue, and screws.
- Assemble two hangers from pipes.
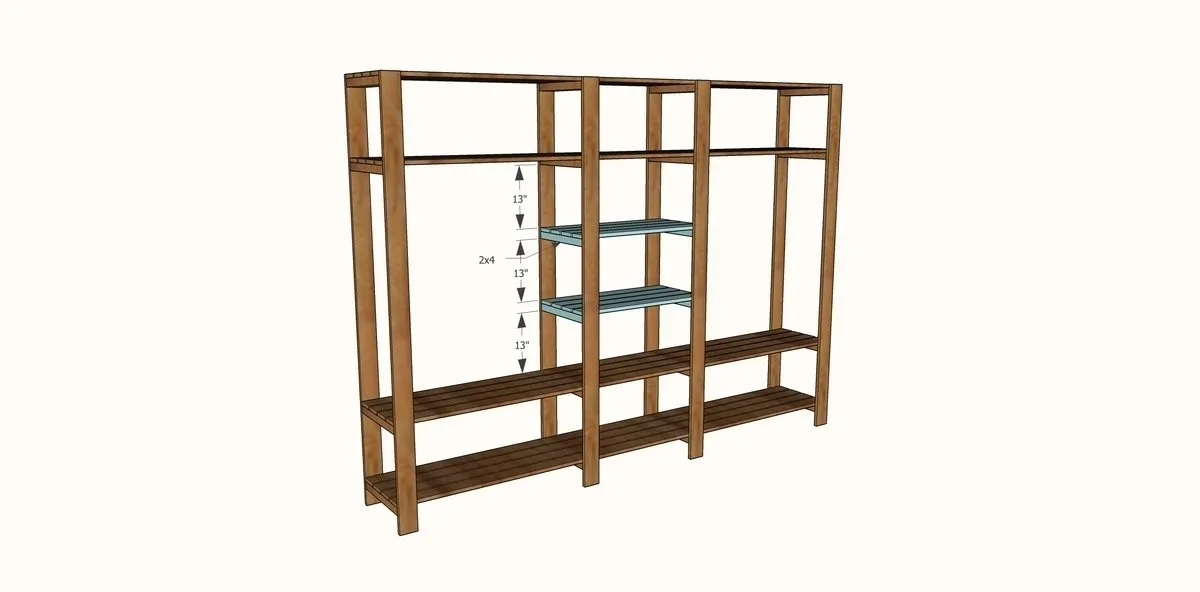
Step 2
- Cut boards for shelves according to the shelf length.
- Drill holes and paint the boards before mounting them on the frame.
- First, screw in two main outer supports of the frame, and then install additional ones between them.
- Now secure the top and bottom shelves, and then install the two middle shelves.
- For greater reliability, attach the shelf to the wall to prevent possible falling.
Step 3
- Measure the distance between the middle supports of the frame and cut boards for the two smallest shelves.
- Secure four supports and mount the shelves on them.
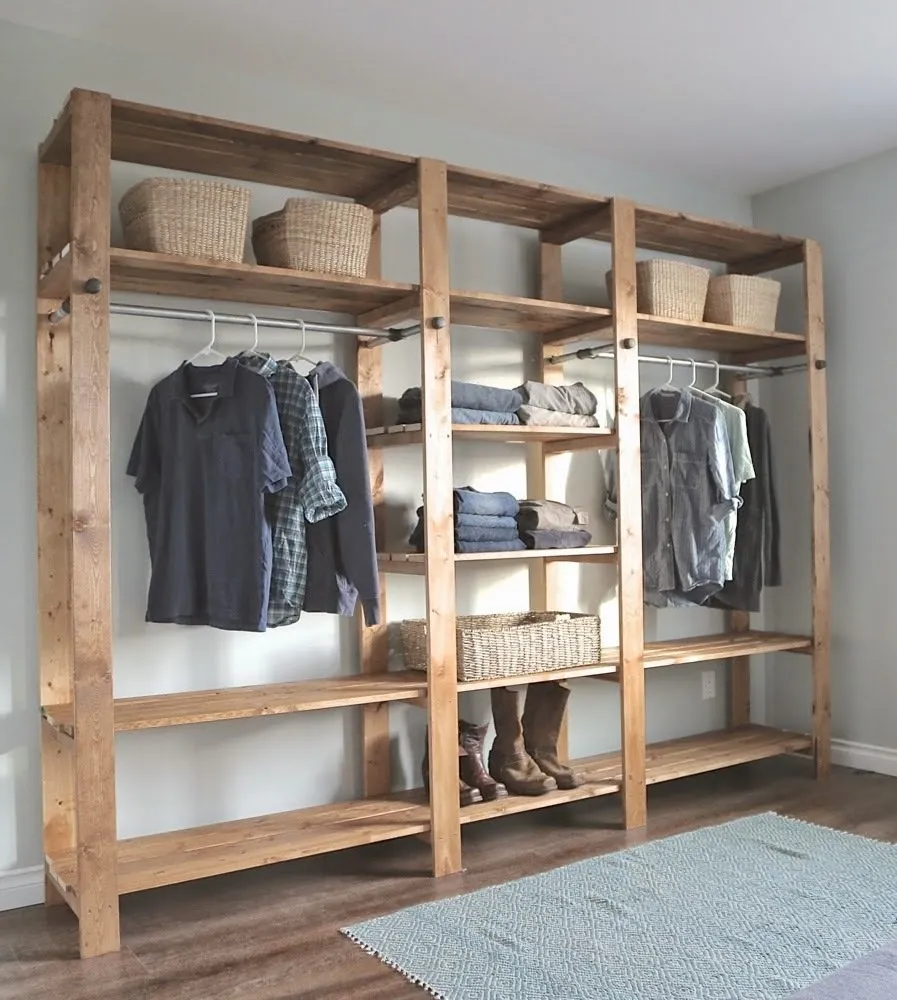
The shelf is ready!
Material in the article: AnaWhite
Need a renovation specialist?
Find verified professionals for any repair or construction job. Post your request and get offers from local experts.
You may also like
More articles:
 How to Use a Garden Plot to the Maximum: Experts' Tips
 Cottage in Stockholm in Country Style
 How to Care for Garden Furniture on the Dacha to Make It Last Longer
 What to Plant in the Shade on the Dacha? 10 Garden Plants and Tips
 How Three Generations of a Family Fit on One Land Plot
 Personal Experience: 6 Silly Mistakes by Builders in Apartment Renovation
 Another 10 Repair Mistakes Nobody Warns You About
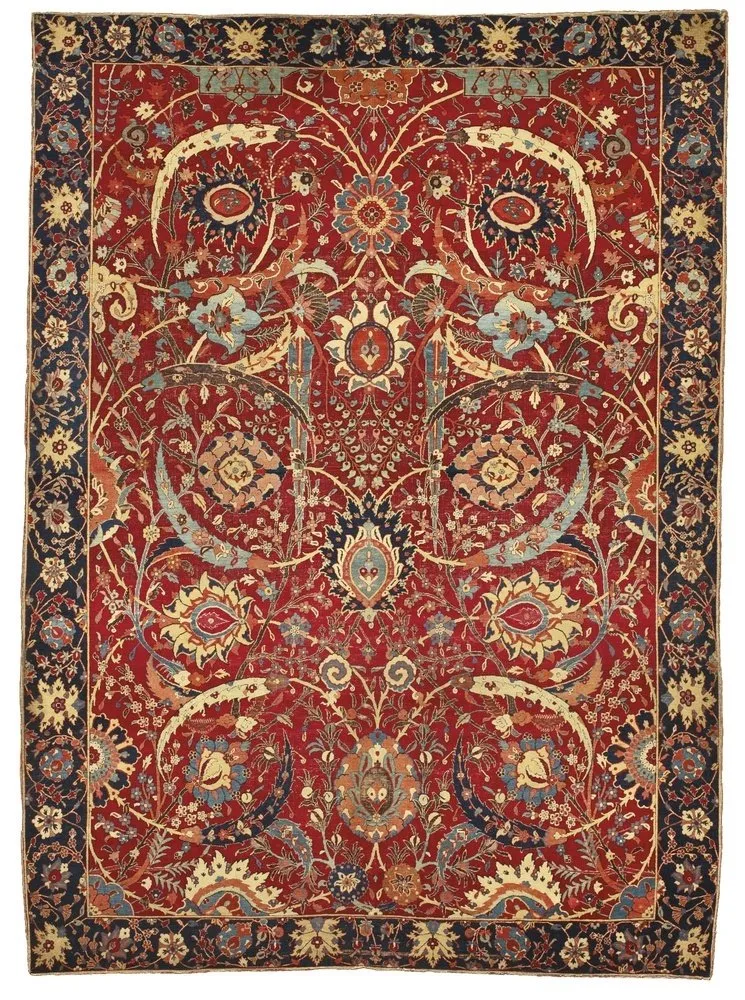 Why Russians Love Carpets (And What to Do If You Live With One)