What to Do If Parquet Has Swelled: Step-by-Step Guide
Step #1: Find the Cause of Swelling
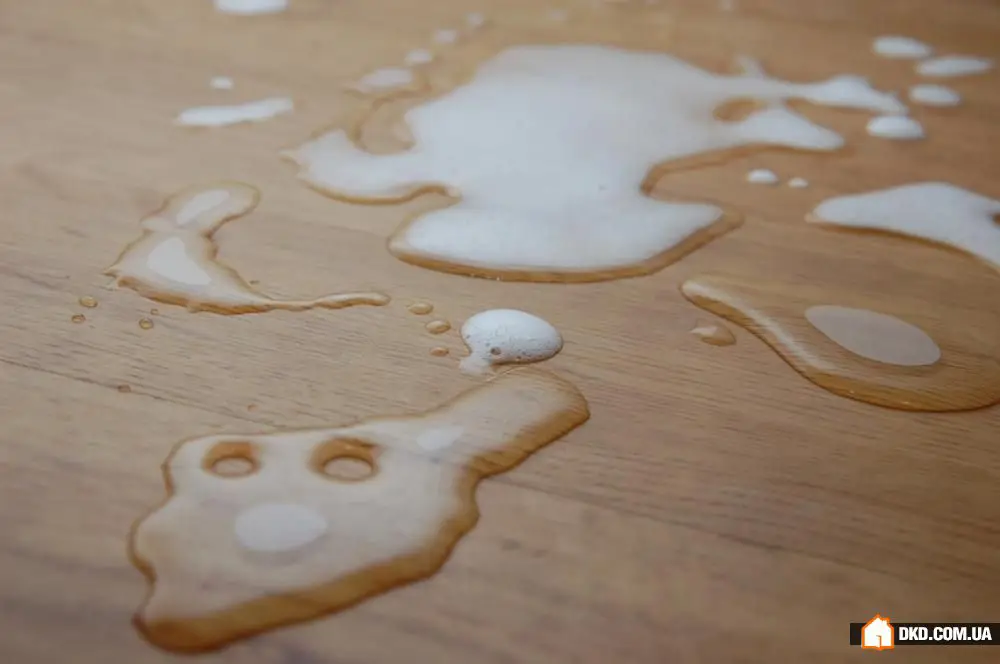
As soon as you notice swollen parquet, the first thing to do is find out the reason. You don't have to be a big expert in floor coverings, as in such cases, the reason is usually obvious. Most likely, it's one of the following circumstances:
Fluid was spilled on the parquet floor, which was absorbed by the boards and caused them to lift up. Perhaps a neighbor upstairs flooded it. The installation process of parquet was violated. It is likely that unscrupulous installers didn't install a waterproof barrier. Too humid air, from which the parquet absorbed excess moisture. You can check the humidity level in the room with a hygrometer, optimal readings are 45–60%.
Tip: if there is a sauna or bathroom on the floor below your apartment, it's most likely that the cause of the parquet swelling is the lack of hydro-isolation in your apartment. Excess moisture from lower floors penetrates into the parquet boards, causing them to lift up. This can happen even if there is a regular kitchen on the floor below. In such cases, to eliminate swelling and prevent such problems in the future, you should install hydro-isolation.
Step #2: Evaluate the Extent of Damage
Once the cause of swelling is found, you need to assess the scale of damage. If parquet has been damaged in spots – that is, individual planks have been affected, they can be replaced with new ones to restore the parquet. If it's about large-scale consequences and restoration is impossible – you'll have to replace the entire floor. Tip: always keep spare boards from the parquet set that came with the installation – in case of minor damage, you won't have to run around building supply stores looking for missing planks by color, texture, and size.
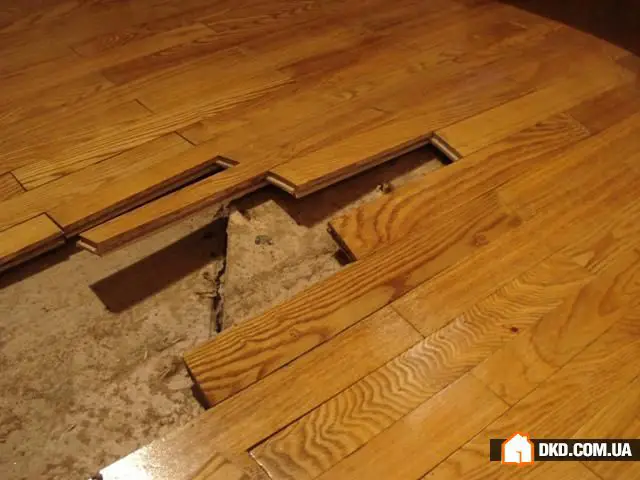
Step #3: Remove Damaged Planks and Dry the Parquet
Before restoring the parquet, it should be thoroughly dried, and the damaged boards should be removed from their slots. The hole left in the surface will weaken the tension in the damaged area and act as a form of floor ventilation. Between the planks, carefully insert a chisel to lift the part that is not nailed down and then the entire plank. After that, ensure gradual temperature increase of 2–3 degrees Celsius in the room. Avoid sharp fluctuations – they lead to over-drying of the boards and cracking or gaps in the surface.
Tip: don't use heating appliances during the drying process – most of them raise the temperature in the room abruptly, which is not acceptable here. It's good if your house has climate control that allows you to gradually increase the temperature. If not, limit yourself to ventilation and ensure good air circulation in the room where the parquet was damaged.
Step #4: Clean the Affected Area
After the surface has dried, proceed to clean the hole created. Under the parquet, a lot of dirt, dust, and grime always accumulate. Old parquet glue, parquet oil, and cracked primer – all of this needs to be removed before installing new elements. A vacuum cleaner is perfect for cleaning the holes, allowing you to prepare the area for new parquet boards in the most effective way. Tip: avoid using screwdrivers and other makeshift tools for cleaning – you risk pushing the debris deeper and thus widening cracks in the parquet.
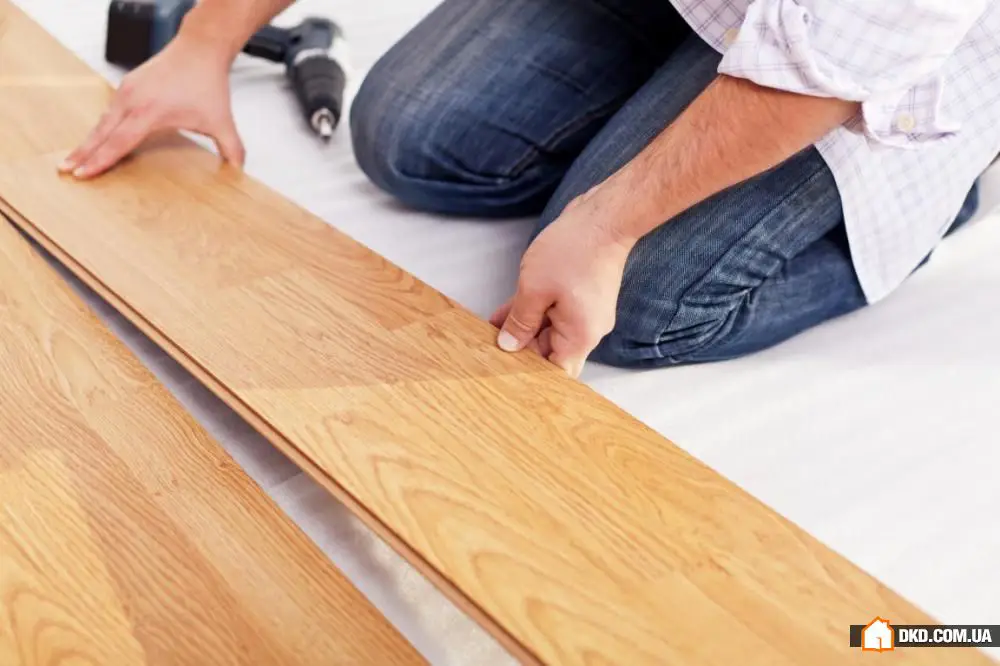
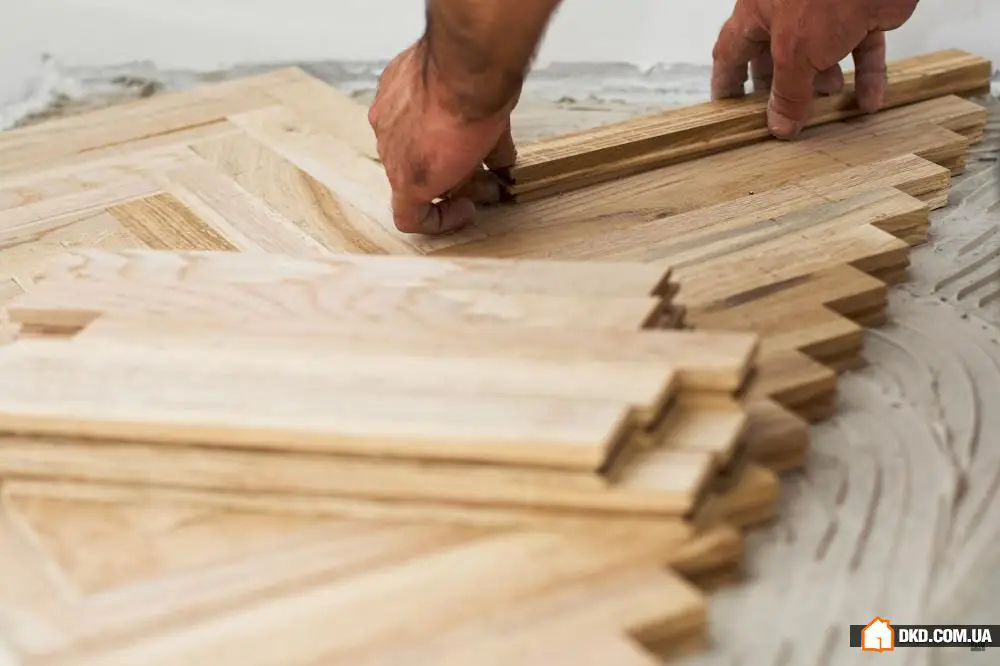
Step #5: Install New Elements
After drying and cleaning the surface, install new planks. You can take them from the old set of parquet boards or buy new ones. To ensure that the boards fit tightly to the existing ones, use a plane to adjust them to size. When it comes to fixing new elements, there are several options. If you need to install several planks, it's better to glue them together first and only then place them in the old spot. You can also secure the planks with screws, driving them at an angle. If the floor is concrete, liquid nails or anchors will work well – they allow you to fix the parquet securely and for good.
Tip: when choosing new elements, carefully examine the material from which the planks are made, their texture, tone, and of course size – all these parameters should match the parquet already laid down.

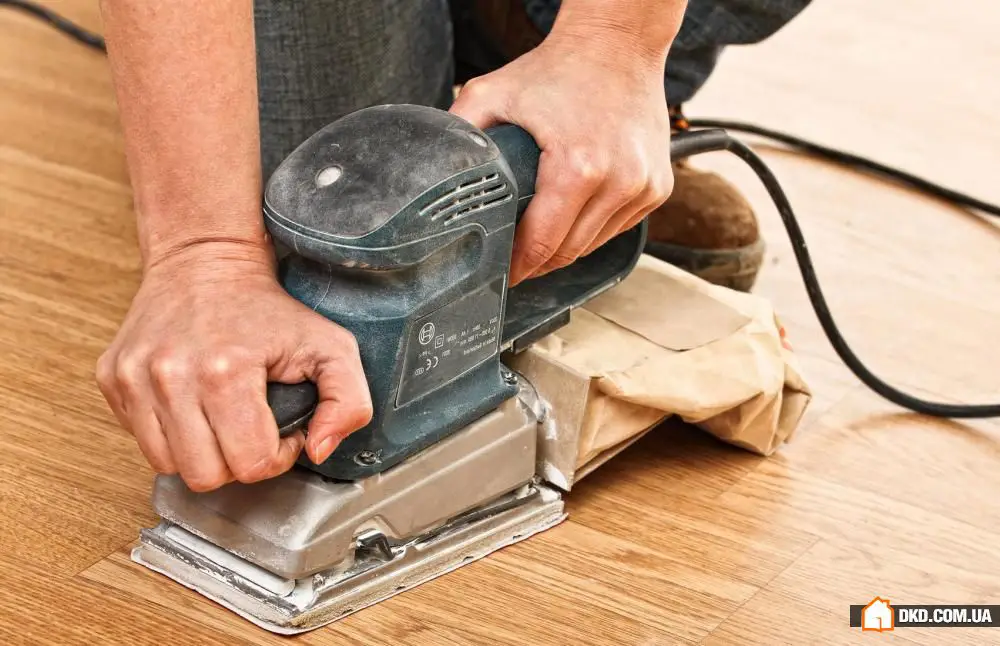
Step #6: Sand the Surface and Apply a Coat of Lacquer
After installing the missing elements, proceed to sanding. The wood layer should always be removed along the grain. Usually, parquet boards are 10–20 mm wide, and about 3 mm of wood is removed during sanding, which means one surface can be restored at least twice. After finishing the sanding, the parquet should be coated with lacquer. Use a roller with a small nap. The lacquer needs to be rolled thoroughly across the surface so that it adheres properly to the wood. Experienced craftsmen apply one thick coat, but beginners may find it easier to apply several thin layers.
Tip: different lacquers dry at different rates depending on their composition. Polymer-based ones usually dry quickly – in a few hours, while natural ones can take up to several days.
Need a renovation specialist?
Find verified professionals for any repair or construction job. Post your request and get offers from local experts.
You may also like
More articles:
 20 lifehacks to keep your apartment tidy
 10 Ways to Create a Healthy Microclimate in Your Apartment
 On a Budget: How to Renovate Without Going Over Budget
 17 White Desk Designs for Your Home Office
 15 Creative Ideas for Stylish Kitchen Design
 Decorating a Small but Functional Bedroom
 Salt and Pepper: Home by KUBE Architecture
 Week's Room: Mix of Tile Moods in the Bathroom