Hallway and Entrance for Reasonable Money
Secret techniques that designers use in their projects
An entrance hall is the first thing guests see when stepping into your home and the last thing you notice when leaving. Yet paradoxically, this space is often overlooked during renovation. "We'll finish it later" is a typical phrase when the budget has already been spent on kitchen and living room. And it's a pity! The hallway and entrance can become the calling card of your home, creating that "wow" impression from the first seconds. And what's pleasant is that this doesn't require a cosmic budget. Professional designers know how to transform even the most modest hallway into a functional and stylish space without bankrupting your family budget.
Main points from the article:
The entrance hall and hallway can be the most impressive rooms in a house with minimal investment thanks to their compact size;
The key secret of designers is using all vertical space from floor to ceiling and a well-thought-out storage system;
Proper finishing materials for a hallway can be 30-40% cheaper than in living rooms, but still create a premium impression;
Lighting plays a critical role in small spaces — a well-designed lighting scheme can visually expand the room without structural changes;
- Designers recommend investing in one or two premium elements (mirror, chandelier, door) that will become accents and "lift" the entire space.
Common mistakes that ruin your efforts
Mistake #1: Ignoring vertical space
Most apartment owners use only the lower part of the entrance hall, leaving the upper part empty or filling it randomly. This creates a feeling of crowding and clutter.
Mistake #2: Excessive furniture "as in the catalog"
Standard sets of entrance hall furniture rarely take into account the specific features of a particular room. The result is inconvenient passages, constant collisions with corners and loss of valuable space.
Mistake #3: Insufficient lighting
A typical scenario is a single ceiling light creating shadows and visually reducing the already small space. An entrance hall without natural light is especially demanding of a well-thought-out lighting scheme.
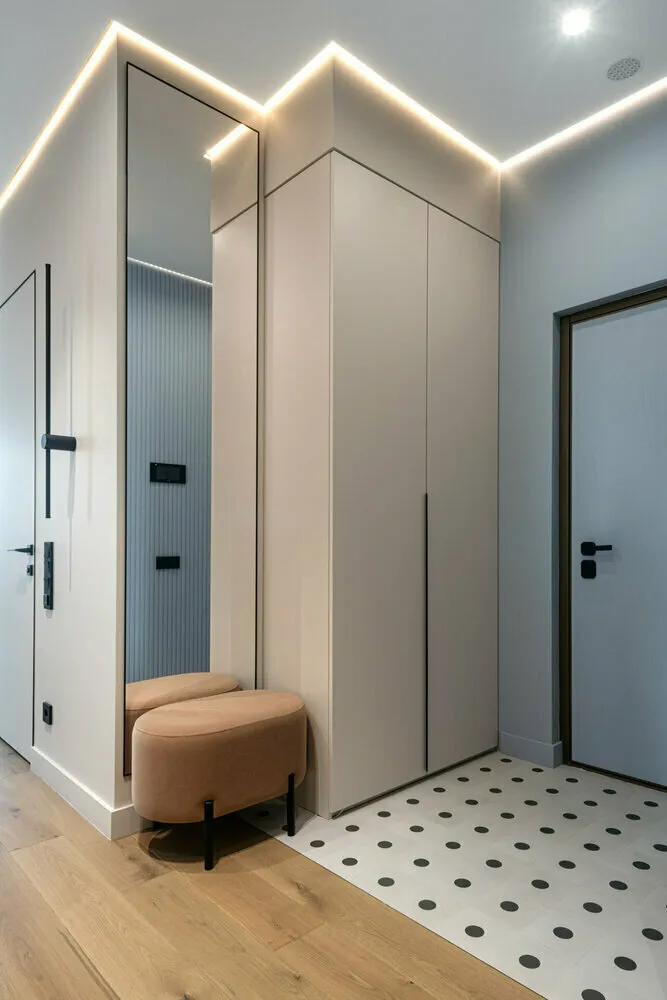
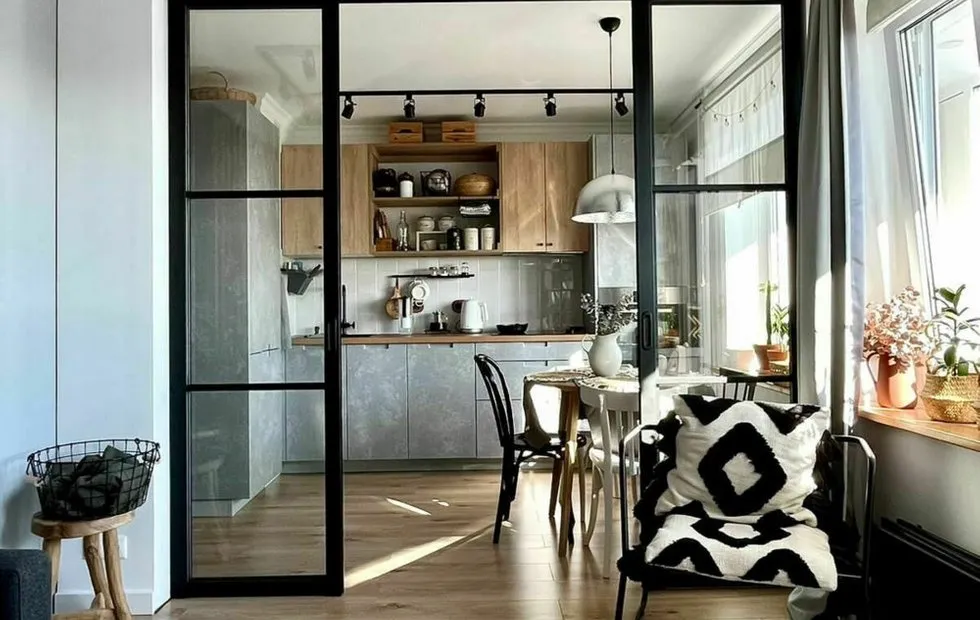
Design: Anna and Dmitry Korobko
Secret techniques of professionals: how to create a stylish entrance hall
Secret #1: The "invisible wall" rule
Professional designers know that in a small space, walls should either "disappear" or become functional. For this they use two approaches:
- Light neutral tones make walls visually invisible, expanding the space;
- Storage walls from floor to ceiling with built-in niches and wardrobes maximize functionality.
"In my own apartment I used floor-to-ceiling wardrobes painted the same color as the walls. This creates an impression of a single surface and visually increases the space," - this approach is used by many designers.
Secret #2: Combining open and closed storage
Instead of relying only on closed wardrobes, designers recommend combining:
- Closed wardrobes for seasonal items and rarely used objects;
- Open hangers and hooks for everyday clothes;
- Compact shelves and niches for small items (keys, gloves, headwear).
This solution is not only functional but also creates an interesting visual rhythm, making the space more dynamic.
Secret #3: Playing with reflective surfaces
Mirrors in the entrance hall are not just a functional element but also a powerful tool for visually expanding space. Designers use several tricks:
- A mirror opposite the entrance door creates a feeling of continued space;
- Mirror inserts on wardrobe doors make them visually weightless;
- Glossy or mirror ceilings in narrow corridors "lift" the height.
It's important to find a balance though — too many reflective surfaces can create the effect of a "fun room".
Secret #4: Budget-friendly materials with premium effect
The entrance hall is a high-traffic zone, so materials must be practical. Designers often use:
- Wallpapers with a fabric texture or graphic patterns (look more expensive than paper but cost 20-30% less than textiles);
- High-wear laminate instead of parquet (savings up to 60% without losing appearance);
- Decorative plaster instead of expensive stone (savings up to 70%);
- Painted MDF instead of solid wood for furniture and finishing (savings up to 50%).
"For my hallway I chose inexpensive tiles imitating natural stone for the area near the entrance door and regular paint for other walls. It turned out practical, stylish and within a modest budget," - such solutions are popular among professionals.
Secret #5: Multi-level lighting as the key to comfort
In conditions of lack of natural light, a well-designed lighting scheme is especially important. Designers use the "three-level" principle:
- General lighting (ceiling lights with soft, diffused light);
- Functional lighting (mirror backlighting, accent lighting for wardrobes);
- Decorative lighting (wall sconces, niche backlighting, LED strips).
The interaction of these three levels creates depth and volume even in the most modest space.
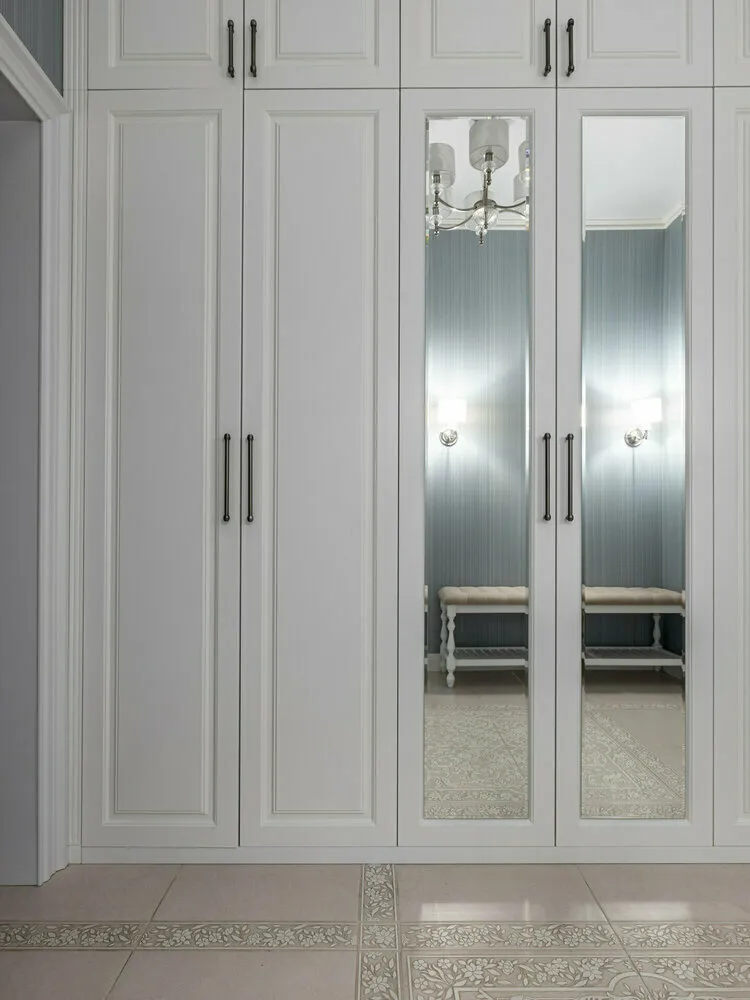
Design: Olga Maganova
Universal layouts: what works for any entrance hall
Linear layout for narrow corridors
For typical narrow corridors in panel buildings, designers recommend:
- A wardrobe-closet with mirror doors on one side;
- A narrow console or shelf for small items on the opposite wall;
- Wall hooks or a compact hanger in the entrance area;
- Suspended ceiling lights instead of a single chandelier.
This scheme maximizes functionality without cluttering the space.
L-shaped layout for square entrance halls
If your entrance hall has a more square shape:
- An angular wardrobe occupying two adjacent walls;
- A bench or compact shoe cabinet in the opposite corner;
- A full-length mirror on a free wall;
- A central ceiling light complemented by wall sconces.
Open layout for modern spaces
In apartments with open floor plans, where the entrance hall is combined with the living room:
- Zone separation using finishing (different materials for floor and walls);
- Semi-open storage systems acting as partitions;
- Suspended structures that do not clutter the floor;
- Integrated lighting highlighting functional zones.
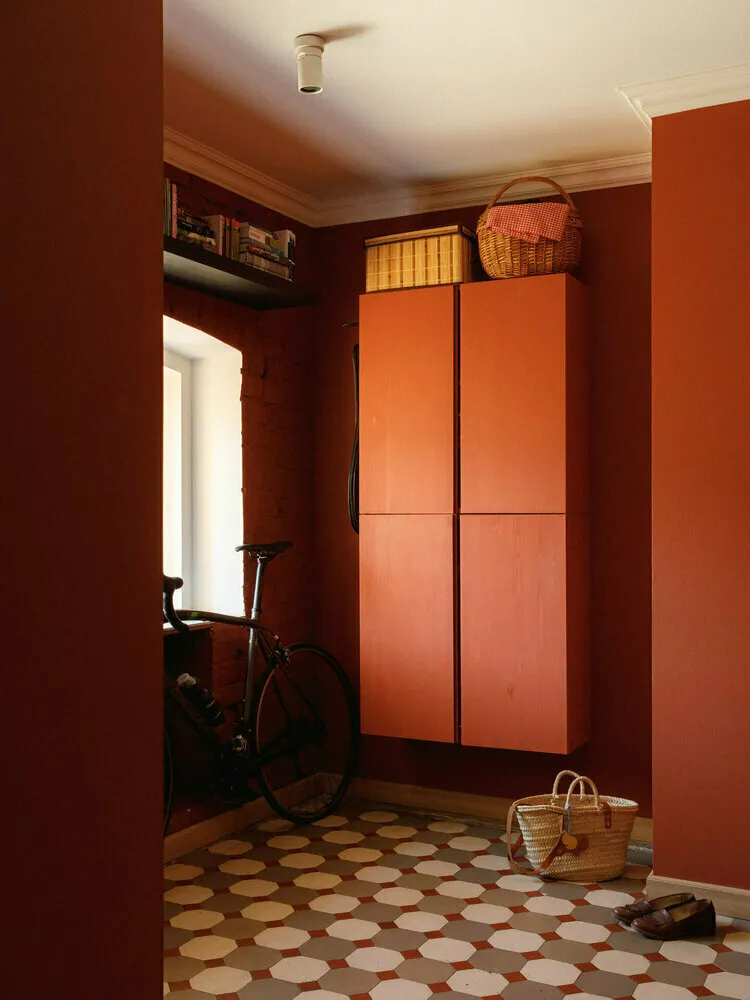
Design: Nina and Andrey Kharyin
Three zones requiring special attention
Zone #1: Entrance door and surrounding space
This is what you and your guests see first. Designers recommend:
- A quality entrance door (an investment in safety and comfort);
- Practical flooring near the entry (tiles, ceramic granite or vinyl laminate);
- A compact shoe rack or special tray for shoes;
- Good lighting in the entrance area.
Zone #2: Storage for outerwear
The optimal solution depends on the room size and number of family members:
- For small entrance halls — a wardrobe-closet with sliding doors;
- For medium-sized — a combination of closed wardrobes and open hangers;
- For spacious ones — a seasonal wardrobe system.
Zone #3: "Preparation station" before leaving
This is the place where you check your appearance and gather necessary items before leaving:
- A full-length mirror or at least to the waist;
- A small shelf or console for keys, bags and small items;
- Sufficient lighting to check your appearance;
- Optionally — a power outlet for charging gadgets.
Current techniques 2025: what is trendy and practical
Technique #1: Built-in invisible sockets
A modern entrance hall requires electrical outlets for charging gadgets, robot vacuum cleaners and other needs. Designers integrate them into furniture or use retractable blocks that do not compromise the aesthetic of the space.
Technique #2: Modular systems with transformation capability
Rather than monolithic built-in furniture, modular systems are becoming more popular that can be reconfigured when needed or supplemented with new elements. This is especially relevant for families with changing needs.
Technique #3: Multi-functional items
A bench with storage, a mirror with built-in hooks, a console-transformer — items that perform multiple functions save space and budget.
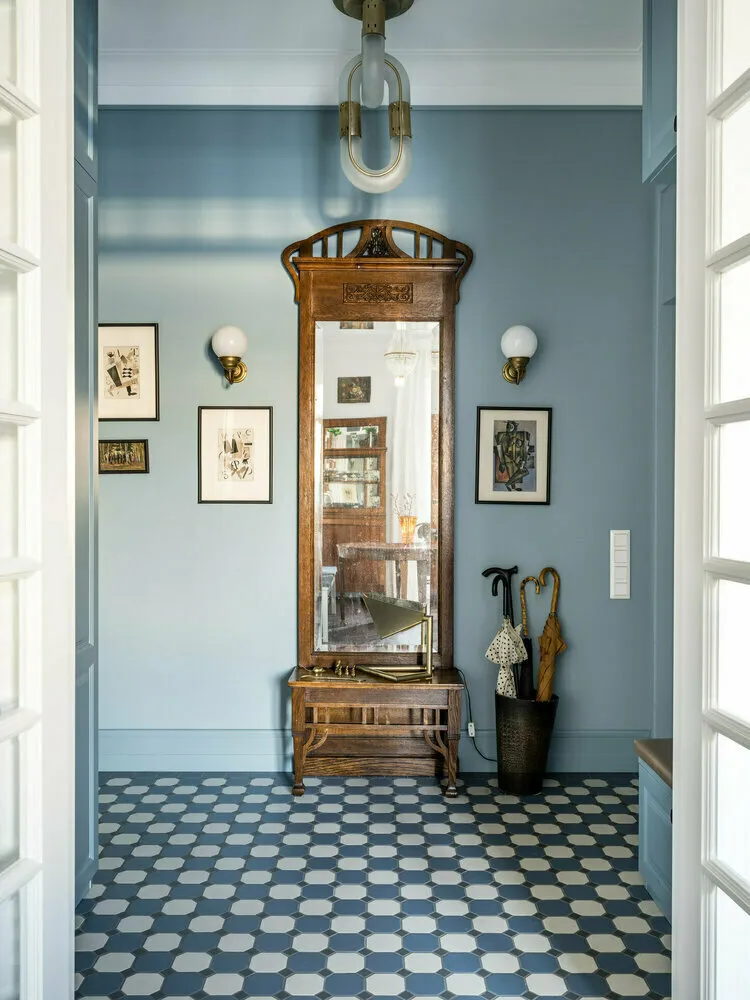
Design: Lina Zufarova
Practical action plan: where to start
Step 1: Analyze needs and habits
Before planning renovation, analyze how you use the entrance hall:
- How much outerwear requires daily access?
- How many pairs of shoes need to be stored in the entrance hall?
- What additional functions are needed (storing strollers, sports equipment etc.)?
Step 2: Optimize layout
Start with an empty space and gradually add only necessary elements, following the rule "function first, then aesthetics".
Step 3: Choose materials with a focus on practicality
For an entrance hall, durability and ease of maintenance are important:
- Flooring should be easy to clean from street dirt;
- Walls should be resistant to stains and minor damage;
- Furniture must withstand intensive daily use.
Step 4: Create multi-level lighting
Develop a lighting scheme taking into account all functional zones and the need to create visual volume.
Step 5: Add individuality through accents
Individuality to the space is added by accent elements:
- An unusual light fixture or chandelier;
- A stylish mirror in an expressive frame;
- Vibrant or textured decorative elements;
- Contrasting or patterned wallpapers on one of the walls.
Saving without compromise: what can be done by yourself
Some elements of a quality entrance hall can be made independently, saving significantly on budget:
Updating old furniture — repainting, replacing hardware, decorative finishing can transform even a Soviet wardrobe;
Creating a functional entrance area — combination of ready-made modules with homemade elements (shelves, seats);
Decorative elements — wall hangings, mirrors in homemade frames, wall hooks with interesting designs.
An entrance hall is not just a technical room for storing outerwear and shoes. It's the space that sets the tone for the entire house, creates a first impression and reflects the character of the owners. Using secret techniques from professional designers, you can turn even the most modest hallway into a stylish, functional and cozy space without extravagant costs.
Remember the main rule: in small spaces, every centimeter should work, and each item should perform a specific function. This approach not only saves the budget but also creates a harmonious space where it's pleasant to start and end each day.
Cover: Design project by Ekaterina Vasilyeva
Need a renovation specialist?
Find verified professionals for any repair or construction job. Post your request and get offers from local experts.
You may also like
More articles:
 Micro-Remodeling: 15 Ways to Refresh Your Interior Over the Weekend Without Major Expenses
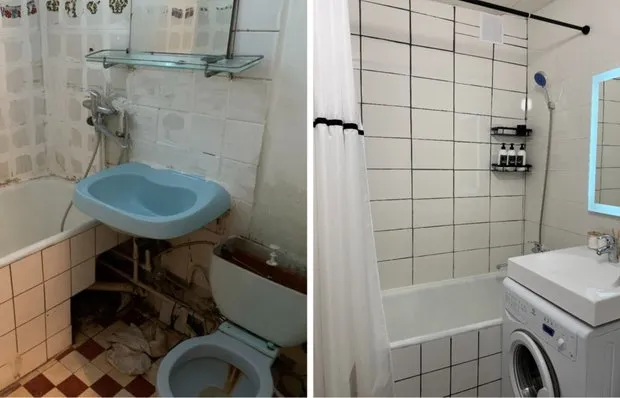 Before and After: Budget Bathroom Renovation 3 sqm by Yourself
 5 Bright and Bold Compact Apartments Under 40 m²
 Stylish and Cozy Home Items: 10 Trendy Finds
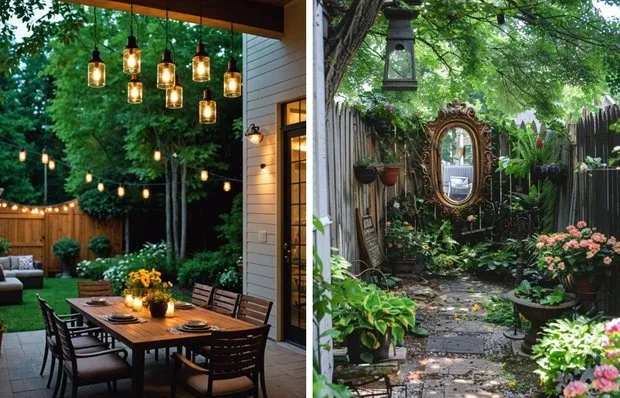 7 Budget Ideas for the Dacha That Will Make Neighbors Envious
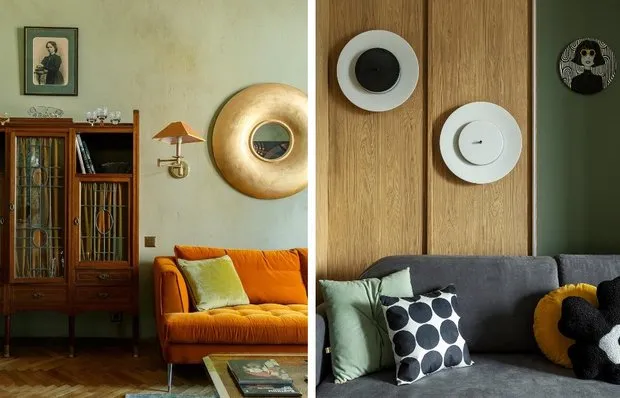 Wall Behind the Sofa: 5 Stylish Ideas for Decoration
 Why Repair Costs Rose by 40%: How to Do Quality Renovation in 2025 Without Going Bankrupt
 What Curtains Designers Choose: Tips + Beautiful Examples