How to Use the IKEA Kitchen Planner: Instructions + Tips
12 simple steps + images to help you understand
We asked designer Olga Kashpurava to explain how to use the IKEA planner and create your dream kitchen.
Olga Kashpurava - INTERIOR DESIGNER Her passion is creating functional, beautiful and cozy homes
Who will find the IKEA planner useful?
Everyone who is renovating and wants to buy a new kitchen, not necessarily IKEA. The "Method" kitchens are systems with a standard set of modules (like most manufacturers).
You can estimate combinations based on your dimensions and try different combinations and facade options.
Step 1: Visit the IKEA website

Step 2: Check details
Don't forget to log into your account or create one. After completing all actions, click the "Create New Project" button.

Step 3: Start planning
Before planning your kitchen, measure the room. The more accurate the numbers, the less likely you are to make mistakes or run out of space. All dimensions must be entered in millimeters.
After setting up the room settings, click the lock icon to prevent accidental size changes during work.

This is how the room looks in different modes.

Step 4: Choose cabinets

All settings are saved. The next cabinets will have the same facades, countertops, edging and baseboards. You can manually adjust handle positions — it's better to do this right away so you don't forget.

This is an example of what it should look like. You can arrange the lower cabinets in a similar way.

Step 5: Create the look of a built-in kitchen
Kitchens from "Method" come with frames of standard depth, width and height. Overlay panels will help integrate the kitchen into the space perfectly by closing gaps and creating a built-in appearance.

This is what it should look like.

Step 6: Add lighting
Then arrange the upper part of your kitchen in a similar way.

Step 7: Add appliances

Step 8: Change the depth of different wall cabinets

Step 9: Make double doors


Step 10: Add a dining table


Step 11: And lighting fixtures

Step 12: Save the project
All done! Don't forget to save your project :)

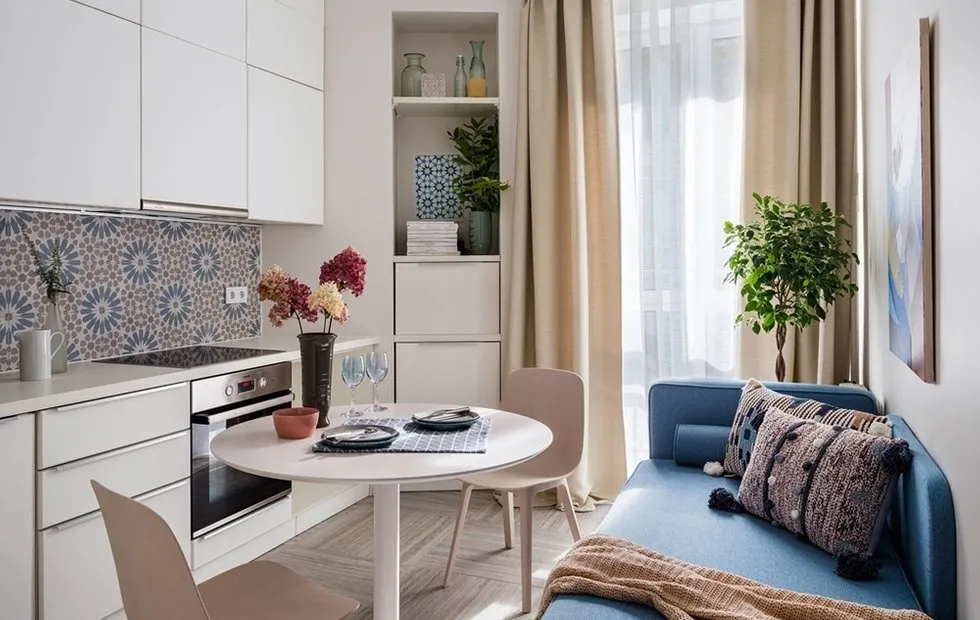
Cover image: Design project "Malitsky Studios"
Need a renovation specialist?
Find verified professionals for any repair or construction job. Post your request and get offers from local experts.
You may also like
More articles:
 How to Create a Cozy Home: 6 Ideas from Projects
 How to Deal with Anxiety When You're Always at Home
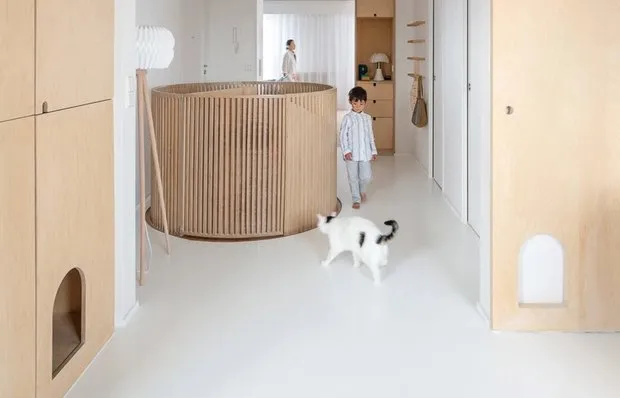 Entire Apartment Made of Plywood and Cat Lanes
 12 Things to Do on the Country Estate in Spring
 Wow Effect on the Kitchen: 14 Ways to Surprise
 How to Disinfect a Smartphone: Step-by-Step Guide
 How to Save Money on Summer House Maintenance During a Crisis?
 10 IKEA Products You Can Buy Online with Discounts