Sloped Roof
Perhaps nowhere in the house is there a more versatile space than the attic room under the roof itself. Here, you can create a relaxation area, a studio for artistic expression, a practical storage room, a guest room, or even a bedroom for a family member — the possibilities go on. The construction method of the sloped roof will vary depending on the intended use of the attic space.
A sloped roof is a system of wooden rafters supported by the load-bearing walls of a building, protecting the entire structure from atmospheric influences and defining the living space beneath its slopes. The goal of any experienced roofer is to complete the work so that the roof not only pleases the homeowner with its aesthetic qualities but also remains practical and easy to maintain.

Roofing System Preparation
The foundation for a sloped roof is always the floor joist system. It rests on the load-bearing walls and is typically made from wooden joists measuring 50 x 150 mm. If the attic will bear heavy loads, joists can be made from 150 x 150 mm timber.
The wall plate (mauerlat) runs along all load-bearing walls and forms the supporting perimeter. Additionally, a support zone must be established above the joists, where struts supporting the truss system will be installed. Holes must also be pre-cut into the joists to allow the feet of the rafters to fit securely.
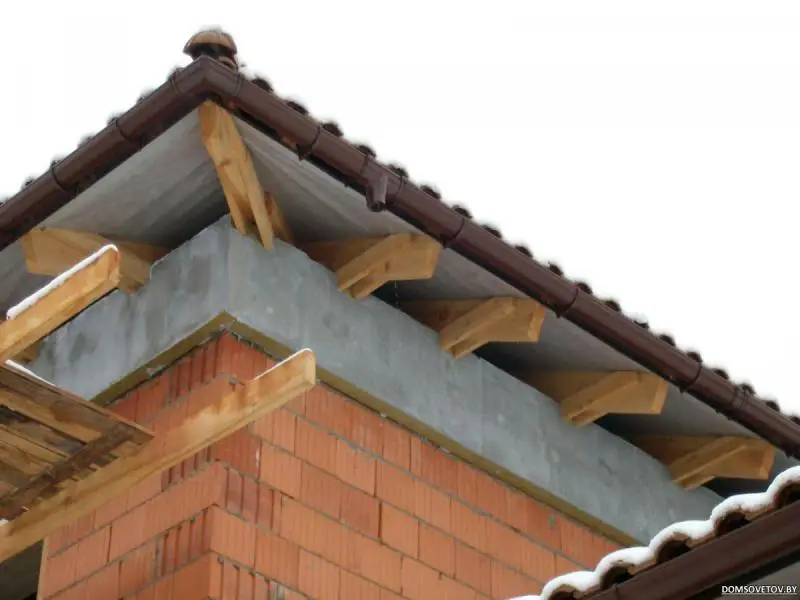
Joists extend beyond the exterior walls by at least 40 cm. This overhang protects the walls and foundation from rain and other precipitation, contributing to both structural integrity and visual appeal.
Joists (or headers) should ideally be made from a single piece of timber. If the distance between the nearest load-bearing walls is too great (and timber length rarely exceeds six meters), two pieces may be joined end-to-end. To minimize the negative effects of such joints, perpendicular ties are installed between the joists at intervals of 1–1.5 meters.
Struts resting on the support beam must be tied together with a 40 mm thick board or timber above the beam before the truss system is installed. The spacing of these struts ranges from 0.6 to 1.2 meters and depends on wind load and snow load per square meter, specific to the region.
Truss Installation
Rafters are installed immediately after both gables are completed. A sloped roof cannot be installed before gables are finished, as strong wind gusts could otherwise tear the incomplete roof away from the structure.
The truss system, resting on and embedded into the floor joists, connects at the roof ridge, while the struts serve only as additional supports. To increase overall rigidity, rafters in each row are tied together with a horizontal 50 x 150 mm timber at the height where the attic ceiling will be installed.
In construction, the most stable and reliable structure is the triangle. This shape should form precisely after rafters are installed and tied together with horizontal timber.
Roof Covering Installation
Sheathing is installed perpendicular to the rafters using untrimmed boards (20–25 mm thick) or sheet materials (plywood, oriented strand board). The choice depends on the type of roofing material used.
Over the sheathing, a waterproof membrane is laid with a minimum overlap of 15 cm, protecting the mineral wool insulation in the rafter spaces. Inside, rafters are covered with vapor barrier film and finished with gypsum board, wooden cladding, or block-haus.
Roofing materials are fastened to the base using various methods. For metal roofing or other sheet metal coverings, roofing screws with rubber washers are ideal. Screw heads are often painted to match the roof color. Onduline or asbestos-cement roofing is fastened with special nails featuring ridges that prevent withdrawal from the wood structure.
Need a renovation specialist?
Find verified professionals for any repair or construction job. Post your request and get offers from local experts.