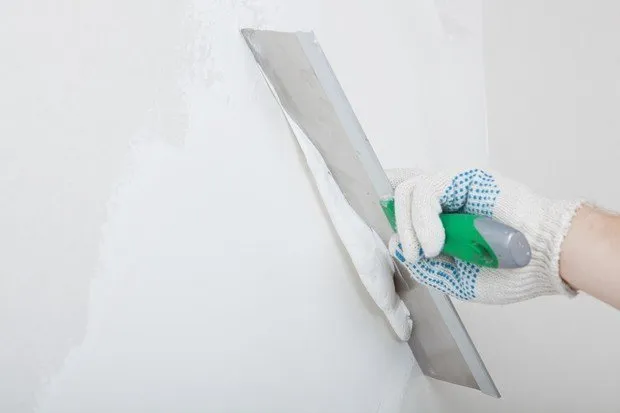
Quick Wall Leveling: 6 Pro Design Hacks
Wall leveling is one of the key stages in renovation. To choose the right materials, monitor the process and evaluate results, you need to understand the specifics of the technological process. Pavel Grishin, technical director of the company «Raummaster», shared some secrets.
Pavel GrishinExpertTechnical Director of the company «Raummaster»
1. First, assess the degree of unevenness
Before starting the leveling process, it is important to evaluate the scale of work. The easiest way to determine wall flatness is using a construction level. For this, you need a straight rule (a ruler) whose height equals the ceiling height in the room. You should place the tool at the corners of the wall so that parallelism is maintained, and the presence or absence of a gap will indicate surface flatness. If the wall being evaluated is in very poor condition and has significant deviations, it might be easier and faster to demolish this partition and rebuild it (if possible).
2. Choose the leveling mixtureWhen selecting a leveling composition, it is important to pay attention to the maximum thickness of the layer that will be applied. For minor surface defects, I recommend using weber.vetonit TT plaster, which is perfectly applied in a 2-10 mm layer and helps avoid material waste. This plaster is also suitable for humid rooms, where only cementitious plasters can be used.
To hide significant surface irregularities, use plastic gypsum plaster weber.vetonit profi gyps: it can level differences up to 50 mm in one layer (locally up to 100 mm). For layers over 30 mm, it is essential to use reinforcing mesh for additional surface adhesion with the plaster layer due to the significant weight of the plaster layer (especially when using cementitious plaster weber.vetonit TT40).
 3. Prepare the surface
When working on smooth concrete or monolithic bases, treat the cleaned surface with bonding primer weber.prim contact to create a rough surface. This allows the thick plaster layer to adhere better to the smooth base. For rough surfaces (such as foam blocks or bricks), use primer weber.prim multi.
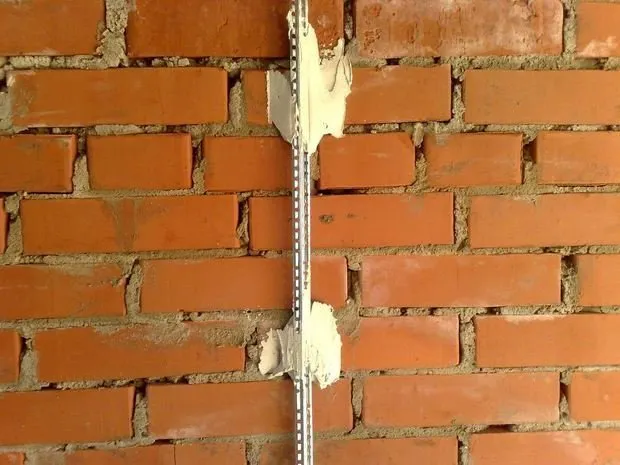
 4. Use leveling stakes
Before plastering, you must set the final plane for leveling — here a regular or laser level will be helpful. Use metal, plastic, or wooden stakes for this purpose — place them at the width of the rule. Keep in mind that metal and plastic stakes need to be removed from the wall after the plaster mixture dries: during work, part of the protective layer is stripped off, and in a humid environment, the stake becomes prone to corrosion — traces may appear on the finishing decoration.
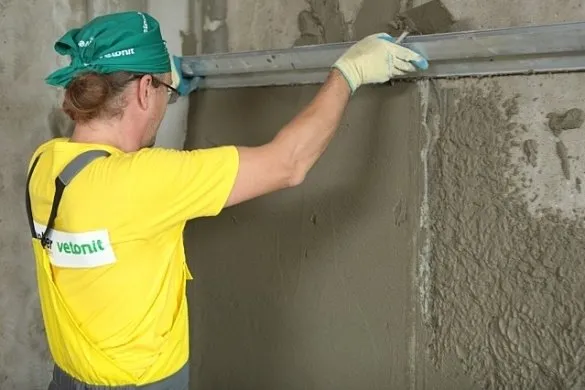
 5. Apply the mixture from bottom to top
Spread the mixture in a direction from bottom to top. Add the mixture until the plaster layer reaches the level of the stakes. After that, carefully remove the rule and fill the remaining space with the mixture. At the junction of walls and ceiling, angles form, which must be made completely equal — this can be done using a level. Special attention should be paid to areas where baseboards and door frames meet, as irregularities are especially noticeable in these places.
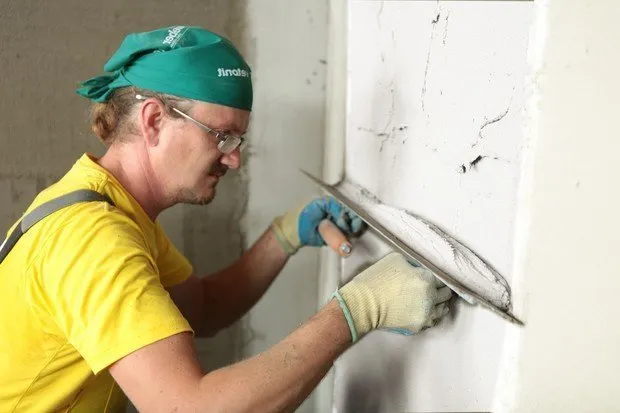 6. Don't forget about finishing leveling
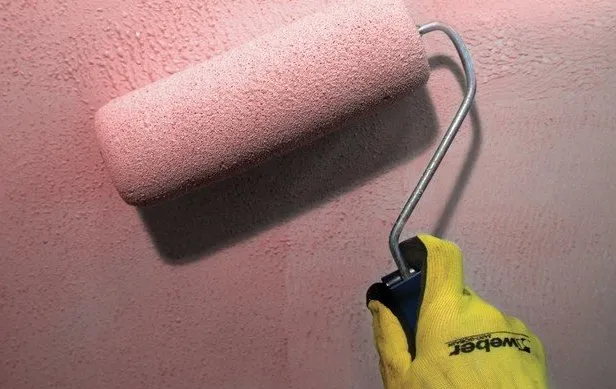
After the plaster layer has fully dried, you only need to remove minor wall irregularities using finishing putty for dry rooms weber.vetonit LR+. For humid rooms, use cementitious putties weber.vetonit VH and weber.vetonit VH Grey. Apply the putty manually using a metal trowel or mechanically in thin layers from 1 to 5 mm. Apply each subsequent layer over a completely dried previous one: drying time is about a day. If you plan to paint the walls, an additional finishing layer of ready-made super-finish putty weber.vetonit LR Pasta will be needed.
 Additional 3 Tips from the Blogger
Almost all owners of old apartments and new constructions encounter uneven walls. Therefore, it is important to understand the technological process to avoid mistakes. Blogger Andrei Shayter answered the most relevant questions.
Andrei ShayterExpertProfessional builder, video blogger.
1. When should stakes be removed?
The timing of stake removal depends on the chosen technique. If a master uses so-called «glazing» (smoothing) of the surface during plastering, stakes must be removed immediately once the mixture on the wall begins to set. Grooves from stakes should also be filled in right away for a uniform surface. However, this method is used by only a minority of craftsmen in real practice. It's much simpler and faster to do rough plastering, then remove the stakes the next day. Stakes can also be removed after a week — the timing of removal is not critical.
2. Can gypsum plaster be used on a balcony or in a humid room?
Gypsum plaster should not be used in places where it comes into constant contact with water. Many manufacturers strongly recommend using cement-based mixes on balconies and in bathrooms.
3. Should window sills be plastered?
Plastered window sills, despite all criticism of this approach, have every right to exist. If done correctly, according to technology, with reinforcement and using the appropriate profile, there will be no problems. Keep in mind that this is a rather labor-intensive task and the work will cost more than sills made from sandwich panels or gypsum board.
On the cover: design project Buro 19.23.
Need a renovation specialist?
Find verified professionals for any repair or construction job. Post your request and get offers from local experts.
You may also like
More articles:
 How to Properly Plan Lighting in an Apartment
 Hydroisolation of Bathroom: Step-by-Step Guide
 How to Install a Closet in a Niche: Pro Tips
 Carpet in Living Room and Other Rooms with Photos
 10 gadgets for home security
 Interior Design of Small Apartments in Various Styles with Photos
 TV Placement Options on Kitchen with Photos
 Interior of Living Room in Provence Style, Kitchen-Living Room Design with Photos