Repair in Practice: How to Replace Cracked Tile
Several damaged tiles on the wall or floor are not a reason to replace the entire covering. We will tell you how to carefully remove an element with a chip, choose the right adhesive and lay a new tile.
Regardless of how high-quality the wall and floor cladding in your apartment is, nobody is immune to unexpected situations: one careless move, and scratches and cracks appear on the surface. Several damaged tiles are not a reason to replace the entire covering. Our instruction will help you carefully replace an element with a chip on your own.
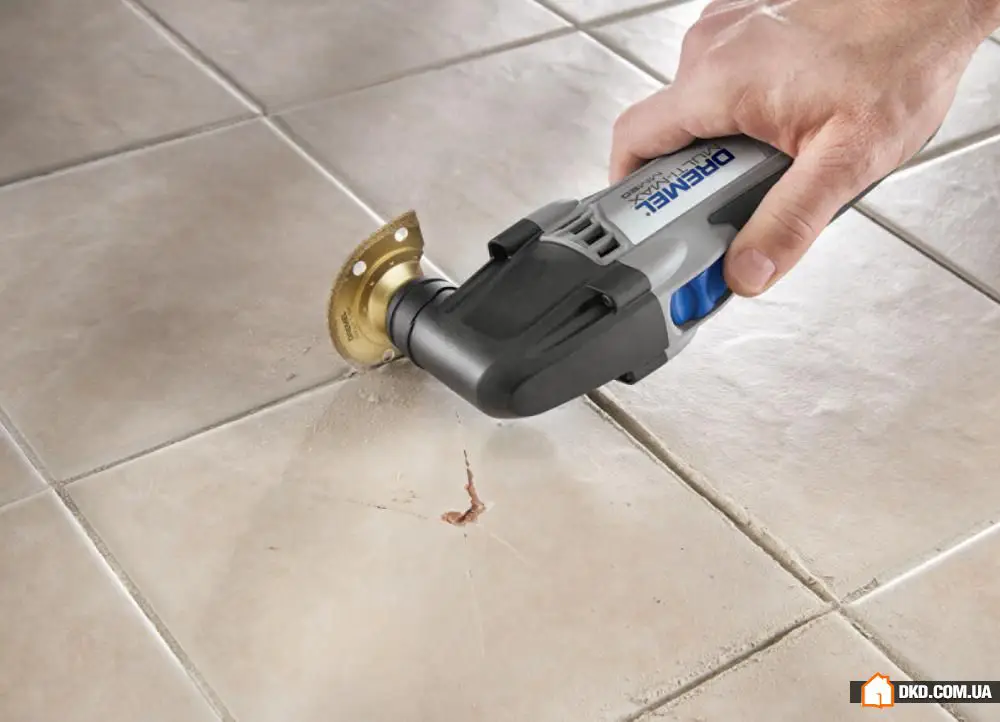
Step #1: Remove Grout
Whether you are working with wall cladding or floor covering, the first step is to remove the grout around the damaged tile. For this, a compact tool with a cement removal attachment or a special trowel will come in handy. The second method is physically more difficult but cheaper.
Step #2: Remove the Tile with a Crack
To remove the damaged tile, use a chisel and hammer or an electric drill. Ceramic tiles are easier to remove than ceramic tiles – in the latter case, you need to make a support point for the chisel. Drill several small-diameter holes in the corner of the tile or at the crack location at low RPMs to avoid damaging the adjacent tile. Then, using the chisel as a support point, tap it gently with a hammer to break off a small triangle from the edge – after that, breaking and removing the tile in parts will not be difficult.

Step #3: Clean the Surface from Old Adhesive
To install a new element in the freed space, clean the surface from old adhesive, otherwise the new layer of fixing mortar will not lie flat, and the tile will fall off in a few days. The easiest way to remove adhesive is with a metal spatula. Before applying the new layer, protect adjacent tiles with painter's tape.
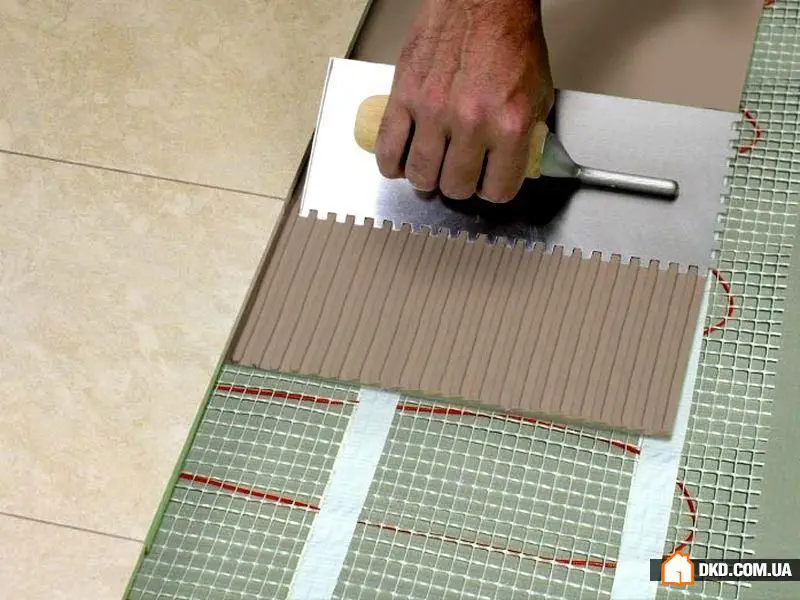
Step #4: Apply Adhesive Mixture
Spreading adhesive for new tiles with a notched trowel is not difficult, but it's important to choose the adhesive carefully. Usually, for small-sized tiles (up to 30 by 30 cm) in a bathroom or kitchen, water-soluble cement-based adhesive is used (cost varies from 5 UAH per kilogram).
For large-format tiles, ceramic granite, or elements laid on a "warm floor," use high-strength or two-component joint fillers based on epoxy (from 100 UAH per kilogram).
Adhesive can be applied to the wall or to the tile itself – however, in the latter case, the wall should be slightly moistened so that the porous surface of the tile does not draw moisture from the adhesive and the tile falls off later.
Important to Know:
The optimal amount of adhesive is selected according to the manufacturer's instructions. The consumption of the mixture depending on the tile size should be indicated on the packaging. If you save on adhesive, the tiles will not fit tightly; too much consumption will cause the tiles to protrude from the general row, making the surface uneven.
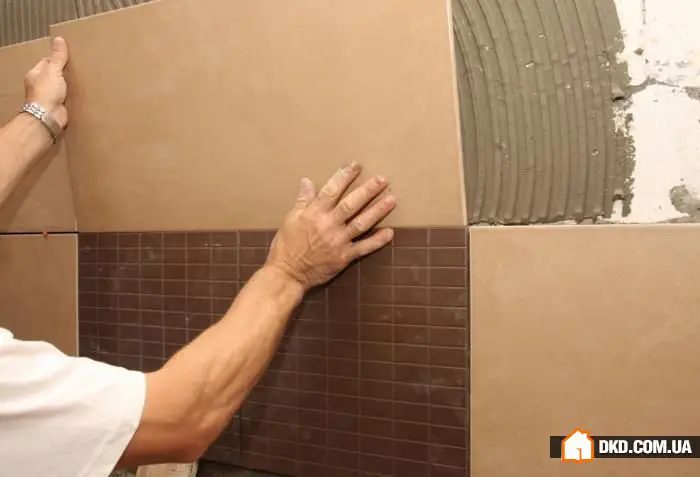
Step #5: Place the New Tile
The final touch: place the new element on the adhesive and press it firmly. To get even joints, use special plastic crossbars – they are inserted between the tiles and can be different in size depending on the desired gap width. The drying time of the mixture depends on the manufacturer, but in any case, it is best to grout the joints with cement or silicone-based grout no earlier than one day later.
When the adhesive has dried, remove the plastic crossbars and definitely grout the joints with material of the same color as during the initial repair: walls will not only look aesthetically pleasing but also won't suffer from mold. Apply grout with a special rubber spatula that won't scratch the tiles, and leave for another day. For joints with a bathroom or sink, it's best to use sealant to prevent moisture from penetrating under the plumbing fixtures.
Need a renovation specialist?
Find verified professionals for any repair or construction job. Post your request and get offers from local experts.
You may also like
More articles:
 Holiday Comes to Us: 25 Best Examples of New Year's Interiors
 How to Save Money on Kitchen Renovation: 5 Practical Ideas
 60 Homes That Everyone Would Love to Live In
 How to Decorate an Interior for Book Lovers: Real Example
 The Stars Say: Interior Horoscope for 2015
 16 Creative Ideas for Wood Storage Near Fireplace
 Course to Comfort: 10 Simple Feng Shui Rules
 Guide to Furnishing Rental Apartments: 7 Best Ideas