How to Make a Display Cabinet by Yourself
Share on Twitter
Post to Blog
The basis for these display cabinet and bookcase is a common basic modular element. A home craftsman can decorate one of the rooms in their apartment with a favorite piece of furniture.
Either of the two considered pieces fits well with modern trends in furniture making. The combination of natural wood color and black-finished details is characteristic of their design. Details from ash wood plywood beautifully frame dark shelves and give the item noble features. Such a cabinet largely defines the character of the interior.
The simpler item is a bookcase. Its appearance is rather strict. This impression is enhanced by intermediate shelves made of natural wood.
The construction of the display cabinet compared to the bookcase is more complex, as it includes some additional elements: three sliding drawers, two glass doors in the upper part of the cabinet, and a triangular rail. In addition, lighting must be installed using halogen lamps and a step-down transformer placed behind the rail.
The display section of the display cabinet is closed by two glass doors. In its lower part, there are three large sliding drawers with wooden front panels.
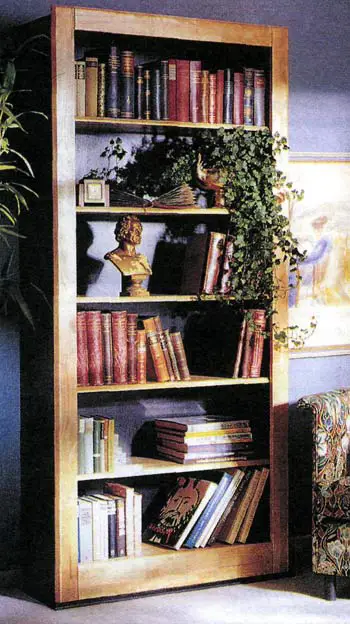
Bookcase Made by Yourself
Strict and clear lines are characteristic of the design of a bookcase with light wood details.
Installing Glass Doors
For lightweight glass doors (as in this case), you can use screw-type spring clips. Larger doors should be mounted on screwed-on hinges. For this, holes must be drilled in the glass (it is better to do this at a glass workshop) for mounting the hinges.
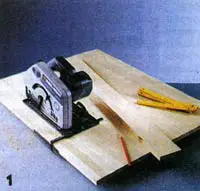
Cutting Plywood
It is best to cut plywood with a hand circular saw with a parallel fence or guide rail.
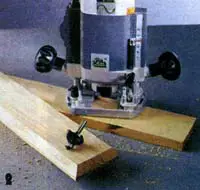
Drilling Holes in Side Panels
Four holes for shelf supports are drilled into the side panels at several levels. An electric drill is mounted on a drilling fixture.
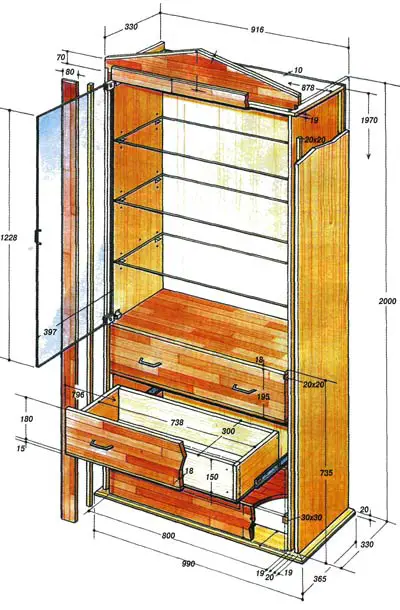
Display Cabinet Construction
Display Cabinet Construction
The side panels are glued from two pieces of plywood, with 20×20 mm blocks in between. Optionally, oak or pine elements can be used instead of ash ones for decoration.
Each load-bearing side wall of the basic structural element consists of two plywood sheets (or MDF) with 20×20 mm blocks inserted between them. The inner panel of the side walls is 10 mm narrower than the outer one, which creates a kind of flange on the back side, allowing the rear wall to be installed flush with the back edges of the outer panels of the side walls. The front edges of the walls are covered with moldings, which are attached as follows: a block is glued to the back of the molding and then inserted between two panels forming the side walls. Moldings are installed only after finishing the cabinet elements.
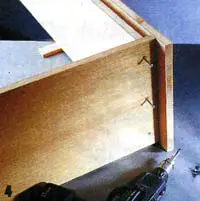
Attaching the Cabinet Top with Screws
The cabinet top is attached from above using screws (three screws per side). Holes for the screws must be drilled precisely in the center of each internal panel's edge of the two-layer side walls.
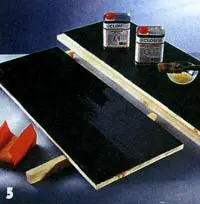
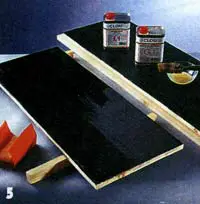
Finishing with Black Stain
Before assembling the cabinet, all its cabinet parts are first finished with black stain using a wide brush, then sanded, treated with primer, and finally coated with lacquer.
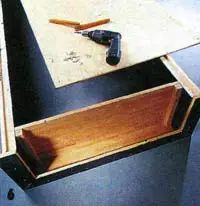
Assembling the Cabinet Base
The cabinet base is assembled from three parts, which are cut at an angle and clamped together from below with screws. The bottom is attached from above to the side support blocks. The rear wall is inserted into the flange and secured with screws.
Installing Vertical Moldings
Vertical moldings are installed after finishing. Applying glue to the contacting surfaces, the blocks attached to the back of the moldings are inserted between the panels of the side walls and tightened with large clamps.
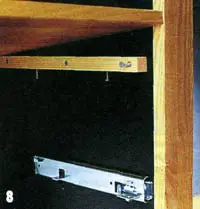
Securing Hidden Shelf
A wooden shelf separates the upper display section of the cabinet from the lower part with sliding drawers. This shelf is mounted hidden on support blocks screwed to its bottom. The sliding drawers move along telescopic guides attached to the side walls.
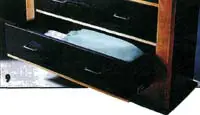
Large Sliding Drawers of the Display Cabinet
Narrow strips of light wood, finished with furniture wax or clear lacquer, contrast beautifully with the dark front panels of the sliding drawers.
To make a display cabinet (or bookcase) truly look beautiful, it is important to correctly select the materials needed for its construction. In this case, the side walls of the cabinet are made from 19 mm thick plywood with veneer. The same material is used to make the cabinet top and the drawer units.
All front parts (drawer fronts, moldings, and triangular rail), as well as the bottom and shelves, are cut from 18 mm thick ash plywood. For the rear wall, 10 mm thick plywood is quite suitable.
Glass doors and shelves (glass thickness – 6 mm) should be cut at a glass workshop. The edges of these items are also polished there.
Hardware: 6 telescopic guides for sliding drawers; 4 hinges for mounting glass doors.
Before finishing, the cabinet is assembled to check the proper fit of its elements and then disassembled. All parts made from plywood and drawer fronts are painted with stain in black color, sanded, primed, and coated with transparent matte lacquer. Final assembly of the cabinet is done after finishing its elements.
Finishing Natural Wood
Instead of transparent lacquer, wooden parts can be coated with liquid furniture wax, which is applied with a brush and rubbed in with a sponge.