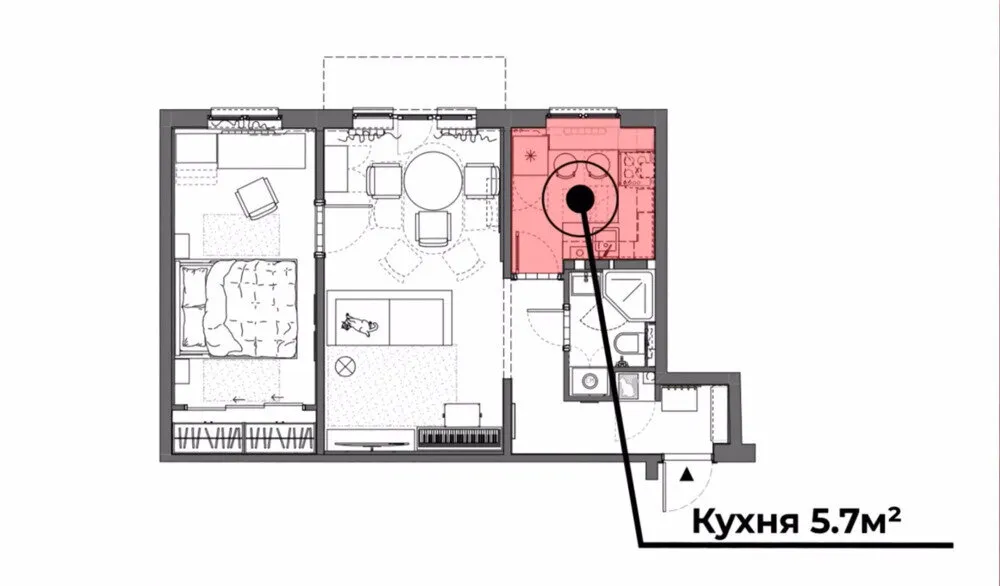
Housing Estate Kitchen: Before and After — How 5 m² Was Transformed Into a Functional Space
How to Turn a Problematic Area into the Heart of Your Home — and Stay Within Budget
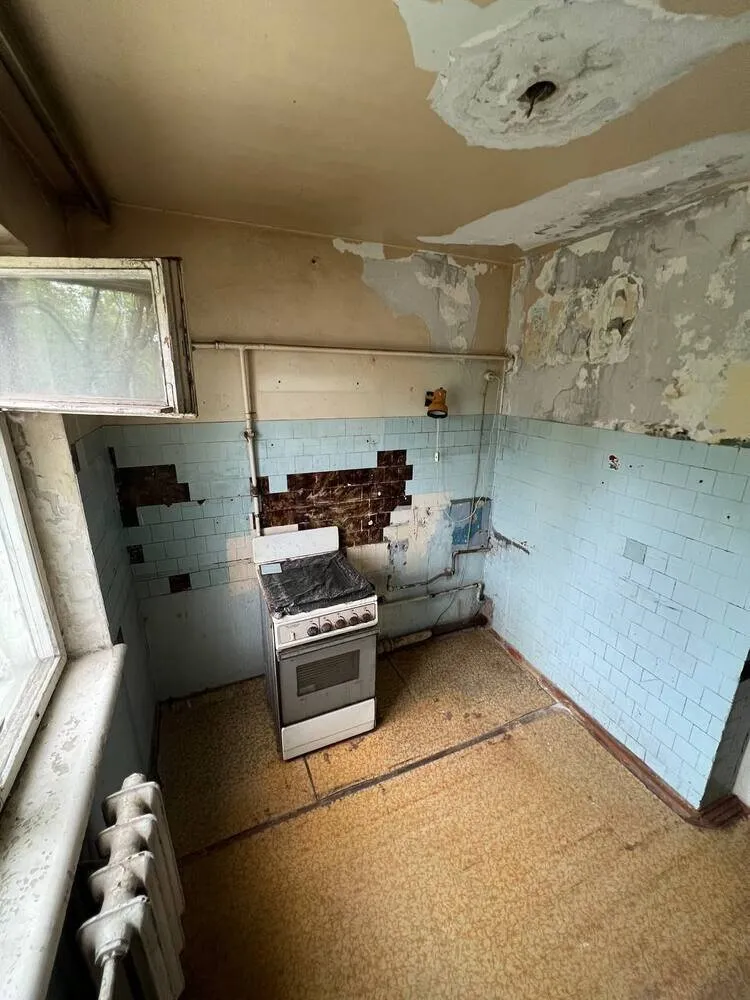
Kitchen in a 1963-built housing estate apartment. The flat had been abandoned for ten years. Old wooden windows, cast iron radiators under multiple layers of paint, a Soviet-era gas heater and just 5 square meters to accommodate the entire life of a family.
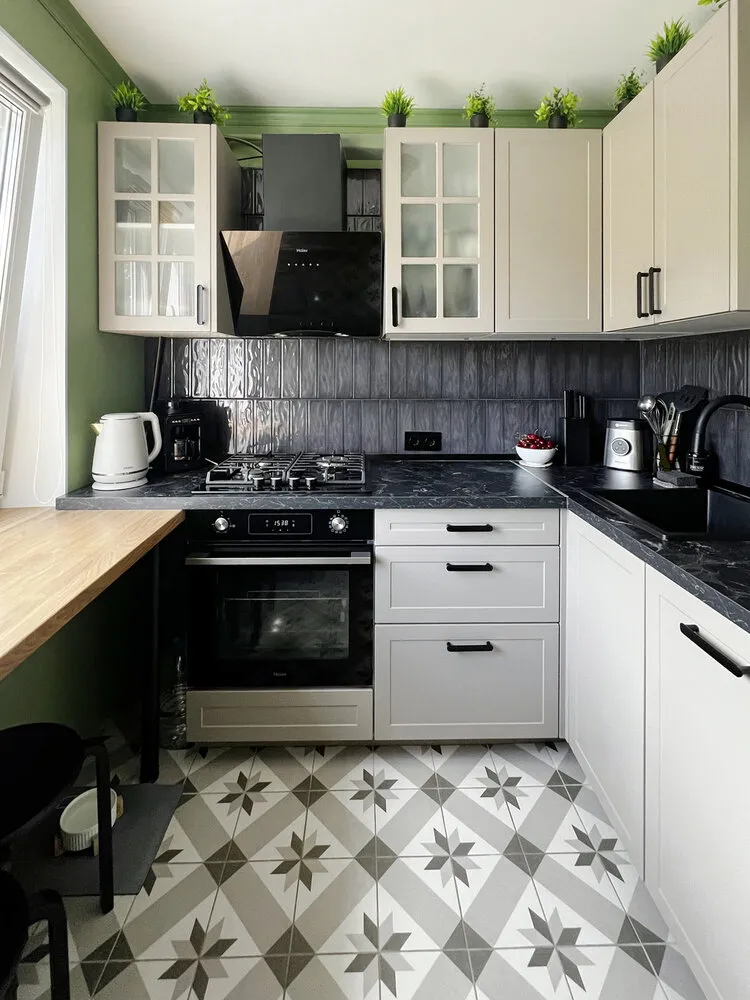
Now take a look at what was achieved after renovation: a stylish green kitchen with full appliance set, thoughtful storage and even an additional bar counter. Designer Oksana Barnash showed how to transform a problematic area into the heart of your home — and stay within budget.
 Before: List of Problems
Designer saw the kitchen only after complete demolition, but problems were obvious:
- Lack of hot water — only a gas heater;
- Old wooden windows with drafts;
- Cast iron radiators under several layers of paint;
- Worn-out utilities;
- Limited space for appliances;
- No clear idea of how to fit everything into 5 square meters.
"The apartment looked terrible. It was an old building where no one had lived for 10 years. The main condition during work with a housing estate was complete demolition," — Oksana recalls.
 After: Functional Transformation
Now the same 5 square meters accommodate:
- A full kitchen set with maximum storage;
- All necessary appliances: cooktop, oven, range hood, refrigerator;
- Dishwasher;
- Food waste disposer;
- Gas heater (updated);
- Additional workspace by the window;
- Carefully planned storage system.
 How It Was Possible to Fit the Impossible
- Layout: G-shaped system. Used two walls to maximum. The G-shaped layout in small kitchens is a classic that works reliably.
- Window sill transformer: the main find — converting window sill into additional countertop. A 62 cm thick veneered particle board gave an extra meter of working surface.
"According to the plan, this was a breakfast area, but it became convenient as an additional workspace," — says the designer. - Smart countertop: the Laminated Particle Board (LDP) countertop doesn't just cap the workspace — it wraps around cabinet sides, creating a cohesive and elegant look. A simple trick that doesn't increase the budget but dramatically changes perception.
The dishwasher was placed beside the sink — a standard but effective solution. Space under the sink freed up for more important storage systems and waste disposer.
"They said you can't install a food waste disposer in secondary housing, but it's individual — we checked the pipe and sewage conditions," — explains Oksana.
 Gas Heater: From Problem to Solution
They planned to hide the heater in a cabinet, but technical issues arose.
"When we placed it higher, it turned out that it didn't work correctly due to insufficient air duct length. We had to lower it 10 cm below the main unit," — explains the designer.
The clients decided not to cover it with an additional cabinet — so they always see that the equipment is in good working order.
Color TransformationBefore: dull walls of uncertain color.
After: deep, slightly dusty green.
"Color should be multi-layered, deep and a bit dusty. On the kitchen we allowed ourselves to play with color a little," — Oksana shares.
Fronts are made from milled MDF with classical lines. Two upper cabinets with matte glass complement the idea of glass blocks above doorways.
Storage: Every Centimeter WorksLower Zone:
- Under sink: multifunctional cabinet with disposer;
- By the stove: sliding drawers for cutlery, grains and utensils;
- Corner cabinet: maximum depth utilization.
Upper Zone:
- Left cabinet: first aid kit, cat food;
- Right cabinet: dishes, coffee accessories;
- Above sink: dish drying rack.
Some cabinet fronts are without handles — a push-to-open system is more convenient in tight spaces.
Practical Changes- Windows: wooden → double-pane plastic;
- Radiators: cast iron → modern bimetallic radiators;
- Lighting: general ceiling light + task lighting;
- Ceiling: suspended (saved from flooding neighbors after a few months).
- Kitchen set: 115 thousand rubles;
- Appliances with refrigerator: 175 thousand rubles;
- Total cost: 290 thousand rubles.
At the same time, they got a fully equipped kitchen with dishwasher, waste disposer and additional workspace.
What Changed Fundamentally- Functionality: from zero to maximum. Now you can cook, wash dishes, store food and even have breakfast in the kitchen.
- Aesthetics: from a faceless space to a stylish green kitchen with classic elements.
- Ergonomics: everything within reach, carefully placed appliances and convenient storage systems.
 Key Takeaways
Even 5 square meters in a housing estate isn't a death sentence. Thoughtful layout, utilizing every centimeter and well-planned appliance selection allow creating a full kitchen.
Key principles of transformation:
- Use vertical and horizontal space to the fullest;
- Transform window sills into work surfaces;
- Choose compact but fully functional appliances;
- Don't hide utilities if they cause problems;
- Invest in smart storage systems.
The result — a kitchen where you want to cook and spend time, despite the modest area.
Need a renovation specialist?
Find verified professionals for any repair or construction job. Post your request and get offers from local experts.
You may also like
More articles:
 10 Dining Tables: Trendy Models for Your Interior
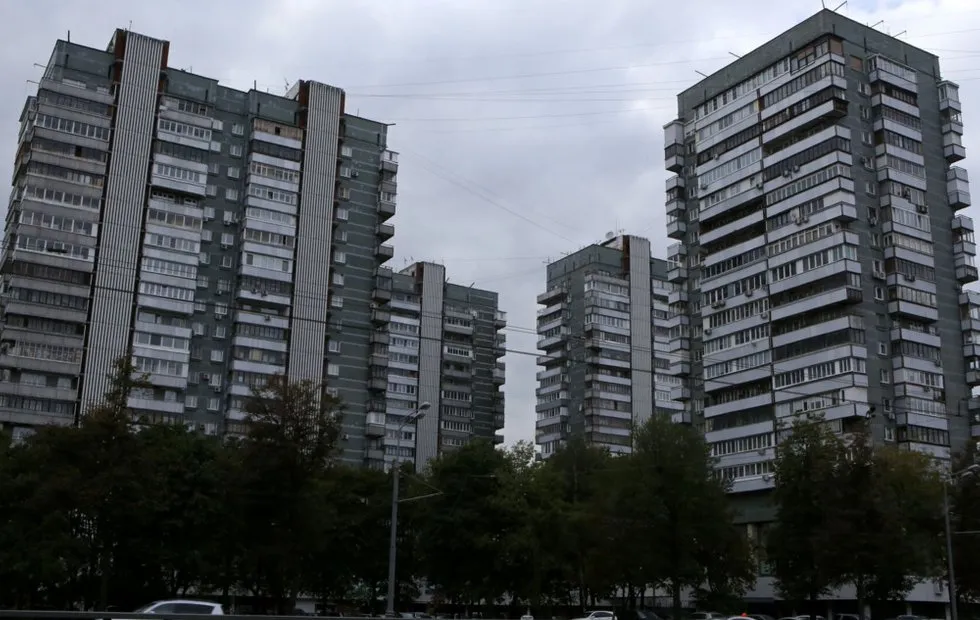 Myths or Truth: Secrets of the Strangest Houses in Moscow
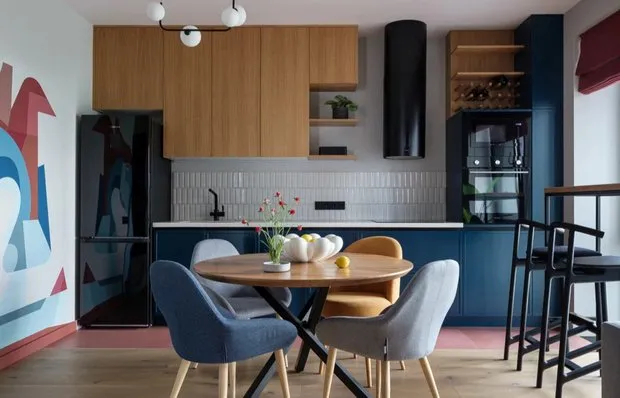 Interior Design Trends 2025–2026: Key Directions
 Uma Thurman in the New 'Dexter': Secrets of the Role and What the Actress Revealed About Filming
 Electricians Scammers: 5 Schemes That Will Cost Hundreds of Thousands
 China Town: Why the Main Trading Quarter Was Named After Celestial Kingdom
 Where to Place a Bed in a Small Studio: 5 Best Solutions
 5 Beauty Secrets of Audrey Hepburn That Still Work Today