How to Properly Groove Concrete and Brick Walls
Electrical wiring must be reliably protected and fire-safe. In addition, wires are laid in such a way that they do not interfere with normal human life and do not spoil the interior. One of the most popular methods of hidden wiring is laying wires in grooves. They represent longitudinal recesses in the foundations.
Wall grooving for wiring is usually done on plaster. However, the thickness of the plaster layer may be insufficient for the groove depth, and then brick or concrete wall grooving occurs.
Electrical wiring installation work is regulated by SNiP 3.05.06-85. Before performing wall grooving, the electrical wiring plan must be approved.
It is undesirable for a non-professional person to handle wiring installation himself, except under the careful supervision of an experienced electrician.
Wall grooving has many nuances, especially when it comes to walls in panel houses.
Factory-produced floor slabs and internal wall panels have channels for wires and niches for electrical installations. New wiring is run through these same voids. If the original wire layout, laid along these paths, does not suit and a reconfiguration is planned, grooving can be done in plaster if it exists on top of the panel.
Grooving Walls for Wiring
Electrical wiring must be reliably protected and fire-safe. In addition, wires are laid in such a way that they do not interfere with normal human life and do not spoil the interior. One of the most popular methods of hidden wiring is laying wires in grooves. They represent longitudinal recesses in the foundations.
Wall grooving for wiring is usually done on plaster. However, the thickness of the plaster layer may be insufficient for the groove depth, and then brick or concrete wall grooving occurs.
Electrical wiring installation work is regulated by SNiP 3.05.06-85. Before performing wall grooving, the electrical wiring plan must be approved.
It is undesirable for a non-professional person to handle wiring installation himself, except under the careful supervision of an experienced electrician.
Wall grooving has many nuances, especially when it comes to walls in panel houses.
Factory-produced floor slabs and internal wall panels have channels for wires and niches for electrical installations. New wiring is run through these same voids. If the original wire layout, laid along these paths, does not suit and a reconfiguration is planned, grooving can be done in plaster if it exists on top of the panel.
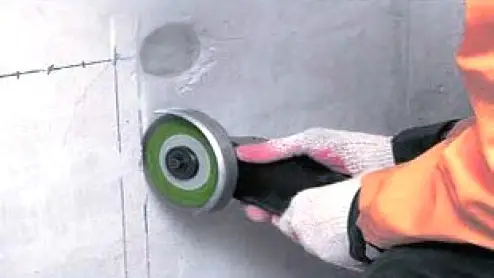
Photo 1 – Grooving Walls with a Angle Grinder
Some General Rules for Grooving Walls for Wiring:
- You cannot groove in load-bearing wall structures, floor slabs, and horizontal joints (e.g., if a wall consists of two panels stacked on top of each other, you cannot groove the joint).
- As with any method of wire routing, wires must be laid strictly horizontally or vertically. Consequently, grooves are made in the same way. Layout is marked and checked for horizontal/vertical alignment with a level.
- The distance between horizontally laid wires and floor slabs must not exceed 150 mm. In building structures thicker than 80 mm, wires must be laid along the shortest routes.
- Vertical grooves (as well as horizontal ones) are not made in wall corners and near door and window openings. The distance between the groove and such locations must be no less than 10 cm.
- Before marking walls for grooving, check the spots where grooves are planned to ensure there is no old wiring, using a wire detector or a special indicator screwdriver.

Photo 2 – Bosch GNF 35 CA Groover
When the layout is in agreement with the plan and the above requirements are followed, actual grooving begins. To perform this dusty work, protective equipment is needed such as a respirator, safety glasses, and gloves.
Grooves are made with a perforator, angle grinder, or groover. Each method has its own advantages and disadvantages.
Perforators are better for plaster, while angle grinders work better on concrete. Dust-free grooving is ensured with a groover equipped with a vacuum cleaner.
Cost of Grooving
- Wall grooving for wiring, price in Kyiv – from 20 hryvnia/meter.
- Wall grooving for wiring, price in Moscow – from 100 rubles/meter.
Wall Grooving for Wiring, Video:
Wiring Under the Ceiling
Installing wiring in an apartment under the ceiling is a convenient option that allows choosing the shortest routes for wires and reducing wall grooving.
When planning how to route wiring during renovation, many choose ceiling grooving. However, it should be remembered that according to standards, grooving in floor slabs is not allowed. Grooves are made on the ceiling plaster instead.
Distribution boxes and wires leading to lighting can be hidden under a suspended ceiling or a stretch ceiling, more precisely behind them.
The wiring will be dusty only in the part where walls are grooved for wire runs to sockets and switches, and if the walls are covered with gypsum board, this may not be necessary.
Wiring to the ceiling is secured using plastic anchors with clamps or metal fasteners. Wiring hidden under a stretch ceiling is a convenient way to run wiring, find it, and replace faulty wires in the future if needed.
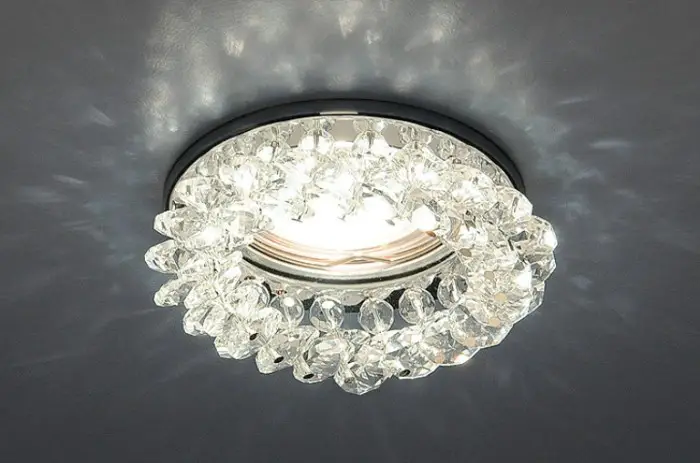
Photo 3 – Wiring Under a Stretch Ceiling
Wiring for Recessed Lights
Due to the popularity of suspended ceilings, the popularity of recessed lights has increased. They provide even lighting and serve a decorative function.
How to wire recessed lights – a more complex question than how to run wiring for a regular chandelier. To ensure sufficient lighting, it is necessary to calculate their number based on the size and conditions of the room and type and power of the bulbs (incandescent or halogen).
Wiring for recessed lights with a working voltage of 220V is standard copper wire suitable for lighting circuits and regular electrical installations. The wire in a conduit, secured to the ceiling with aluminum or plastic fasteners, is run to each light fixture from the distribution box. From there, the wire goes to the switch, with each button controlling a group of lights.
The installation of the lights themselves is done by connecting wires and securing the fixtures in the suspended structure. If lights for halogen bulbs with 12V voltage are used, a step-down transformer must be installed.

Diagram 1 – Connection Scheme for Standard Recessed Lights (220V)
Video: Wiring for Recessed Lights:
Need a renovation specialist?
Find verified professionals for any repair or construction job. Post your request and get offers from local experts.