Ceiling from Gypsum Board by Yourself. How to Make a Ceiling
Gypsum Board Ceiling
Why do you need a gypsum board ceiling, what are its charms and what are its drawbacks?
If your ceiling is not perfectly flat, you will have to spend considerable effort to level it. Of course, you can spend a lot of time and carefully plaster the difficult "roof," but this work is labor-intensive and will cost you a lot.
A gypsum board ceiling is much easier to install, saves your money, energy, and time. In addition, you can embed all kinds of ceiling lights in gypsum board, which is impossible with a regular ceiling.
Also, in a suspended ceiling, you can hide utilities, pipes, beams and other unsightly things. Another advantage of a suspended ceiling is that it improves sound and moisture insulation of the room.
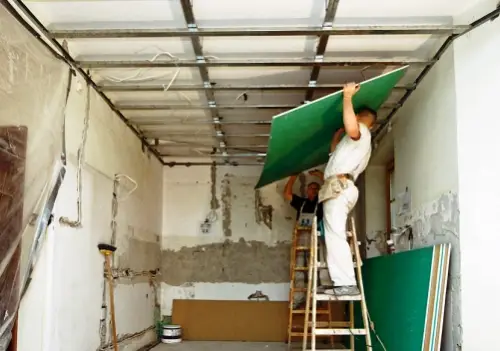
Photo 1 — Installing a Gypsum Board Ceiling
Although, of course, there are drawbacks to gypsum board.
- Firstly, suspended ceilings are not recommended for small apartments with low ceilings, since the suspended structure will steal at least 10-15 cm of height from you;
- Secondly, even with gypsum board, painting work cannot be avoided. You will still have to prime and plaster the surface of gypsum board sheets, especially the joints.
On the other hand, these are not such significant drawbacks.
Therefore, if you have decided on a suspended gypsum board ceiling, let's start working with measurements, layout, and material procurement.
Pay attention to the room where you will be installing the suspended ceiling. If it is a bedroom, living room, or children's room, you can use regular gypsum board (GKL).
If you are making such a ceiling in a bathroom, it is better to use moisture-resistant gypsum board (GKLV). And if you have decided to hang a ceiling in a living room with a fireplace, then it is better to buy fire-resistant gypsum board (GKLO) right away.
There is also a combination of them - fire and moisture-resistant gypsum board. And if you want the ceiling to be especially strong in case of a elephant invasion - take the gypsum fiber board GVL, which is distinguished by increased strength (GVL is usually used for internal cladding of attics).
In addition, gypsum board can be ceiling and wall, as well as arched. However, we are interested in the first variant above all.
In Ukraine, the most popular gypsum board is from the Knauf brand, which you can find in any construction store. In Russia, gypsum boards from manufacturers Lafarge, Rigips, Belgip, and Volma are also found. Lafarge and Rigips can also be found in Ukraine, but German Knauf is preferred by builders.
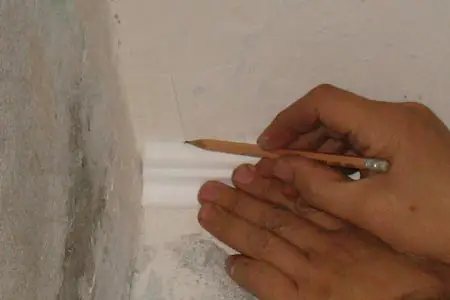
Photo 2 — Ceiling Layout with a Pencil
How to Make a Gypsum Board Ceiling. Practical Guide
So, let's move to the question of how to make a gypsum board ceiling by yourself. Our renovation is in full swing, and before we start working on the walls and floor, we need to finish the gypsum board ceiling finishing.
Installing gypsum board on a ceiling is an activity that is better done with at least one other person. If you decide to do this alone, find a hoist for the boards. Otherwise, you won't be able to handle it by yourself.
The installation of a suspended ceiling usually consists of a strong metal frame made of special profiles for gypsum board (you should also not forget to buy these profiles in advance) and, of course, the mounting of the gypsum board on the ceiling. By the way, specialists also recommend Knauf profiles.
As we have already written, the advantage of such a ceiling is that it hides utilities and provides sound and moisture insulation.
However, do not forget to leave inspection hatches on the ceiling that will give access to utilities in case of need.
Features of the Frame Installation
Screw in the end profiles and brackets to the ceiling. Then screw the load-bearing profiles to the end profiles. After that, mount the connecting fasteners and insert the transverse profiles into them. Finally, adjust the height of the load-bearing profiles and fix the gypsum board to the resulting frame.
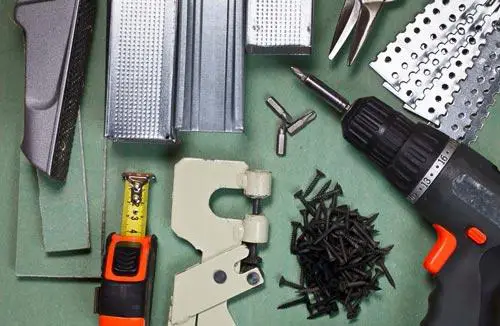
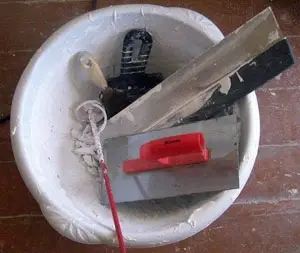
Photo 3 — Tools Needed for the Frame Installation
Depending on the wall material (brick, wood, concrete), the end profiles are attached to the wall with wood screws or expanding anchors.
Mark and fix the load-bearing profiles on the ceiling at half the size of a gypsum board sheet, then secure the bracket fittings with spacing every 60 cm for mounting. To prevent the frame from sagging in the center, it should be secured to the ceiling with fittings set at the correct height.
Install load-bearing profiles at intervals of 120 cm from the edges and secure them. Adjust the resulting frame with a construction level.
On load-bearing profiles, install connecting fittings every 30 cm for the auxiliary transverse profile of the suspended ceiling. Then mount and secure the transverse profiles with connecting parts. Bend the ears of the connecting part around the transverse and load-bearing profiles, and fix the entire frame with self-tapping screws into these bent ears.
As we can see, the technology of a gypsum board ceiling still requires some skills.
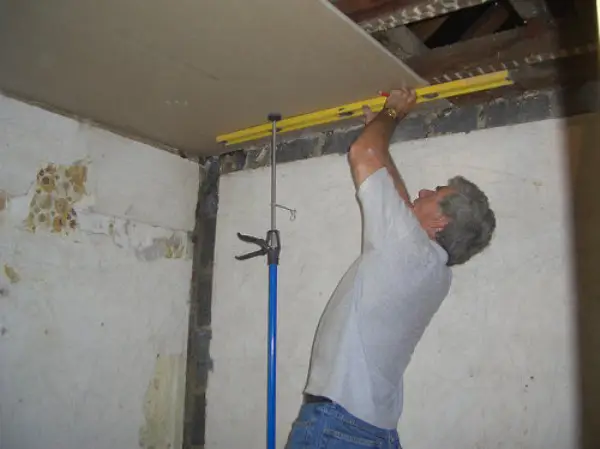
Photo 4 — Check the Evenness of a Suspended Ceiling with a Level
Mounting Gypsum Board
What do you need for working with gypsum board?
- A drill (screwdriver) with a depth limiter to avoid damaging the gypsum board sheets;
- A hoist for boards if you work alone.
So, let's move to the mounting of the gypsum board sheets. By the way, if one of the reasons for installing a suspended ceiling is additional sound insulation, then you will have to lay 2-3 layers of gypsum board and add mineral wool for a better effect.
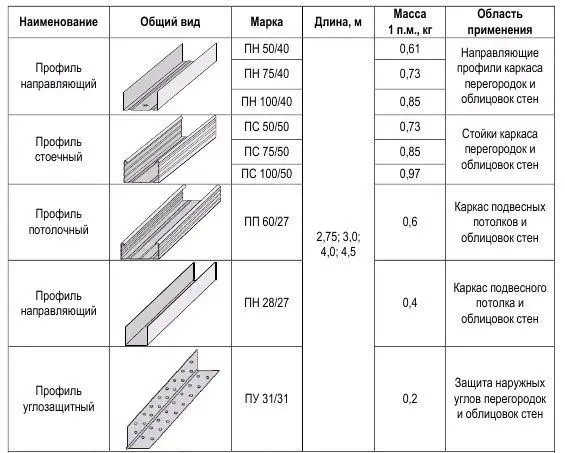
Table 1 — Profiles for a Gypsum Board Ceiling
Advises on Working with Gypsum Board:
During laying of the gypsum board, act carefully as this material is quite fragile. After completing this difficult task, we will move to the finishing work, but we'll talk about that later.
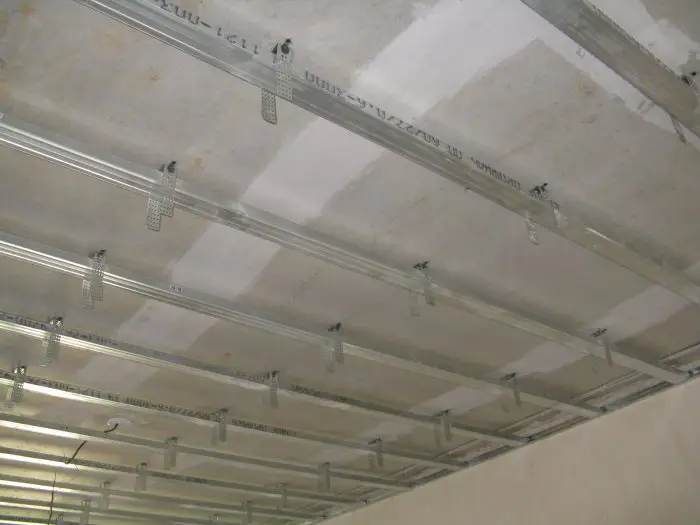
Photo 5 — Installing a Frame for the Ceiling
Let's consider the situation when you need to hide pipes or utilities. Renovation is intended to improve the appearance of a living space and make it more functional.
Besides, the box can serve not only as an excellent cover for unsightly wires but also as a base for a fireplace, wardrobe, cabinet, or place for mounting lighting fixtures. The box can be adapted to any interior style (from Provence to hi-tech).
How to Mount a Gypsum Board Box?
Your work will consist of several stages:
- Designing the structure itself;
- Installing the frame;
- Mounting the gypsum board sheets to this frame;
- Finishing the box.
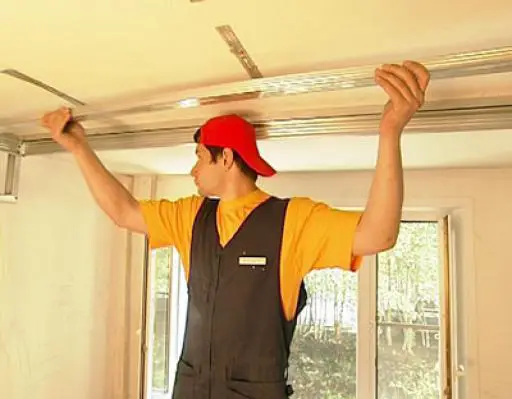
Photo 6 — Installing a Metal Frame
Before starting the installation of the frame, make accurate markings, take measurements, and draw up the final desired result on paper. For accuracy, double-check the markings with a level. This will help avoid possible problems if one mistake causes the whole project to go wrong.
To install the frame according to the markings, secure guide and upright profiles. The first form the perimeter of the entire structure, while the second rest on the guides.
Some details:
- Check the reliability of mounting the box to the base: especially important for boxes that will be mounted with ventilation;
- Always check the evenness of profile installation with a level.
After that, the mounting of gypsum board sheets is performed. Remember, the screw heads should be recessed into the gypsum board almost flush but never protrude above the surface, otherwise finishing the box will become a serious problem.
After installing the sheets, you will need to prime the surface, spackle it, and perform the finishing work.
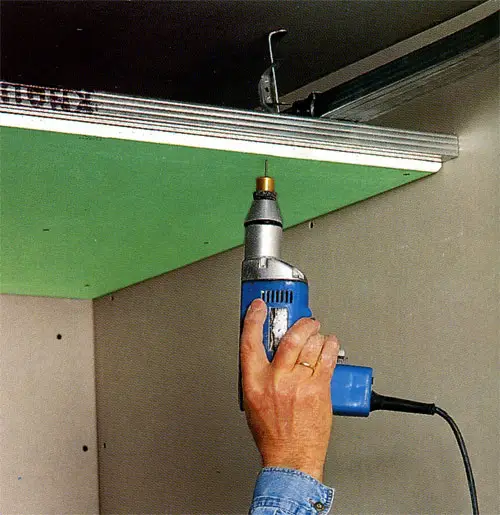
Photo 7 — Screw Heads Should Be Set Flush
How to Paint a Gypsum Board Ceiling
We have already finished the installation and mounting of the gypsum board ceiling, now it's time for finishing work. We will tell you how to paint a gypsum board ceiling.
By the way, by deciding to paint a gypsum board ceiling by yourself, you save quite a pleasant sum of money (on average, the cost of painting a ceiling with water-emulsion paint is about $7 per square meter).
First, we need to prepare our ceiling for painting.
Preparing for painting includes several steps:
- Priming the surface;
- Spackling the joints with spackling compound;
- Spackling the ceiling;
- Surface finishing.
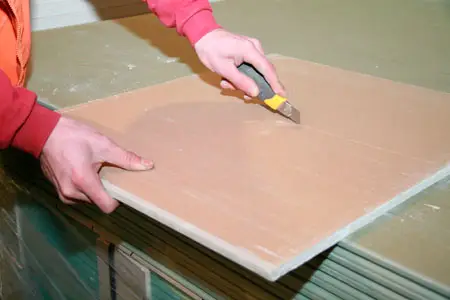
Photo 8 — Gypsum Board Can Be Cut with a Simple Office Knife
The choice of paint for gypsum board depends on its characteristics and your financial possibilities.
Let's consider what kind of paint is usually used for painting gypsum board?
The main rule is not to paint gypsum board with oil-based paints.
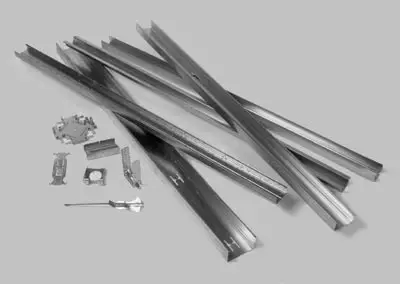
Photo 9 — Profiles for a Metal Frame
What do you need for painting the ceiling?
- The chosen paint itself;
- Gloves and protective eyewear;
- A tray for painting work and brushes of various widths;
- Ladder;
- Painter's mesh or tray;
- A roller with long fibers;
- A construction mixer.
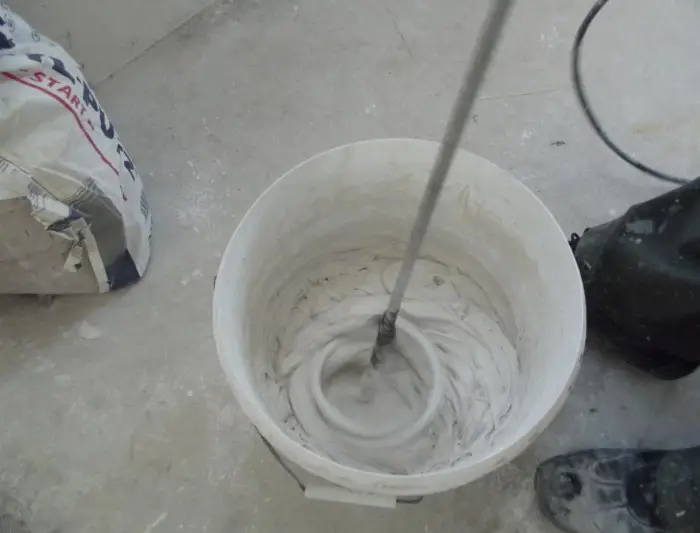
Photo 10 — Preparing the Spackling Mixture for the Ceiling
Remember that painting gypsum board should be done only with one side of the roller, and it should not be turned over or changed. Also, do not stop the painting process or repaint areas of the wall that are beginning to dry.
Painting Tips
If you plan to decorate the ceiling with a trim, it should be glued either after full painting or between paint layers. Do not forget to paint the trim so it doesn't become a dust collector.
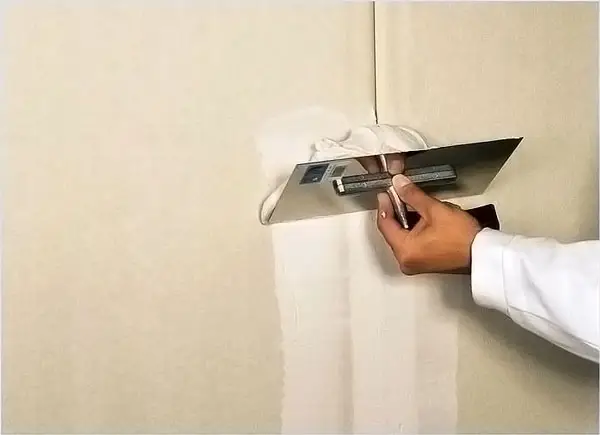
Photo 11 — Spackling the Joints
Size of Gypsum Board Ceiling
Let's consider the size of a ceiling gypsum board using the material from the German manufacturer Knauf as an example.
Regular ceiling gypsum board has a thickness of 9.5 mm. The sheet size is 1.2 * 2.5 m, the area is 3 sq. m, and the weight of one sheet is 22.1 kg. Moisture-resistant ceiling gypsum board differs only in weight - it is heavier by 1.2 kg. By the way, there is also gypsum board measuring 1.2 * 2 m (18 kg).
In Russia, a ceiling gypsum board sheet costs from 240 rubles, and in Ukraine - from 45 UAH.
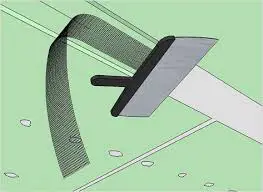
Photo 12 — Spackling the Joints with Reinforcing Mesh
Gypsum Board Ceilings. Instructions
One of the most common methods of ceiling renovation today is gypsum board ceilings. The instructions for their installation are outlined in this article. This method helps to level ceilings with minimal effort.
Let's briefly go through the main points and stop on some details.
So, installing a gypsum board ceiling consists of the following stages:
Make horizontal markings on the walls with a level
Fix the perimeter (UD-profile) according to these markings
Attach the suspensions to the ceiling
Run the load-bearing CD-profile along the ceiling and attach it to the suspensions and the UD-profile
Mount the gypsum board sheets to the CD-profile
Spackle the joints
Perform finishing work on the surface
By the way, one method of installing a gypsum board ceiling is with adhesive, known as the frameless method. However, this method requires a flat ceiling. And the sheets, before gluing, must be cut in half. Besides, the reliability of this method is lower than that of the frame method. But the frameless method does not steal height from the room.
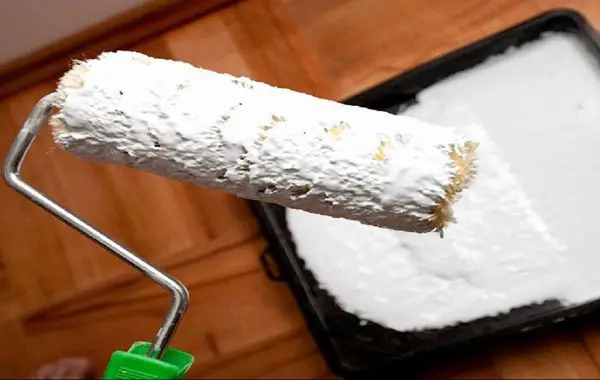
Photo 13 — Carefully Distribute Paint on the Roller
Let's now look at how to spackle a gypsum board ceiling.
Before spackling the ceiling, thoroughly prime it. After that, it is recommended to reinforce the screw heads and joints with paper tape or mesh.
Spackle the joints several times for reliability.
After drying, sand the ceiling with 100 or finer grit sandpaper.
The gap between the wall and the gypsum board ceiling should be filled with acrylic mass and then sanded after drying.
To determine if the spackle has dried, check the ceiling color. If it is white - it's dry. Otherwise, the shade will be gray.
Finally, it should be noted that installing a ceiling with gypsum board is one of the simplest ways to level a ceiling. Materials for this task can be found in any construction store.