Cement-sand floor screed
Cement-sand screed is universal and can be applied to any surface: concrete, stone floor or floor on brick base.
Mixture composition
For preparing the mixture, additional components are rarely used: two components mentioned in the name of the method are sufficient. The standard mixture is prepared in a proportion of one part of M 300 cement and 2.5-3 parts of sand. The third essential component is water. To increase the density of cement-sand screed, plasticizers are recommended to be added to the mixture.
IMPORTANT! If cement-sand screed is used for floor installation in rooms with high intensity of mechanical impacts, the screed should be done with reinforcement (reinforced screed).

Figure 1 — Proportions of components for preparing cement-sand mixture and concrete (M 150 and M 200 mixes)
With strict adherence to the technology, cement-sand screed can withstand a specific pressure from point loads of approximately 500 N/cm2, suitable for use in public places and rooms with high traffic intensity (pedestrian zone, vehicle zone).
Cement-sand screed: material consumption
When calculating before purchasing construction materials, note that for traditional 4-centimeter screed, approximately 7 bags of cement (enough for a room area of about 13 m²) are needed.
Based on the ratio of 1:3, sand is required in three times more quantity, i.e., 21 bags (note that sand is often sold only in 50-kilogram bags, whereas cement is sold in 25 and 50 kg bags).
Weight of cement-sand screed
Before starting a large renovation at home or in an office, ensure that the floor of the room can withstand the weight of the screed: it might be better to choose a lighter option — for example, a dry screed instead of a wet one, or a semi-dry screed with fiberglass.
For example, in frame-monolithic construction, such structures according to SNiP can withstand about 400 kg/m² as permanent load and an additional 150 kg/m² as temporary load. A 5 cm thick screed will add a weight of 90 kg/m² to the floor. Not every building is designed for nearly 25% overload of the load-bearing capacity of the floor slab.
Before starting work, it is better to consult with specialists or, even better, get approval for the renovation plan from local authorities.
When calculating the weight of screed, it is important to understand that the concept of 'weight' cannot be considered in isolation: there are two types of weight — specific weight and volumetric weight, i.e., the weight of a solid material and the weight of material in its normal state. For example, according to GOST 8736-77 (Sand for Construction Works), the volumetric weight of 1 m³ of sand should contain 1,600 kg, and the specific weight of sand according to the same GOST can vary between 1,550 and 1,700 kg/m³.
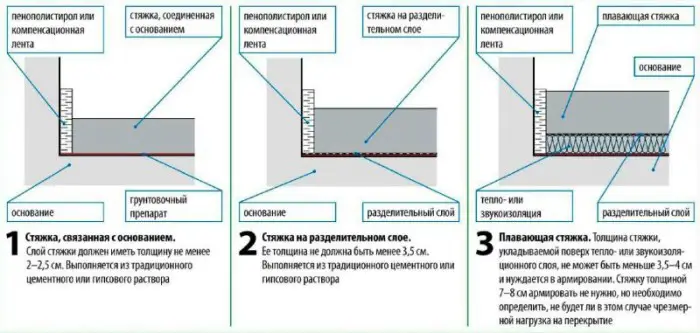
Figure 2 — Types of screeds and their installation methods
Additional characteristics
When selecting ready-made mixes, it is important to consider the density of the dry composition. There are light and heavy cement-sand screeds: light has a density up to 1,500 kg/m, while heavy one is from 1,500 kg/m and more. The screed density affects the strength of the composition itself as well as sound insulation and frost resistance.
Light screeds are suitable for apartments and quiet offices.
The thermal conductivity of the composition should also be taken into account when purchasing materials for screed installation. Primarily, cement-sand mixture has a thermal conductivity coefficient of 1.2 W/m·K. This is not always sufficient to maintain a comfortable temperature in the room, so additional insulation materials are recommended.
IMPORTANT! For floor installation in humid rooms or those frequently in contact with the external environment, a so-called floating screed (walls and floor separated from the screed by special gaskets) can be used, which is not significantly different in technology from standard installation.
Installation of cement-sand screed
Preparation stage
Screed installation can be performed in any room, provided that the base temperature does not drop below +5°C.
After clearing the floor of old flooring and construction debris, mark the top edge of the screed.
This is done using a level and marking string. Some craftsmen for more accurate measurements draw a control line at a height of 1 meter above the horizontal level (!), and then drop perpendiculars to the desired screed height.

Figure 3 — Room marking
The thickness of the cement screed from the floor should not exceed 5 cm. It is also not advisable to lay screed less than 3 cm.
IMPORTANT! For repairing existing screeds and minor cracks in the floor base, you can use M 100 mix.
On the cleaned and prepared base, a layer of hydro-isolation — polyethylene film with a thickness of at least 8 microns overlapped by 15-20 cm — is laid if one piece of film is not enough to cover the entire floor surface. The film should extend up the walls: the length of the overlap is determined based on the final height of the screed — the film should be 5-7 cm higher than that.
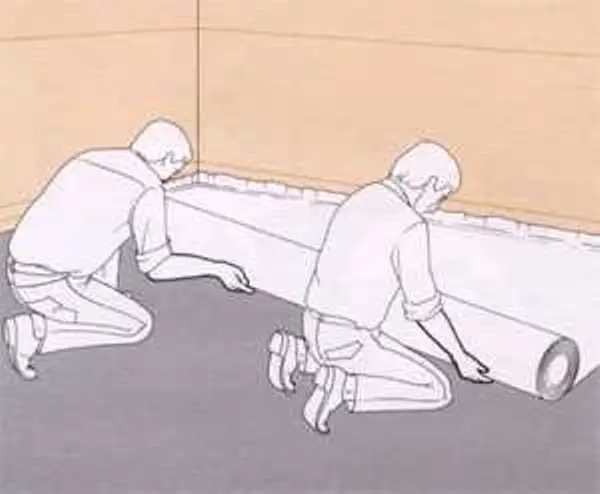
Figure 4 — Laying hydro-isolation layer
Screed is laid on screed markers, or you can use screed rails or ceiling metal profiles up to 3 meters long (60 mm × 27 mm).
Markers are fixed to gypsum with a spacing of 15-20 cm or to cement-sand mixture prepared in the ratio: one part of M 400 cement to three parts of sand. As a fixing mixture, you can also use a diluted gypsum plaster called "VOLMA-Sloy" (consumption of materials in this group is one bag per 13 m²).
Markers must be aligned in parallel rows with a spacing of up to 2 meters (the length of the step is determined by the ruler’s length, it's more convenient for beginners to use a 1.5-meter rule). The outer markers are set according to marks on the walls, and intermediate ones are placed arbitrarily while maintaining the ruler's length.
Allow approximately 1.5 hours for the fixing composition on markers to set.
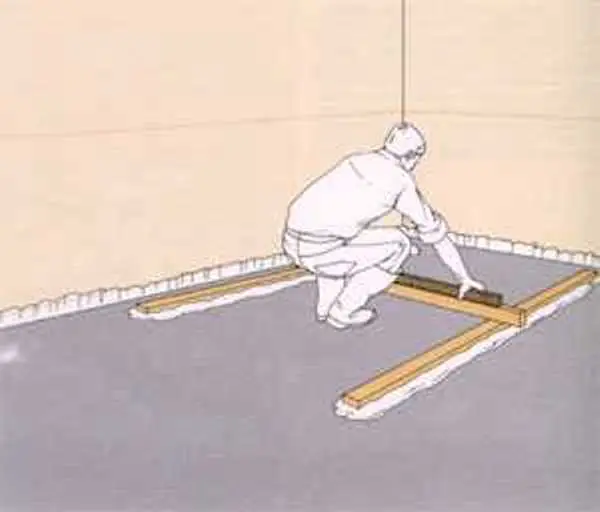
Figure 5 — Checking level of first markers before applying cement-sand screed to the floor base
Beginning of work
The floor base is thoroughly moistened with water.
Screed is laid in strips according to the markers, mixing the solution in portions.
Screed is leveled with a rule.
The second strip is not poured until the first one is completed (work direction: from the far corner of the room to the entrance door).
Screed flatness is checked with a level.
After completing the entire floor pour, it is advisable to cover the screed with polyethylene film.
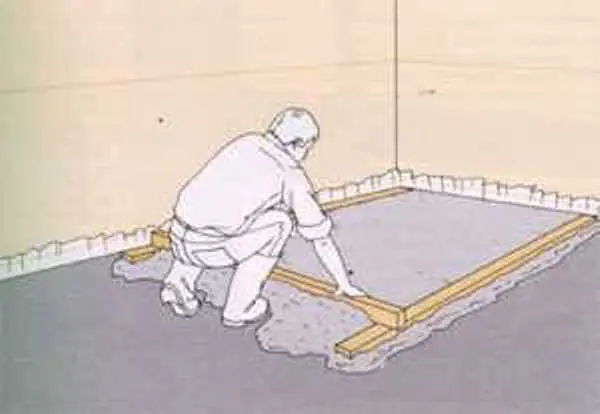
Figure 6 — Leveling the applied composition using a rule
Wait at least 12 hours until the screed reaches medium consistency.
Polish to shine!
If bumps appear on the screed surface or surface roughness needs correction, you can use a metal trowel and wooden float.
Allow at least 12 more hours.
IMPORTANT! Screed will fully harden approximately in 28 days.
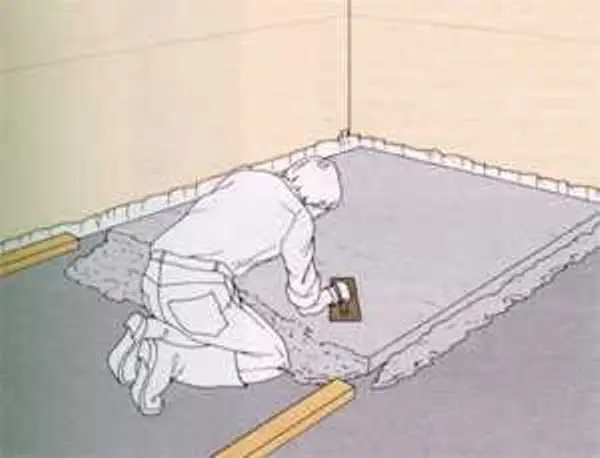
Figure 7 — Troweling irregularities
Many craftsmen also recommend priming the floor surface before starting work, while some do not like the hydro-isolation layer under the screed, saying that in case of flooding, polyethylene film will only block the natural drainage path of water.
Repair with a 28-day delay is not always convenient, so before making a "wet" screed, consider an alternative, equally reliable option: installing a "dry" screed in the room — within two days, the leveled floor surface will be ready for further use!
Cement-sand screed: cost of the project
If you can pay craftsmen for construction work and only worry about the screed at project completion, then material purchases for the screed are often the burden of apartment owners and renovated rooms.
When purchasing construction materials by yourself
You should expect the following prices:
- floor primer Ceresit CT 17 (10 l) — from $10.1/unit;
- marker (3 m) — from $0.7/unit;
- gypsum for fixing markers (20 kg) — from $5.2/bag;
- river sand for construction (50 kg) — from $8.2/bag;
- cement M 400 (25 kg) — from $3/bag.
Cost of labor
For installation of screed with thickness up to 40 mm:
- In Moscow — 180 rub./m²
- In Kiev — 45 UAH/m².