How to finish a ceiling yourself: choosing the right compound and proper application
How to choose the right compound
Using the wrong materials makes proper application of the compound ineffective.
To prevent the compound from peeling or cracking and to ensure a smooth, attractive ceiling, carefully read the instructions for each product and use it only as intended.
Depending on the binder, compounds are available in cement-based, gypsum-based, and polymer-based forms. They are sold as dry mix or ready-to-use paste. Different types exist for rough and finish leveling: starter, finish, and super-finish compounds. Compounds are available as universal or specialized for various conditions, finishes, and decorative uses.
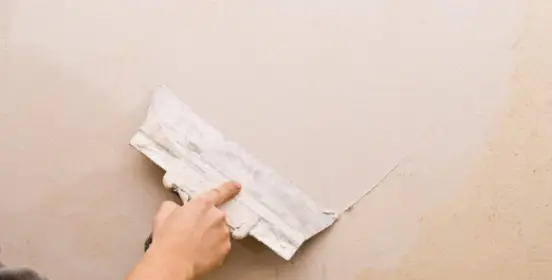
Photo 2 — Applying the compound
Applications of any compound type
- First, consider the base to which the compound will be applied.
For example, if applying to gypsum board, use a gypsum-based compound; conversely, if the base is gypsum plaster, do not use cement-based compound. Although using a different type is possible, the product’s instructions must confirm compatibility with the surface type. Usually, start with a starter compound, then apply finish. However, if the ceiling is already fairly smooth, you may use only the finish compound.
- Second, consider the type of finish to be applied.
Compound choice depends on the final finish. For heavy wallpaper, a basic compound suffices, as perfect leveling isn’t required. For painting or thin wallpaper, a finish compound is essential. It’s also beneficial if the compound matches the composition of the decorative coating.
For example, if planning to paint the ceiling with acrylic paint, it’s recommended to use an acrylic-based compound.
- Third, environmental conditions in the room significantly affect compound selection.
If humidity is high and temperature fluctuations occur, avoid gypsum-based compounds. For polymer-based mixtures, check instructions—some are moisture-resistant, others not suitable for wet areas. The best choice for high-moisture rooms is cement-based compound.
- Fourth, for better adhesion, especially on unrendered ceilings, priming is essential. For best compatibility, purchase all materials for ceiling leveling from the same manufacturer.
- Fifth, avoid choosing the cheapest options, especially for universal compounds. A high-quality product suitable for all conditions, substrates, and finishes cannot be inexpensive.
How to finish a ceiling: video guide
How to finish a ceiling yourself – step-by-step process
The question "how to properly finish a ceiling" includes several aspects. You might need to fix cracks, joints, the entire surface, or all of these. The process involves a specific sequence.
1. Ceiling preparationAs with any finishing work, ceiling finishing starts with surface preparation. The ceiling must be pre-levelled and cleaned: remove all irregularities and dust.
2. PrimingApply deep-penetration primer to a clean, even surface. Use the one recommended by the compound manufacturer.
3. Filling joints and imperfectionsIf the ceiling is already smoothly rendered, you can apply starter compound immediately after primer dries. If there are small dents or chips, fill them first. If working on a concrete or gypsum board ceiling, first fill joints between slabs or Gypsum Board (GKB) sheets. Tips on choosing the best compound are given above.
Regarding joints: always use starter compound—finish compound is not suitable. First, fill the joint with compound, scrape and level with a trowel. Then immediately apply fiberglass mesh or special tape, and apply another layer of compound.
4. Starter compound applicationApply starter compound to the ceiling in a 1–5 mm layer. Use a float for best results. If height differences exist or thicker layers are needed in spots, use reinforcing mesh and apply with a straightedge.
Multiple layers of starter compound may be used for leveling.
Remember: compound is not meant for thick coatings. It should be applied as thin as possible and only for minor leveling. After drying, sand and prime the surface.
5. Finish compound and sandingApply finish compound in a thin layer (up to 1–2 mm) using a float or trowel. The number of layers depends on surface flatness. Usually, 1–2 layers are applied. After drying, sand the ceiling again.
6. Repairing cracksIf cracks appear after drying—due to workmanship errors, temperature and humidity fluctuations, etc.—first remove the loose compound. Then fill the crack, scrape it smooth with a trowel, and sand after drying.
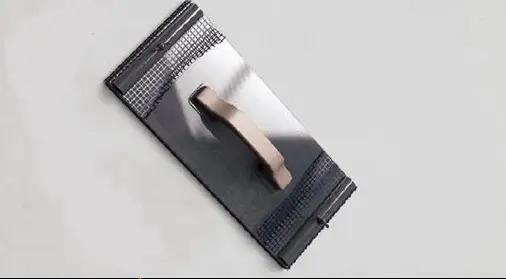
Photo 3 — Tool for sanding the ceiling with sanding mesh
Cost of ceiling finishing compound
Cost of ceiling finishing materials:
- Universal gypsum-based compound Knauf Fugen – about 380 RUB for 25 kg.
- Basic cement-based compound Bergauf GLATE ZEMENT – from 320 RUB for 25 kg.
- Finish polymer-based compound Osnovit Gladsilk T-38 – from 365 RUB for 20 kg.
If not doing it yourself, hiring professionals costs from 125 RUB per square meter.