Stages of Building a Banya Sauna Frame from Log
A sauna built from prepared logs will delight with its attractive facade for decades. You can relax and simultaneously improve your health in a fragrant wooden structure with family or friends.
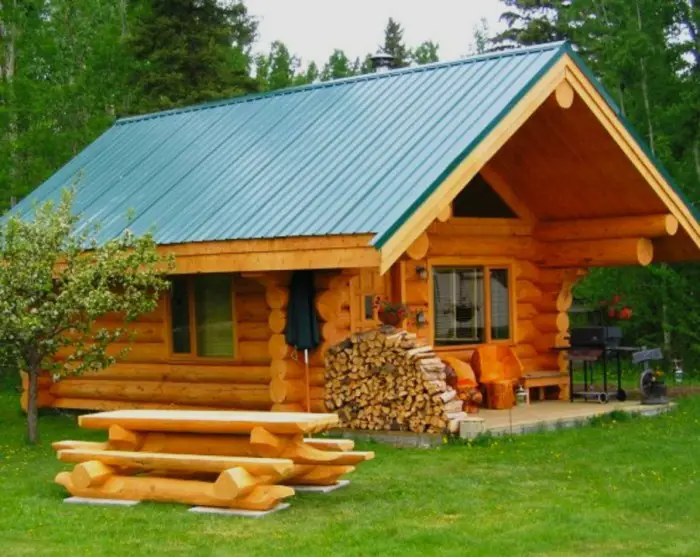
Photo 1 – Log sauna frame
Choosing the wood
To ensure a reliable structure, you must initially select the 'right' type of wood. When choosing prepared logs, consider the following parameters:
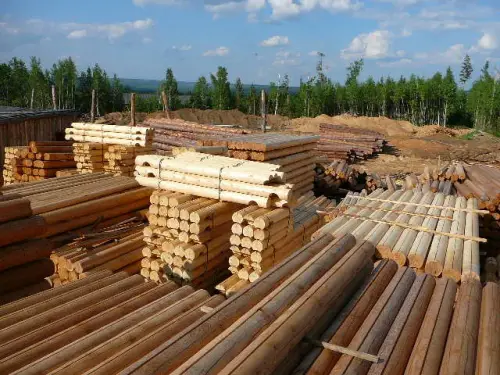
Photo 2 – Choosing the wood
IMPORTANT! The lower rows are recommended to be made from larch. This wood is most moisture-resistant.
If you order a sauna built 'turnkey', you can entrust wood selection to professionals from your chosen construction company. Alternatively, you can purchase the 'right' wood yourself, taking all listed parameters into account.
A hand-rubbed sauna built from prepared logs will last longer and look more attractive.
Log sauna frame made from machine-surfaced logs
Choosing machine-surfaced logs for sauna construction offers simplicity, speed, and high-quality frame assembly.
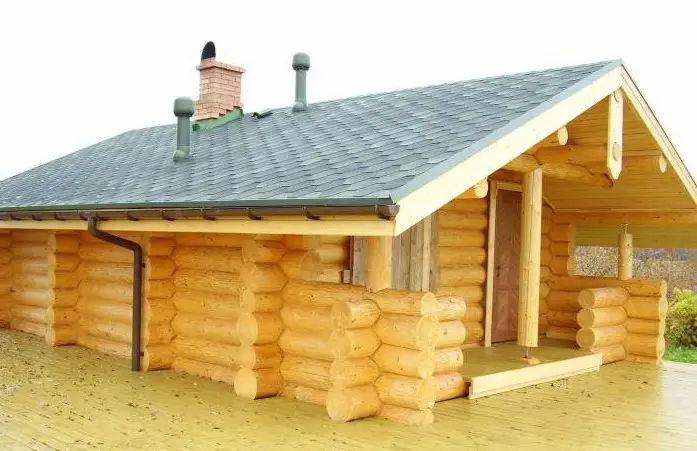
Photo 3 – Sauna frame from machine-surfaced logs
Logs prepared in a factory have smooth surfaces, calibrated dimensions, and consistent diameter on both sides. Therefore, they fit tightly on the support timber.
Construction Stages
Building a frame from prepared logs, like constructing saunas from timber, follows a defined sequence. Let’s go through it step by step, skipping the wood selection process (see above).
FoundationLogs are heavier than timber, so the foundation must be stronger. You can pour a strip foundation or prepare a pile foundation. The foundation type depends on:
- soil type on the site;
- planned building type: with or without a basement.
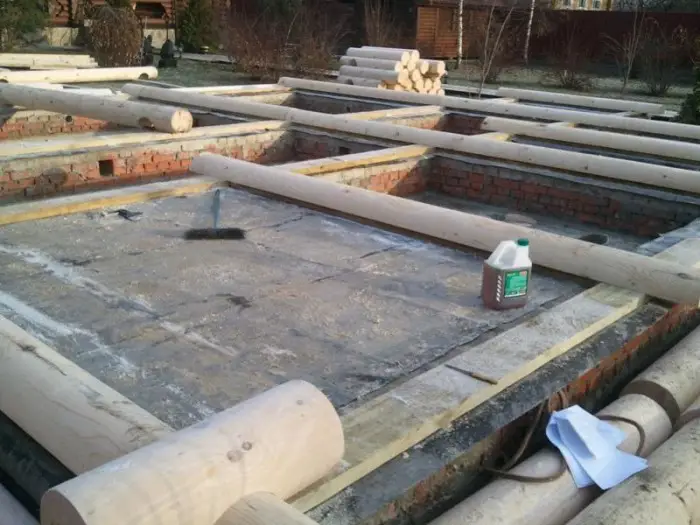
Photo 4 – Strip foundation with waterproofing layer
WaterproofingThe first row is tightly sealed from the foundation surface. You can use roofing felt or another equivalent. Above it, crosswise, 30–40 mm thick base boards are laid.
IMPORTANT! Base boards and first-row logs must be treated with waterproofing agents.
For more information on waterproofing, see: Sauna frame from timber – from material selection to installation, and Sauna frame: full details on technology and design.
Corner JoineryAn important part of frame assembly is choosing the type of corner joint. Popular types include:
- ‘in lap’;
- ‘in mortise’.
Uses the full length of the logs. Suitable for additional facade cladding. The ‘in lap’ joint implies further insulation of the corners with boards.
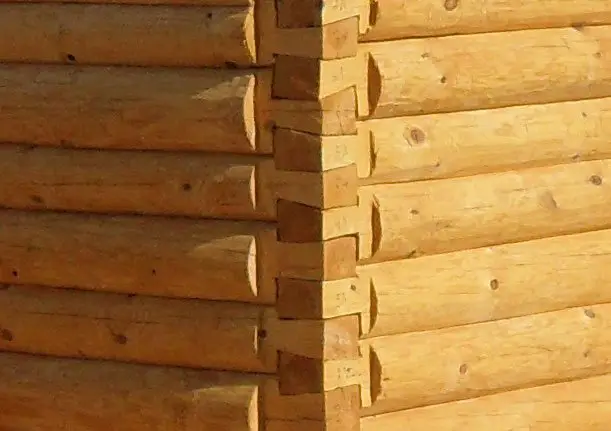
Photo 5 – ‘In lap’ joint
‘In mortise’The decorative design of the mortise joint is particularly attractive. Corners are protected from winter freezing and do not require additional insulation. The ‘in mortise’ sauna joint is simpler to build. However, internal space is reduced. Each log loses up to 60 cm in length due to overhanging ends beyond the corner.
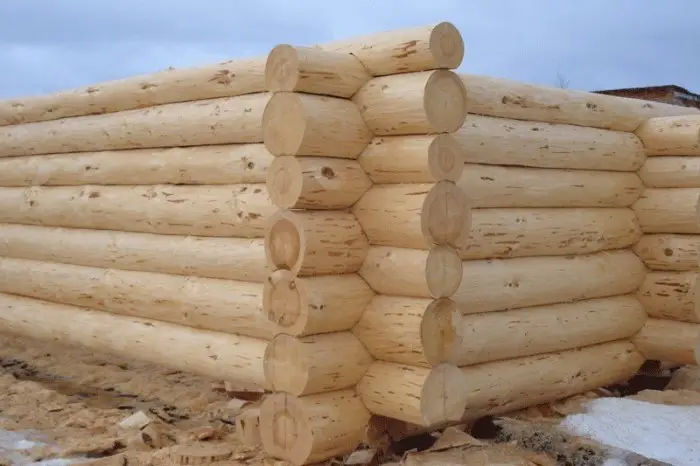
Photo 6 – ‘In mortise’ joint
RowsThe first row uses logs with a larger diameter. The outer logs are offset to improve contact with the foundation by one edge.
Next: a layer of waterproofing (roofing felt, bitumen paper). Then the next row. Each new layer is laid perpendicular to the previous one.
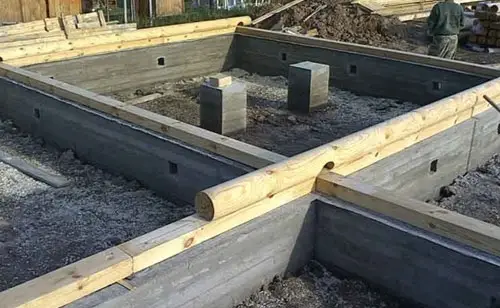
Photo 7 – First row of logs
The simplest type of connection for round logs when laying rows is ‘in mortise’. You’ll need a tool called a ‘cherta’ to measure the size of the next ‘mortise’ on the end of lower logs.
When the upper logs are properly positioned, measurements are transferred to the future mortise site, marked, and cut.
More secure log connections are achieved using longitudinal grooves, which are also made with the ‘cherta’ tool and a hand axe (or chainsaw). Longitudinal grooves can be semi-circular or straight.
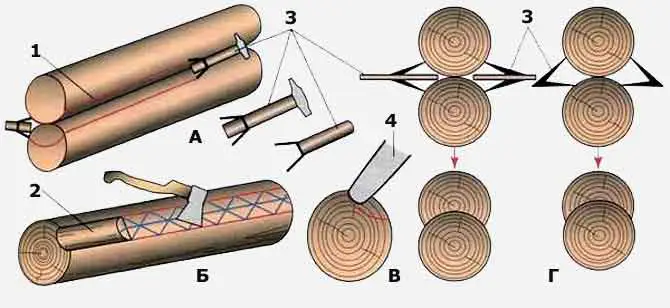
Figure 1 – Longitudinal grooves
Semi-circular longitudinal grooves provide better thermal insulation.
Rows are secured with square dowels or round pegs.
IMPORTANT! Grooves must be filled with jute, moss, or packing material.
You can use a regular axe for frame assembly. However, it is recommended to use a chainsaw to speed up the process.
OpeningsWindows and doors can be cut easily after the structure is built and has settled.
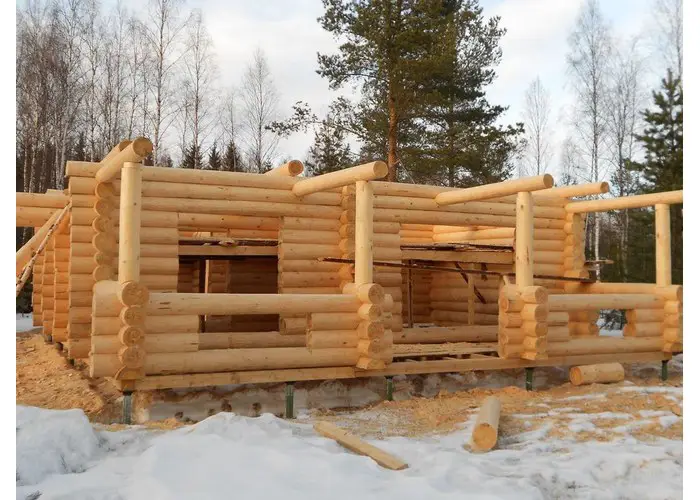
Photo 8 – Openings in the frame
RoofingRoofing elements are installed during frame construction.
ChinkingIf jute was used during sauna construction from prepared logs, chinking is not required. If moss or packing material was used, double-sided chinking is needed after the structure has settled.
How and with what to sand sauna logs?
Sanding is recommended to protect the frame from rot, mold, and insect infestation. Sanded logs look more attractive and are easier to treat with antiseptic agents and lacquers.
ToolsIt is best to sand logs using a specialized machine. Experts recommend Makita, DeWalt, Bosh, or InterSko with a special sanding attachment, as well as a vibratory machine. Corners are finished with a chisel.

Photo 9 – Tools for sanding the frame
Protective GearRemember that sanding produces dust. Protect yourself from inhaling dust particles. For example, wear a respirator. Protect your eyes with safety goggles.
Sanding steps:
For reference: a master sands 1 meter of 30 cm diameter log in 2 minutes.
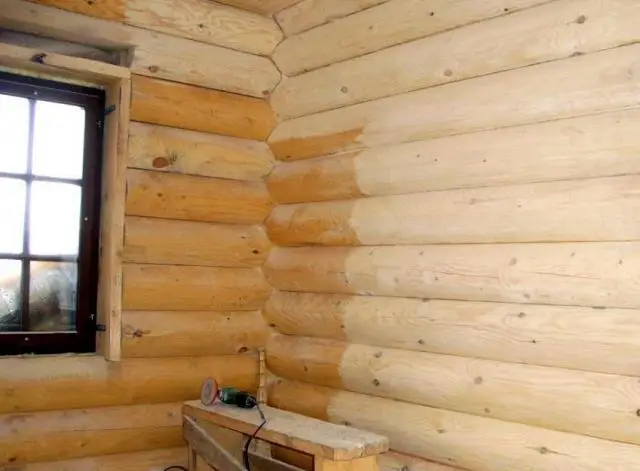
Photo 10 – Sanding the frame
After SandingAfter sanding, apply special protective treatments to the logs:
Log sauna frame cost
The cost of a frame built from prepared logs depends on the building size and whether finishing is included. Additional costs may include a design plan, wood procurement, and delivery.
Currently, the price for constructing sauna frames from machine-surfaced logs starts at $170–180 per square meter. Turnkey construction starts at $450.