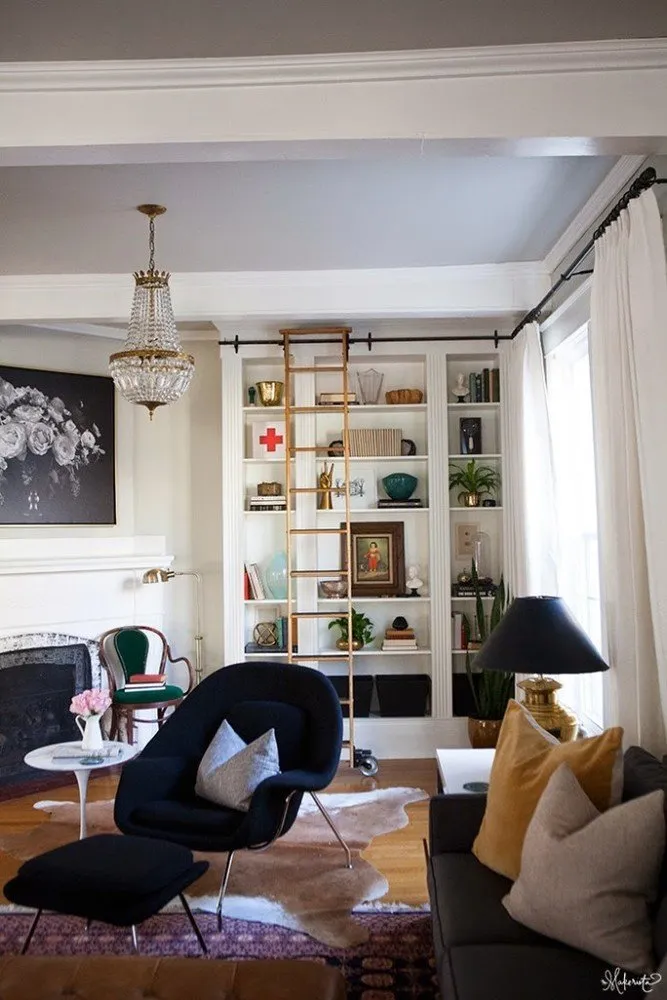
How to Transform a Cheap IKEA Shelf into a Luxury Interior
Creating furniture on order did not fit into the budget of the owner of this apartment, Lora, so she decided to make it herself. We provide a step-by-step guide that you can also follow to achieve the same result.
Step 1. Assemble the Shelves
First, assemble all three shelves (two IKEA Billy shelves 40 cm wide and one 80 cm wide). If you have high ceilings, you can use additional top shelves (40 cm and 80 cm) to make the shelves the desired height.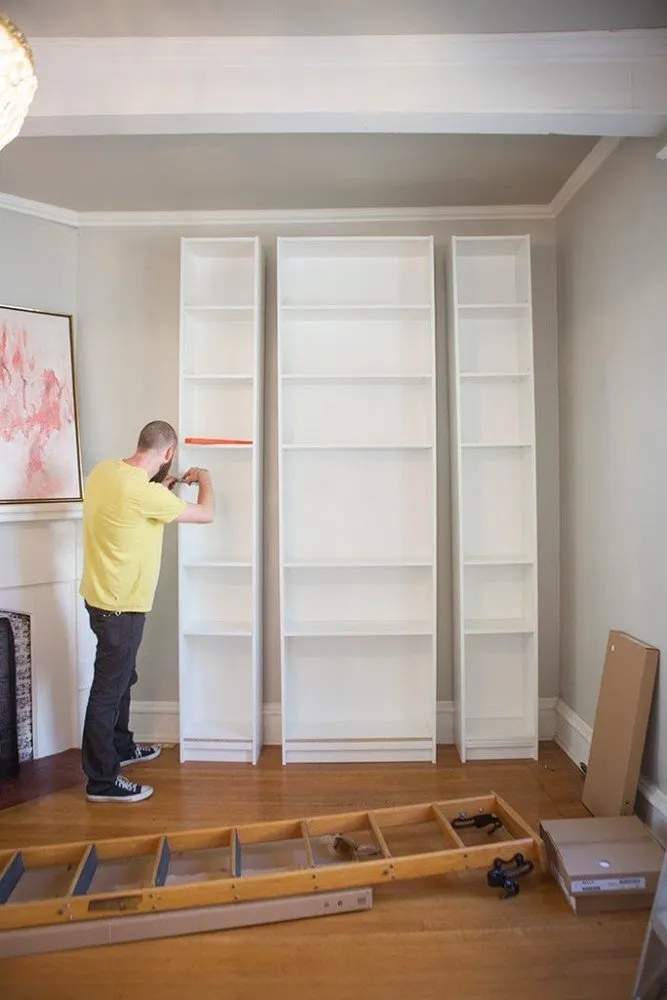
Step 2. Determine the Size
Plan in advance where the shelves will be placed. If you want the wall shelf to look "antique," add massiveness and make it visually larger by leaving 13-centimeter gaps between the shelves. Don't forget to leave the same distance from the wall on the sides.
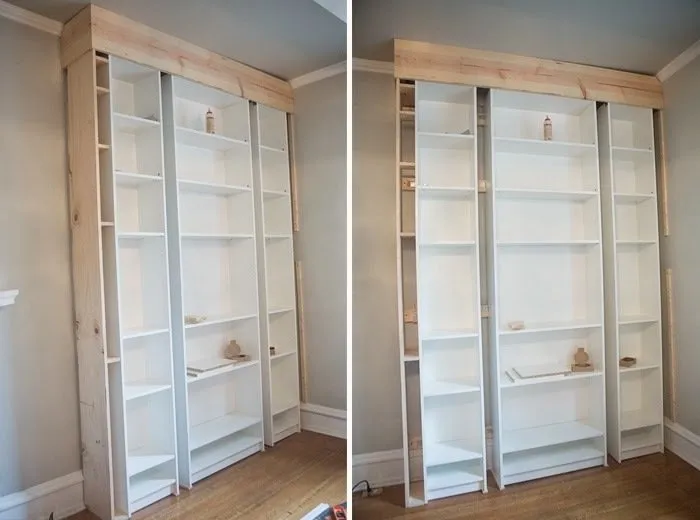
The box is needed to make the structure symmetrical.
Attach a wooden box 13 cm wide (adjust height and depth to match the shelf so that the box becomes its extension) to the side of the shelf opposite to the free side. The resulting gaps will later be covered with decorative panels.
Main Expenses During Renovation: How to Minimize Them
How to plan the budget? Where to find a renovation crew? What can you save money on, and what is not advisable?
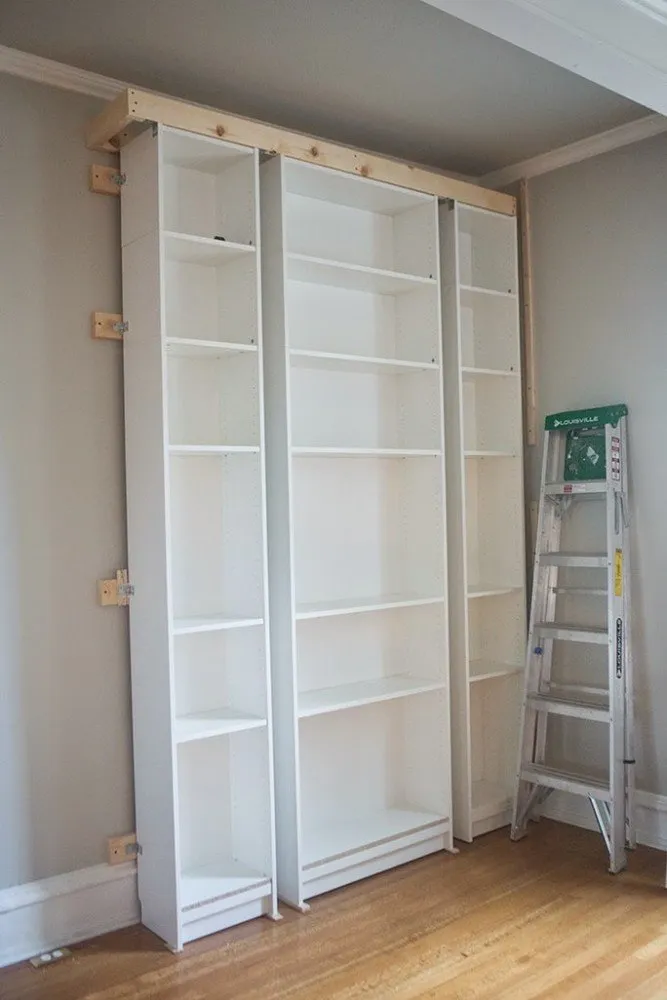
Step 3. Secure Shelves to the Wall
Install wooden strips measuring 5x10 cm on the wall. If you need to level the wall, use thin shims between the furniture and the wall. Attach the shelves to the strips using small L-shaped brackets (shown below as they appear). If you leave space between the shelves, the brackets can be attached to both sides of the shelf.

Step 4. Reinforce the Structure
To securely install the shelf, reinforce the structure from the top using a rectangular box that will serve as the top of the cabinet. First, decide where the rail with the sliding ladder will be installed and mount it to the wooden box. Cover the box with wooden panels.
Step 5. "Integrate" the Wall Shelf with Decorative Elements
To create the effect of built-in furniture, install a ceiling cornice identical to that used throughout the room above the cabinet, and repeat the floor cornice below. Try to use as similar models as possible or assemble what you need from several parts, just like the author of this guide.
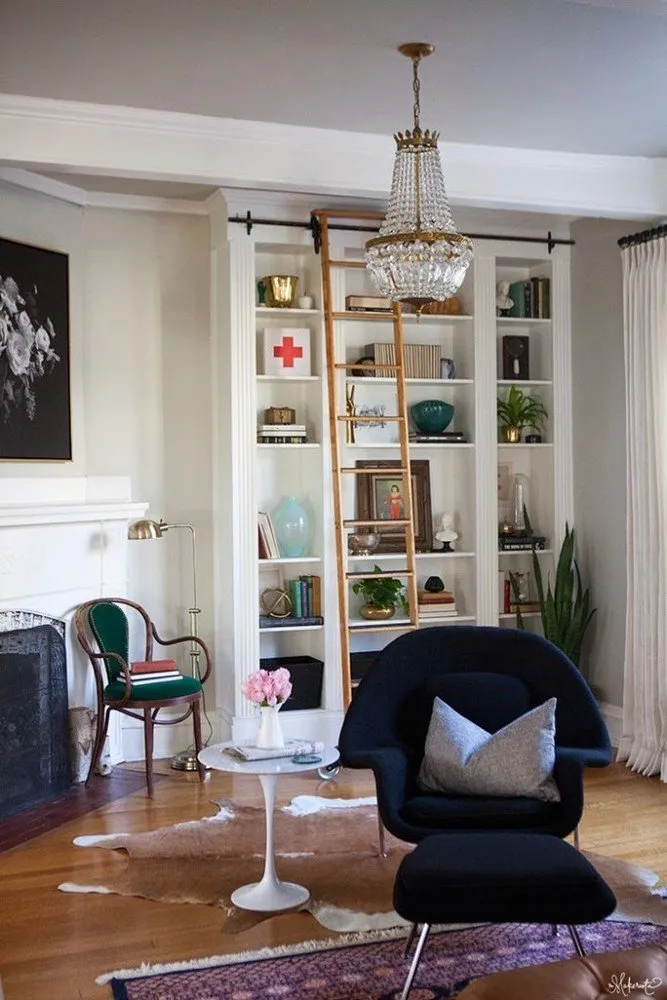
Thanks to the fact that the cornices on top and bottom repeat the cornices located around the room perimeter, the cabinet looks like a continuation of the wall.
Step 6. Final Touches
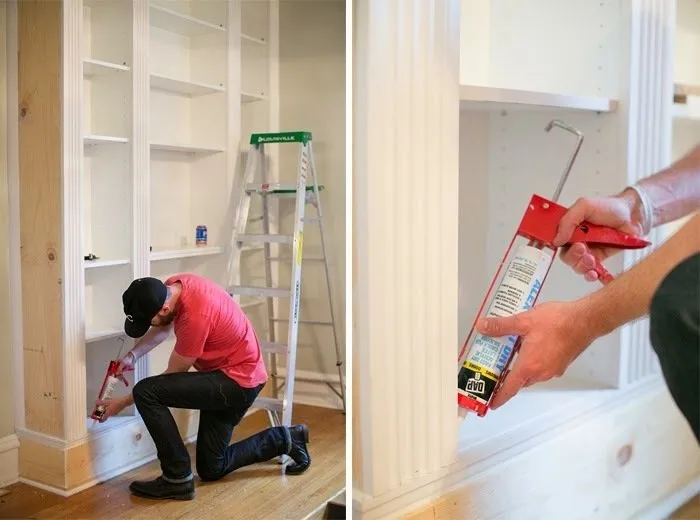
After the entire structure is securely fastened, hide the 13-centimeter gaps between shelves with decorative panels. These can be attached using a glue gun. Fill all cracks and remaining holes with sealant. All that remains is to paint the wall shelf and hang the ladder!
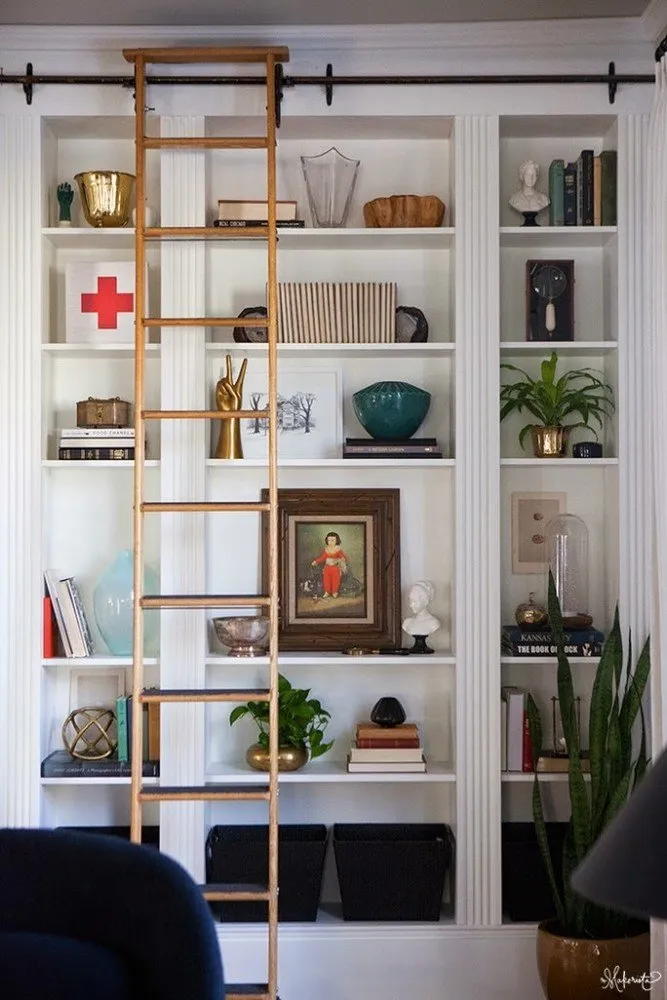
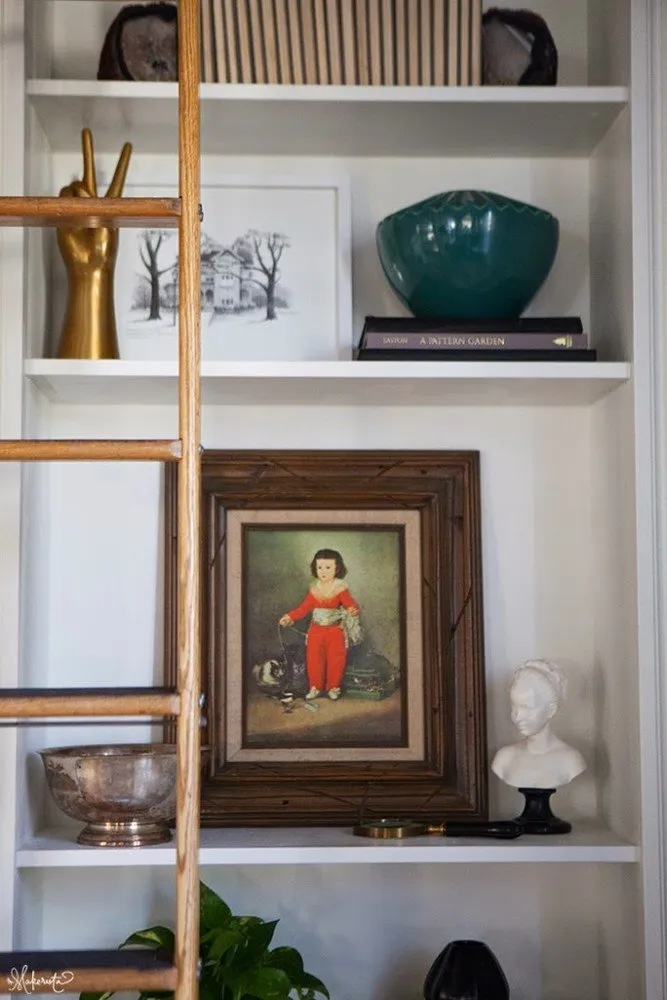
Step 7. Plan the Filling
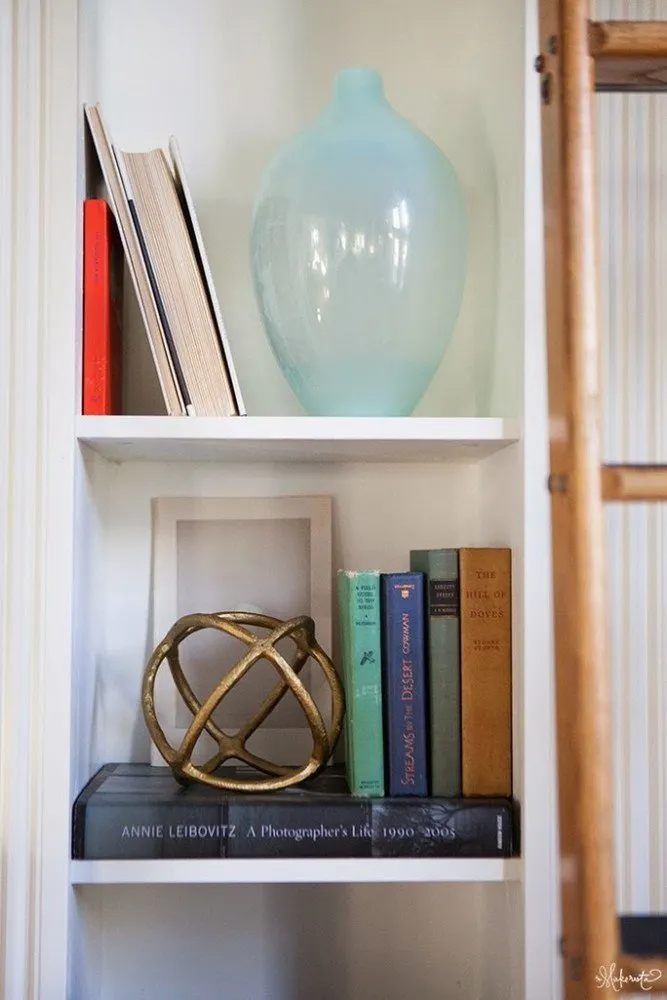
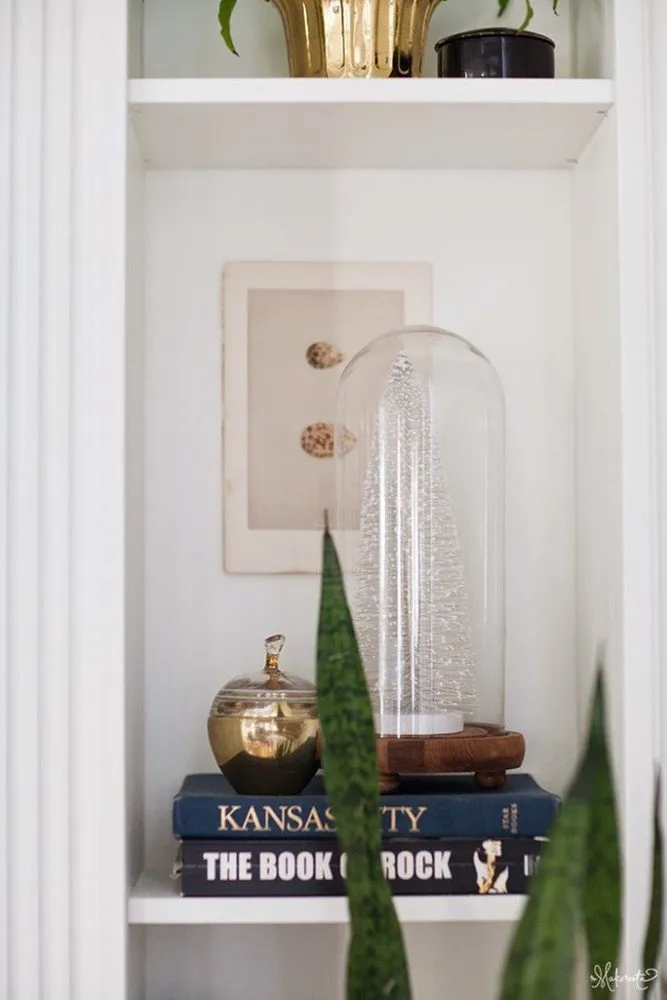
To give the shelf a finished look, fill all unused shelves with decorative items. Finally, there's a place for everything!
How to Build Your Dream Kitchen Without Going Bankrupt
How to plan the filling so you don't buy unnecessary items, and where to get a payment plan that's actually free
Need a renovation specialist?
Find verified professionals for any repair or construction job. Post your request and get offers from local experts.
You may also like
More articles:
 It's Still Not Too Late: What to Plant in the Garden in July
 Bungalow on Hawaii: How They Restored an Old Cottage
 Credit for Renovation: How Banks Deceive and How to Fight Back
 Fitostena: What It Is and How to Care for It
 Redesigning old IKEA furniture and 11 more design hacks to make your home better
 Relocation: what did they sacrifice for a bedroom in a studio?
 Summer Sale at IKEA: Up to 20% off on PAX and 9 Other Products
 Repairing the Bathroom Without Mistakes: 12 Tips from Professionals