Make a Scandi-Style Table from IKEA Cabinet Yourself? Easy!
American designers Katlin and Menda create furniture and interior items and run their own blog where they share instructions and hacks for their DIY projects. The friends aim for rational consumption: they try to buy less and make more with their own hands. At the same time, they both work with eco-friendly materials, mainly wood. They also love the Scandinavian style.
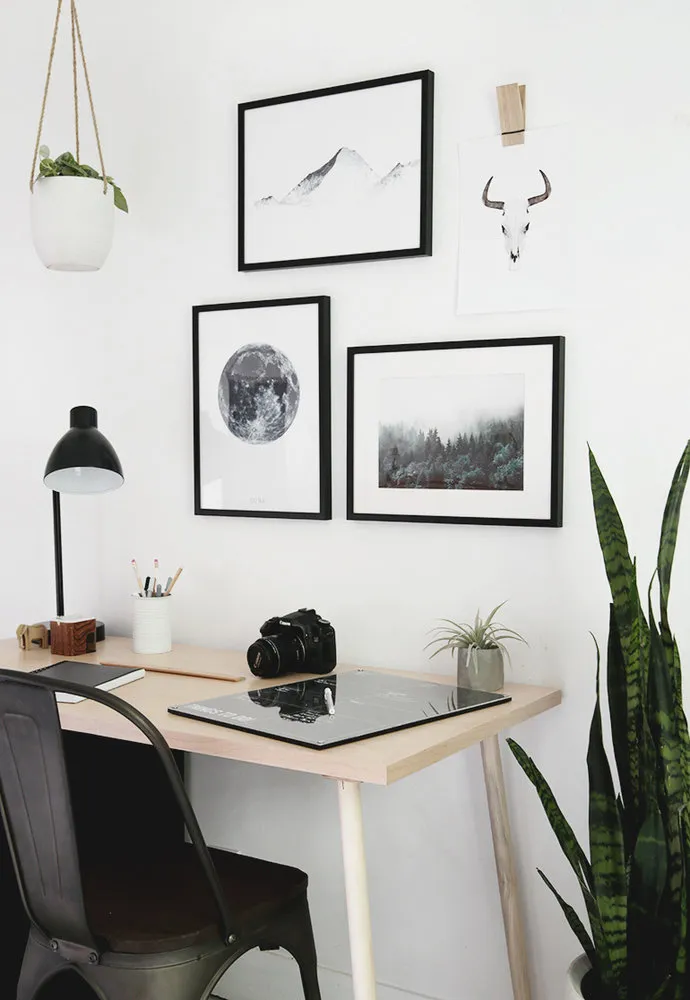
In this style, the friends decorated their son Menda's room, a teenager's study. To make the work desk fit perfectly into the new interior, they made it themselves. We provide a detailed instruction so you can repeat this DIY project.
You will need:
✓ Circular saw
✓ Clamps (holders)
✓ Drill/Impact driver
✓ Drill bit
✓ Tablesaw
✓ Miter saw
✓ Hand saw
✓ Planer
✓ Wood screws
✓ Wood glue
✓ Hammer
✓ Sandpaper
✓ Water-based polyurethane finish
✓ Birch plywood
✓ Board of maple (1 thick and 1 thin)
✓ Round legs of maple (about 3 cm in diameter)
✓ IKEA ALEX cabinet with drawers.
Step 1. Determine the Size
Measure the depth of the drawer unit, subtract the thickness of the maple edge. This is the width of the plywood for your tabletop. Measure the width of the drawer unit, add the width of the working surface that would be enough for work at the desk, and add about 5 inches for the table legs. Subtract twice the thickness of the maple edge. This is the length of your tabletop.
Step 2. Cut the Tabletop
Using a circular saw, straight board, and clamps, cut the top of the table from birch plywood. It is better to use a thin blade with 60 teeth to avoid chipping. Plane the edges.
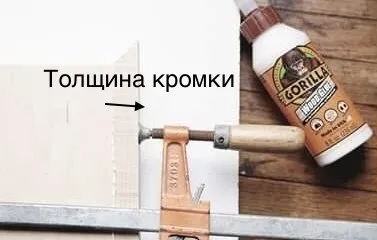
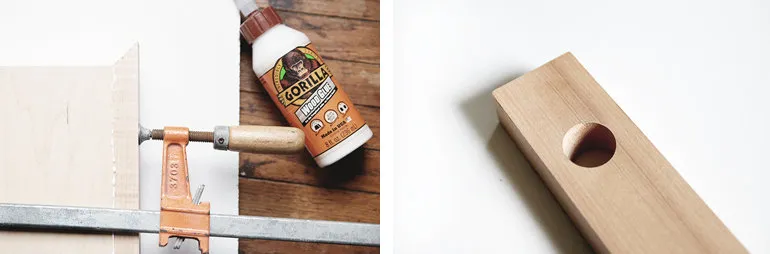
Step 3. Make the Edge Banding
Cut an edge band 1 inch wide from a maple board using a tablesaw. Cut the end and side parts with a miter saw. We suggest gluing the edge band on the front side of the tabletop and sides, but leaving the back side without an edge band so it fits tightly against the wall.
Trim the edges of the edge band at a 45-degree angle. Join the edge band to the plywood tabletop using glue and clamps.
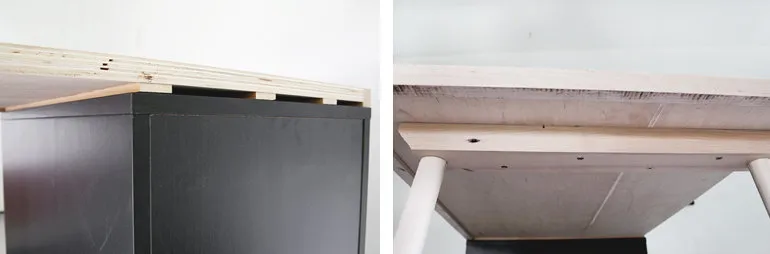
Step 4. Assemble the Parts
Cut three strips of maple board, about 5 cm wide and 1 cm high. Attach them to the bottom of the plywood tabletop and place the tabletop on top of the cabinet.
Step 5. Make the Legs
Cut a strip 5–6 cm wide, 3 cm thick, and 13 cm shorter than the length of your tabletop. Leave 5 cm from each end and drill holes for the legs.
Measure the height of the drawer unit and add the height of the strips between the drawer and the tabletop. That will be the height of your legs. Cut the legs to length.
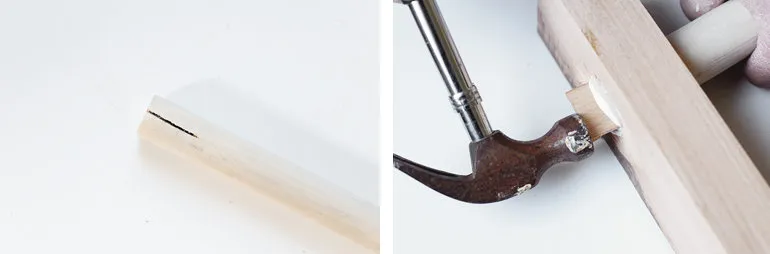
It is not necessary to sharpen the legs. If you decide to do it, here’s how: Measure 30 cm from the bottom of the legs and make a mark. On the bottom of each leg, draw a circle 2 cm in diameter. With a belt sander, move around the drawn circle, gradually going higher and removing less wood each time. In the end, a cone should be formed. Don’t forget to sand the leg.
Step 6. Attach the Legs
Glue one of the holes in the strip and insert a leg until it is flush with the strip. If needed, use a spacer for a tighter fit. After the glue dries, remove the part of the leg that protrudes from the top. Attach the strip with the legs to the plywood using screws.
Step 7. Finish the Wood
Sand the resulting structure and treat it with stain, varnish, or special wood oil.
Step 8. Attach the Drawer
Attach the drawer to the tabletop with screws.

Need a renovation specialist?
Find verified professionals for any repair or construction job. Post your request and get offers from local experts.
You may also like
More articles:
 6 Things That Should Be in Every Modern Home
 Redesigning a Small Stalin-era Apartment: How It Was Done
 How to Save Time on Cleaning: Tips from Professionals
 How an Old Attic Was Transformed into a Studio-Mansion for a Girl
 Save to Bookmarks: A Cleaning Guide That Saves Energy
 Repairing the Bathroom: 8 Design Hacks in 5 Minutes
 Before and After: How We Transformed a 1940s House Without a Designer
 How to Set Up a Summer Shower on the Dacha: 5 Ideas