How to Make a Multi-Level Ceiling from Gypsum Board
As we already wrote, it is quite difficult to assemble multi-level ceilings from gypsum board by yourself without experience in such work, but it is still worth reading about the technology for educational purposes.
In this article, we consider one of the most common types of multi-level ceilings - a two-level ceiling with backlighting (the ceiling design provides for organizing the 'core' of the ceiling not from a suspended system, but also from gypsum board, see photo).
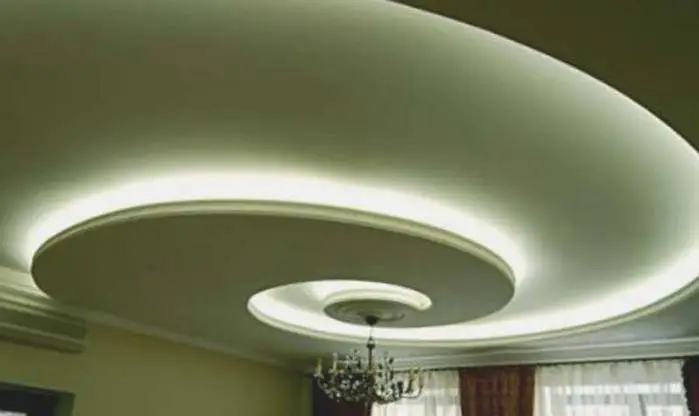
Photo 1 — In this example, spot lighting is not used - halogen lamps are installed under the cornice
How to Make a Gypsum Board Ceiling (Multi-Level): A Brief Instruction
Clean the ceiling from old coating - wallpapers, paint, plastic tiles.
Using a tape measure and laser level, mark the height of the future two-level ceiling (without taking into account the thickness of the gypsum board sheets). There should be 3 to 4 marks on one wall. You can connect the lines either with a laser or, if you don't have a laser level, with a carpenter's string. Draw a line connecting the marks. This is the basic ceiling level.
Mark the mounting points of the CD frame profile on the ceiling (how to properly mark the ceiling we wrote in one of our previous articles). Use the same markings for mounting the suspension brackets, to which the profile will later be attached. The first line for this mounting should also be drawn by connecting 3-4 control points on the ceiling. Then, at a spacing of 600 mm, mark additional points for the other profile strips.
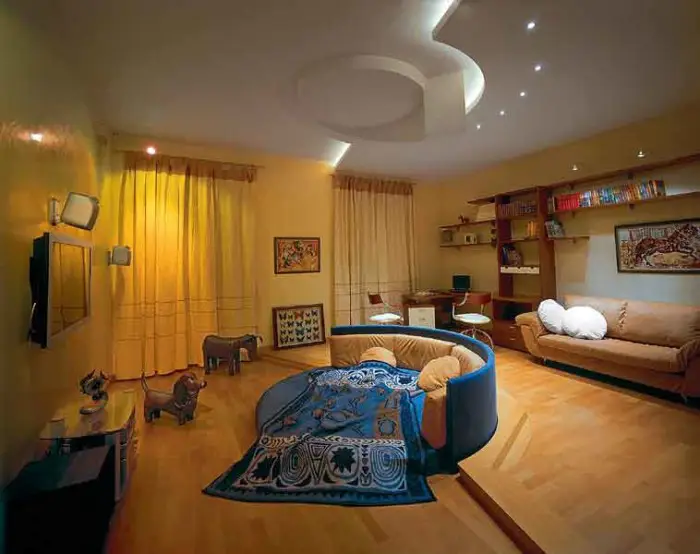
Photo 2 — Multi-level ceiling in a child's room
Work with the guide profile UD: drill holes for fasteners every 300 mm, place the profile against the wall so that the bottom edge of the profile is exactly aligned with the marking.
Mark the places for mounting anchors with a chisel. Drill holes with a perforator, drive in anchors. After placing the profile against the marking again, fix it firmly to the wall.
IMPORTANT! Working with screws and anchors takes quite a long time, so to speed up the process, we recommend using professional tools. For example, a gas gun or at least a screwdriver. Almost any tool for such work can be rented.
Mount the suspension bracket to the ceiling, drill a hole for fastening using a perforator. You can make one or two such holes to strengthen the reliability of the structure's fastening. After drilling holes for each suspension bracket, drive in anchors and then screw the brackets with screws.
IMPORTANT! When drilling holes for suspensions, make sure that the marking line is strictly perpendicular to the suspension bracket, passing directly through its center.
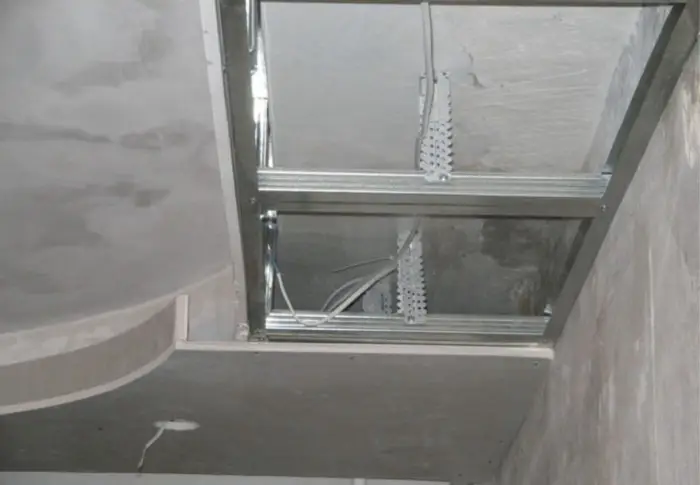
Photo 3 — Mounting suspensions and profiles
Mount the CD frame profile (first level of ceiling). For this, bend the ends of the suspensions to form a 'P'-shaped shape: the profile should fit snugly inside. Consider the suspension design: each suspension has manufacturing holes that allow adjustment of the height of the future structure.
Based on the desired ceiling height, determine in which of the fastening holes to screw the screws. A reliable connection of suspensions is one made with two screws - one from each side.
After securing the frame profile strips, use a tape measure to mark the mounting points of the 'crab' fasteners on the ceiling (used for connecting the transverse strips of the multi-level ceiling profile).
After marking, install the crabs. According to the mounting technology of these accessories, each such fastener should be inserted under the profile with the claws facing down, snapping securely into place inside the profile when pressed. The crabs should be secured to the profile with screws.
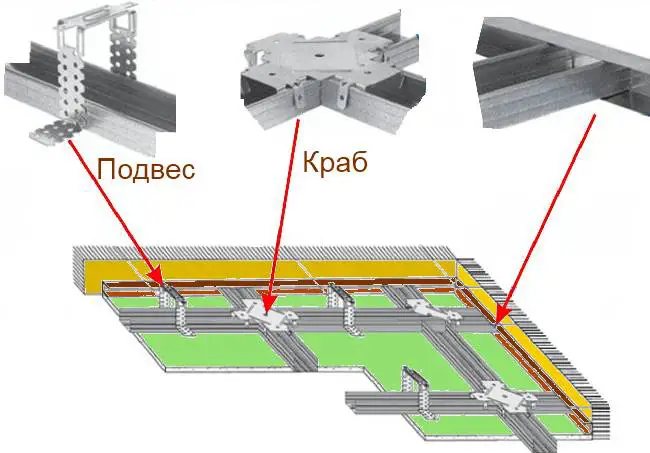
Figure 1 — Scheme of mounting connections
Install braces for the frame. For this, cut the required number of braces from the original CD profile using a angle grinder or metal shears (the size and number of braces for each structure is determined individually).
To install the braces, you need to insert each one from the bottom under the crab and, pressing firmly against it, snap it into place. The brace should also be secured with two screws.
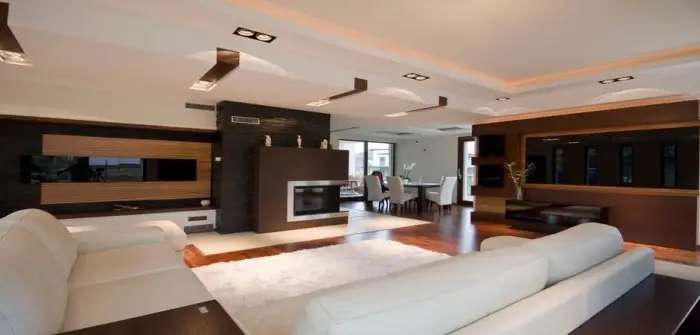
Photo 4 — Multi-level ceiling in a hall
Installing a Multi-Level Ceiling from Gypsum Board by Yourself: Second Level of the Structure
The CD profile needs to be inserted into the guide UD profiles and secured to the suspensions. The profile is fixed to the guides with 2 screws.
You can increase the stiffness of the structure by connecting all CD profile strips of the second level along the perimeter with a UD profile (secured with 1 screw).
To secure vertical sections of gypsum board, the profiles of the second and first levels must be connected vertically using a brace made from a CD profile. These braces should be installed above each of the horizontal CD profile strips (second level of the structure).
At this point, mounting the frame of a two-level ceiling can be considered complete.
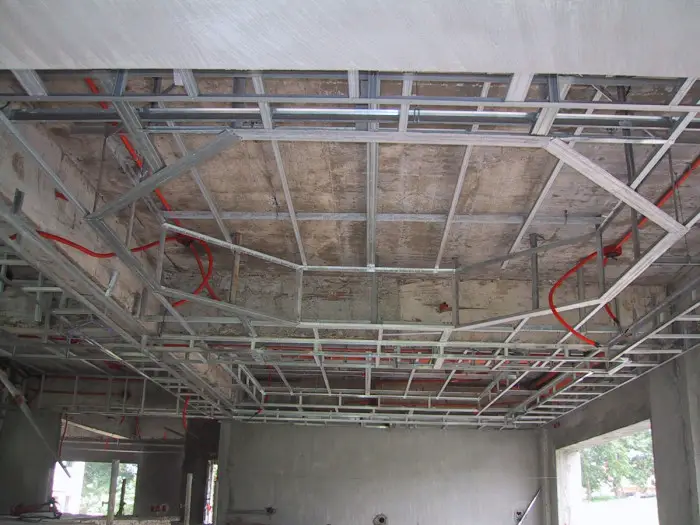
Photo 5 — Finished frame of a multi-level ceiling
Multi-Level Ceilings from Gypsum Board with Backlighting
If you plan to organize backlighting in the ceiling, after completing the frame work, you need to install the electrical wiring according to the previously developed plan.
There are several options for running cables in a multi-level ceiling frame: for example, the cable can be run directly through a hose from the power source to the light fixture or by mounting a cable tray on the wall, in which the cables will then be placed.
IMPORTANT! When performing mounting work for electrical cable installation, do not forget to leave a 10-15 cm excess for pulling the cable tray beyond the ceiling frame.
Installing Gypsum Board Sheets
Installing gypsum board sheets in multi-level ceilings always begins with the first level. To make the structure more reliable, gypsum board sheets can be mounted in a staggered pattern and secured to the profile fastened to the ceiling by suspensions. For this type of mounting, special screws should be used, screwed in at intervals not exceeding 250 mm.
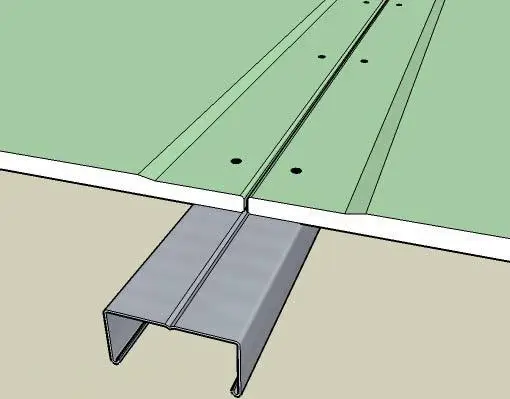
Figure 2 — Proper mounting of gypsum board sheets to profiles
After completing the first level, you can proceed to the second. For working with the second level, you will often need to trim the gypsum board sheets, shaping or resizing them as required.
For this purpose, use a special knife for gypsum board or appropriate electric tools. Make sure that the sheets of the second level match the length of the profiles.
Gypsum board sheet trimming is done as follows: under the ruler on the back side of the sheet, cut the cardboard covering, slightly cutting into the gypsum core. Then, carefully snap the sheet along the scored line and cut off the gypsum board from the back side of the sheet.
After cutting, the sheets are screwed to the profiles according to the markings and construction plan.
To hide the internal structure of the frame, vertical sections of gypsum board sheets must be secured between the first and second levels of the ceiling by screwing them to the vertical metal profile posts.
If, according to the designer's plan, the second ceiling level has a complex curved contour, the gypsum board sheet is bent according to this technique:
- a strip cut from the gypsum board is thoroughly soaked in water;
- after a few minutes, it is perforated with a needle roller;
- bent according to a template and set aside until completely dry.
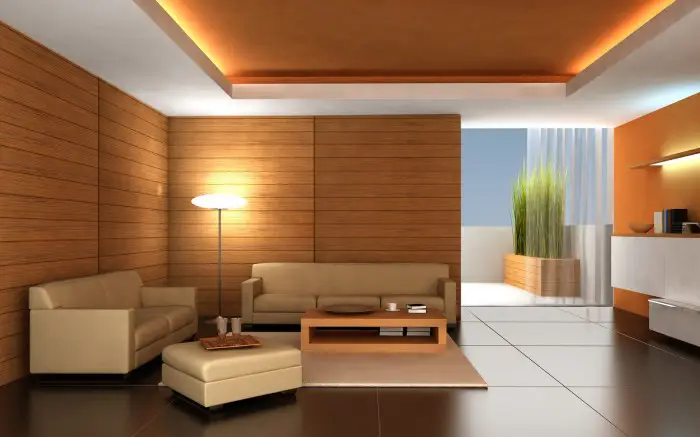
Photo 6 — Multi-level ceiling in a living room
Only after the gypsum board has gained initial strength and taken the desired shape, the strip is mounted to the profile.
After completing the mounting of all parts made from gypsum board, drill holes in the sheets according to the markings for installing lighting (a special corona bit is used).
Sheet joints are reinforced with paper tape or serpentine tape, then spackled and sanded.
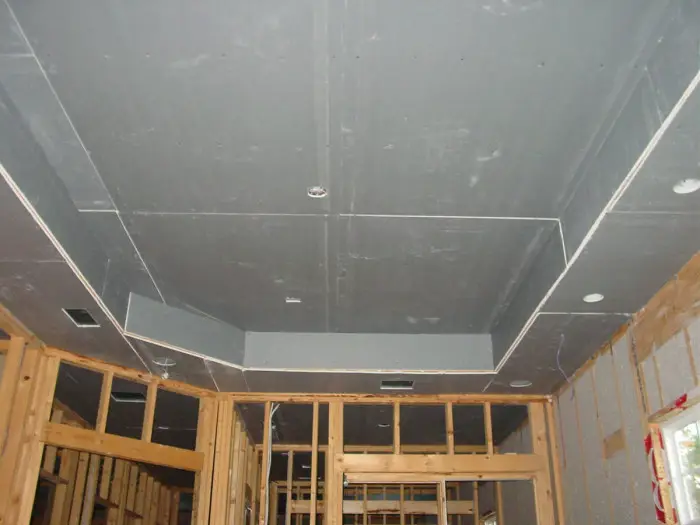
Photo 7 — Frame covered with gypsum board, holes have been made for spot lights. You can now proceed to spackling the sheet joints
Multi-Level Ceilings by Yourself: VIDEO
Multi-Level Ceilings from Gypsum Board: Cost of Work
Quality completion of the above-mentioned work may cost:
- in Moscow - from 380-450 rubles/m² (depending on the type of structure);
- in Kiev - from 65 UAH/m² (depending on the type of structure).