Laying Ceramic Tile: All Details
Key Rules for Successful Completion of Work: The Tiles Must Be of Good Quality;
The Wall Surface Must Be of Good Quality;
The Tile Laying Process Must Also Be Done Properly.
Without Constant Monitoring of Compliance with These Three Components, You Will Not Achieve Any Good Results Even with Very Laborious Work.
The Technology of Laying Ceramic Tile: What Should Not Be Done
Key Rules for Successful Completion of Work:
- The tiles must be of good quality;
- The wall surface must be of good quality;
- The tile laying process must also be done properly.
Without constant monitoring of compliance with these three components, you will not achieve any good results even with very laborious work.
Checking the Quality of Tiles
- Before starting, some workers do not calibrate tiles, i.e., they do not check edge flatness, consistency of tiles in packaging, and also do not verify tiles for matching angles (critical difference - 1.5 mm);
- Tiles should also be checked for color consistency of the coating across different packages;
IMPORTANT! Sorting and identifying defects will be more successful if the master lays tiles on the floor or wall for a "fitting" check of the pattern and placement before installation.
Checking the Quality of the Wall or Floor Base
- There should be no bulges or depressions, cracks, mold, protruding nails, etc. on the wall surface;
- The joints between walls and walls, walls and floors, walls and ceilings should be at 90° (permissible tolerance - 0.01°);
IMPORTANT! If the master claims that significant irregularity can be corrected during installation by slightly skewing the layout, cut and refuse to accept such work. Tiling done without following this rule may be unstable and unattractive.
- After leveling the wall or floor, a "fitting" layout should also be performed.
Quality Installation
- Success in installation depends on working according to an agreed-upon tile layout scheme with consideration of hidden cuts, the joint line that will later align, for example, with a kitchen wall, and other nuances (it is unacceptable for tile joints to run at an angle rather than parallel to walls after laying tiles and installing kitchen furniture, as this ruins the appearance of any kitchen);
- Professionals lay tiles only on a solid base, i.e., concrete or plaster; any other surface (plywood, particle board, OSB, ceramic tile panels, or gypsum board) is not suitable for laying tiles.
IMPORTANT! Exceptions to the previous point may apply in cases of tiling small areas (up to 3 m²).
Proper Tile Installation
A Brief Guide to Tiling Work That Helps Avoid the Most Common Mistakes:
The strength of the floor screed must be no less than the strength of the adhesive used in the work. For example, Ceresit CM-117 adhesive has a strength of about 10 MPa, so the base strength should be no less than 12 MPa. This strength is found in M-150 mortar. You can also use cement (M-400) and sand in a ratio of 1:3-2.5.
IMPORTANT! When doing the work yourself or purchasing materials independently, pay attention to the adhesive purpose: for example, the above-mentioned Ceresit CM-117 is designed for tiling pool areas, balconies, foundations, and surfaces without removing old tiles.
There is no mention of use in bathrooms or kitchens. Therefore, you need a different adhesive. For example, Ceresit CM-11, although its application range is not as wide. Therefore, read carefully the description of the application area and mixing methods of a particular adhesive (you might need plasticizers or other binding additives)!
The base must be primed after the screed or leveling is done.
The teeth of the trowel should not exceed the thickness of the tile.
To level tile placement, use spacers up to 4 mm wide. Otherwise, the gaps between tiles will be too wide, more grout will be needed for their treatment, and thus more areas for persistent dirt accumulation will appear. The optimal size of the spacer is 3 mm.
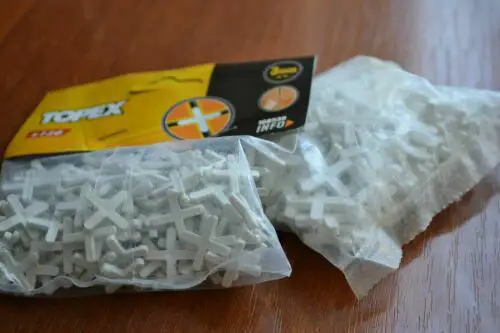
Photo 1 — Plastic Spacers
The arrangement of spacers can vary, but it is better to place them in the center of the tile rather than at their intersections. Centering tiles helps hide tile irregularities on joints (as seen in the image below, improper placement of spacers can lead to uneven joints).
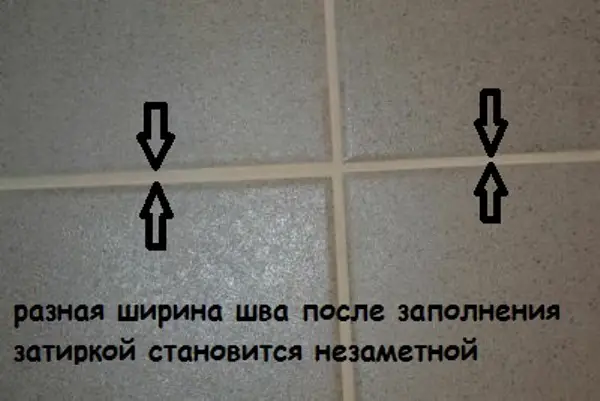
Photo 2 — Tiling Mistake - Uneven Joint
Spacers should be removed on the second day after tile installation, gently prying them out with a knife or another spacer and so on.
However, all necessary rules are described in the relevant SNiP standards. Do not hesitate to read this document before starting finishing works - it will help avoid many unpleasant situations.
Laying Ceramic Tile: VIDEO
Part 1:
Part 2:
$ Cost of Tiling Work
- Kiev - from 65-80 UAH/m²;
- Moscow - from 350-380 RUB/m².