Tynk wenecki: elegancja i ponadczasowy styl
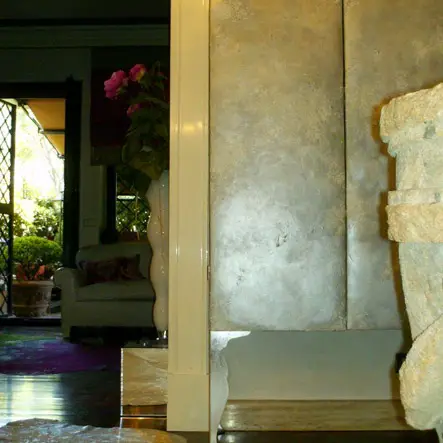
Photo 1 — Classic marble surface of Tynk wenecki by Hageri (Hageri)
After its revival, marble finishing became known as 'Tynk wenecki': a decorative wall plaster used as a base for frescoes, paintings, and interior finishes:
- in the Church of San Giorgio Maggiore (Venice, 1565);
- in Palazzo Tieni (Vicenza, 1545);
- on Villa Forni Cerato (Vicenza, 1540);
- in Teatro Olimpico (Vicenza, 1579), and in many other private homes and public buildings across Italy. Today, restoration of some of these listed buildings continues as part of the country’s architectural heritage.
IMPORTANT! The recipe for plaster was revived by Italian architect Andrea Palladio in the 16th century. His contribution to architecture is called a 'bridge' connecting the Renaissance and Baroque. The buildings listed above are his designs.
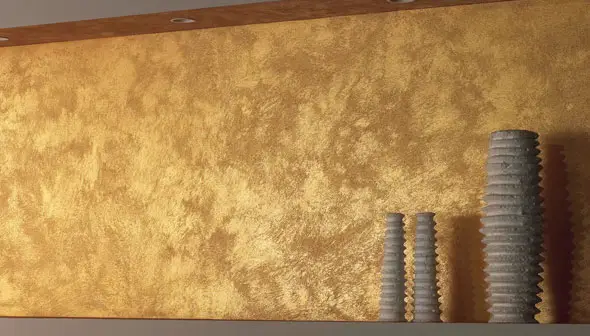
Photo 2 — Tynk wenecki in a corridor by Oikos (Oykos)
Features of Venetian Plaster
What does Tynk wenecki look like? Tynk wenecki is a translucent finishing material that, after application, uniquely refracts light. Surface preparation before applying 'Tynk wenecki' is half the success: any minor wall imperfections will cause the plaster to apply unevenly.
IMPORTANT! Although 'Tynk wenecki' is sensitive to surface flatness, it is indifferent to wall base material — it can be applied equally well on concrete, brick, or wood. However, it is not suitable for exterior use and is sensitive to weather changes: it cracks and loses appearance quickly. For exterior applications, a more affordable alternative is recommended.
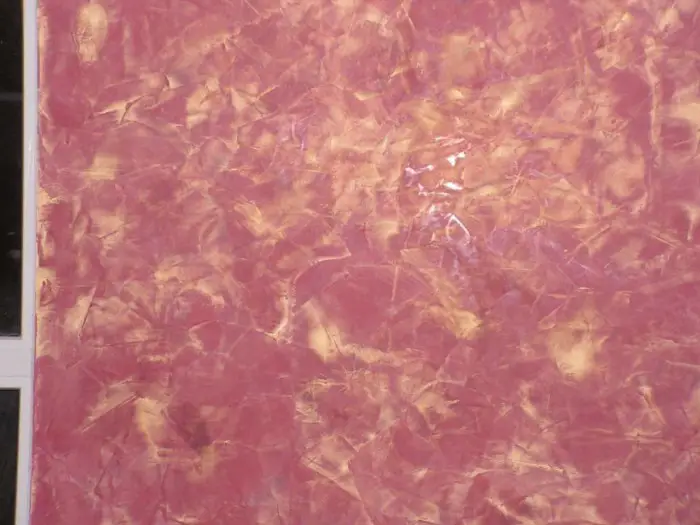
Photo 3 — Ottocento (Ottocento) Tynk wenecki by Oikos
What is 'Tynk wenecki' made of?The composition has remained unchanged for centuries. However, modern artisans may use synthetic additives, which, in essence, compromise the image of 'Tynk wenecki' as a purely natural finishing material. The base of the plaster consists of:
- stone powder (granite, quartz, marble, and other stone types);
- stone chips (same stone types used);
- binding agent;
- colorants.
IMPORTANT! The finer the powder, the better the material adheres to the wall.
As for non-stone components, Renaissance Venice used slaked lime as a binding agent. Additionally, water added viscosity to the mix, and natural colorants (plant sap, animal blood, and other dyes) provided color. All ingredients were mixed to a thick yogurt consistency.
Today, traditional lime plaster has been slightly modified: synthetic binders or polymers (such as acrylic) are added. Natural colorants are now often replaced with synthetic ones. However, this formulation is only an imitation of authentic 'Tynk wenecki', as only a natural composition provides true marble-like sheen and light play. Of course, animal blood is not used as a pigment — modern paint may be used instead, but we insist on natural materials: marble chips, stone powder, and lime.
A natural beeswax finish may be used as the final layer.

Photo 4 — Original texture with cracked marble effect MA+V+gold
Venetian Plaster: Key Material Properties
Drawbacks include material and labor cost, as well as application complexity (the mix is applied in 2–10 layers).
After application, Tynk wenecki absorbs carbon from the air, and carbonation occurs in the layers, forming a hard carbon film that provides unique performance characteristics.
Texture can be matched to any interior style and furniture.
Venetian Plaster in Interior Design (Examples from Magnat Style)
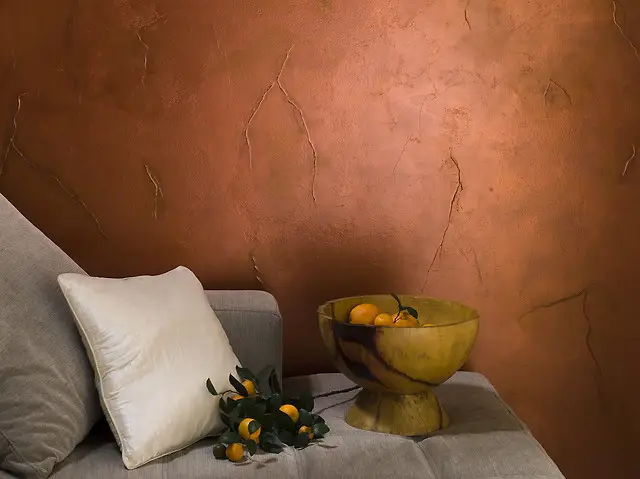
Photo 5 — Classic marble and rustic lacquer in bedroom wall design by Magnat
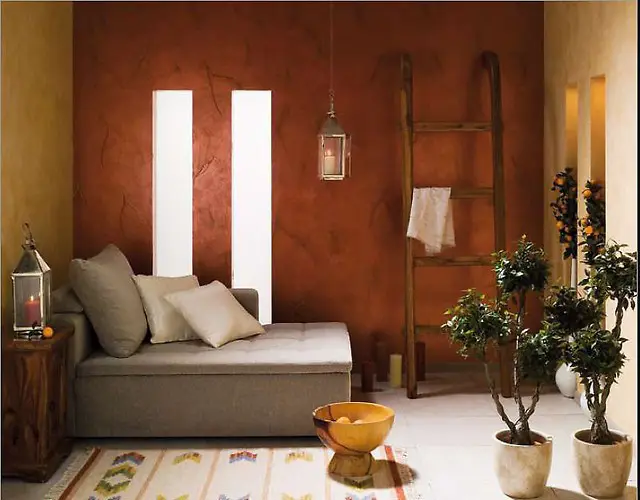
Photo 6 — Combination of artificial and natural marble in bedroom interior
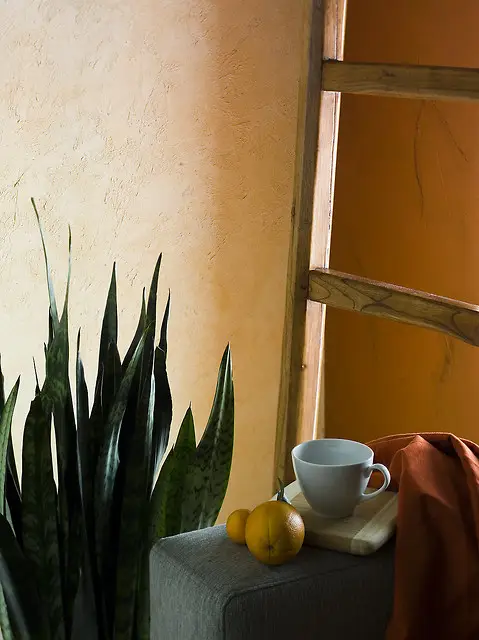
Photo 7 — Gallery of works from Magnat Style
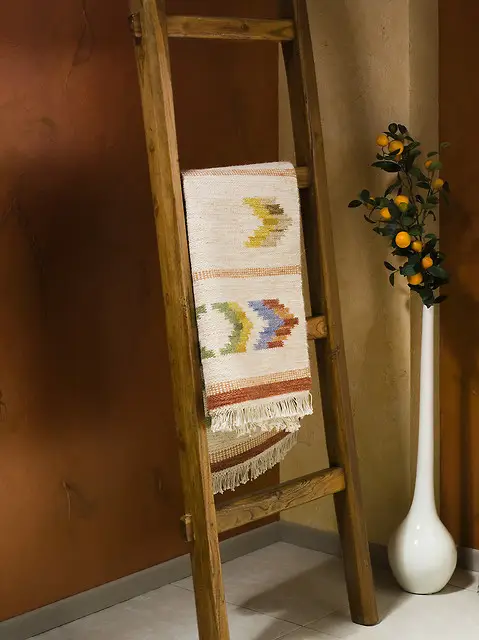
Photo 8 — Marble in interior does not have to look luxurious — it only needs to create coziness and warmth
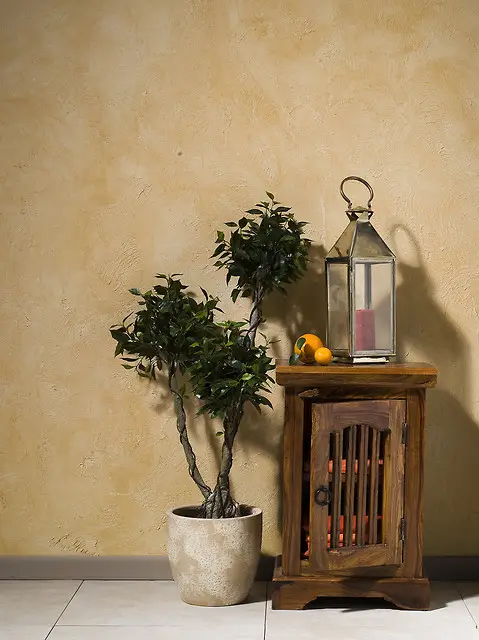
Photo 9 — Typical use of natural colors in finishes using artificial and natural marble
Venetian Plaster: Colors
Among the most popular colors of 'Tynk wenecki' are noble natural tones for imitating natural stone surfaces: gray, emerald, light brown, blue-gray, etc. However, thanks to synthetic dyes, any shade can be achieved: beige, wave-blue, black, gold, bronze, and silver 'Tynk wenecki' are available.
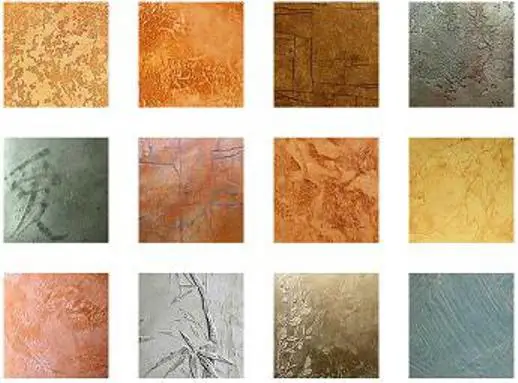
Photo 10 — Colors of Tynk wenecki
Types of Venetian Plaster
Depending on composition, several types of classic 'Tynk wenecki' are distinguished.
«VENETO» (Veneto)This type offers optimal price-to-quality ratio and is easier to apply than others. A wax finish is applied on top, enabling wall washing, not just dusting.
This is Tynk wenecki with a polished marble effect.
Photo 11 — Tynk wenecki in a study by Clavel – Veneto
Photo 12 — Tynk wenecki in a living room Stucco Veneziano by San Marco (San Marco)
«TREVIGNANO» (Trevignano)This type is distinguished by semi-transparency of the plaster layers: imitation of marble or any other stone surface is more realistic. According to experts, 'Trevignano' visually resembles travertine (a polycrystalline rock that forms spectacular cave stalagmites and stalactites). It also contains a polymer in its composition, differentiating it from other types. This variant offers several hundred shades. Its elegance suits both grand halls and entryways. It fits well in Baroque, Classic, and vintage interiors.
This is Tynk wenecki with a polished marble effect.
«MARBELLA» (Marbella)Distinguished from classic Tynk wenecki by its velvety surface, which perfectly complements glossy, polished veins. MARBELLA can be used in humid areas (e.g., bathrooms or kitchens) due to copolymer additives in its composition.
This is Tynk wenecki with an antique effect of coarsely finished marble.
«ENCAUSTO» (Encausto)This type provides a semi-matte surface with dark inclusions, visually resembling granite. A wax finish is used as the final layer, though it must be periodically renewed to improve moisture resistance.
This is Tynk wenecki with a polished marble effect and terracotta inclusions.
«IMPERIALE» (Imperiale)This modern type of Tynk wenecki includes gold pigment. With it, traditional decorative coating not only reflects sunlight but also exudes luxurious gold sheen! The surface is semi-transparent, and the color palette includes dozens of shades. 'IMPERIALE' fully justifies the marble surface as a 'shining stone'.
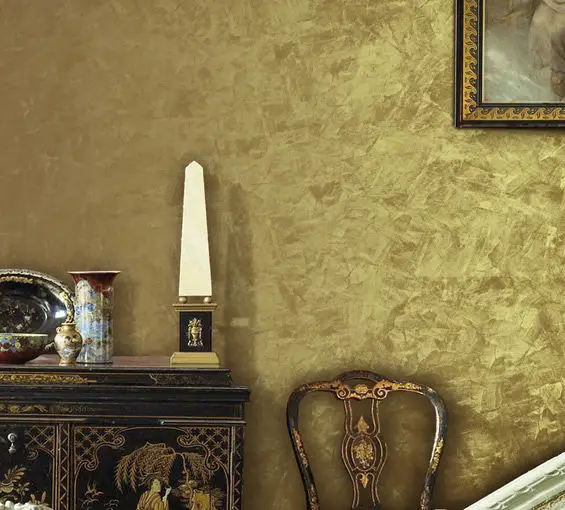
Photo 13 — Plaster IMPERIALE
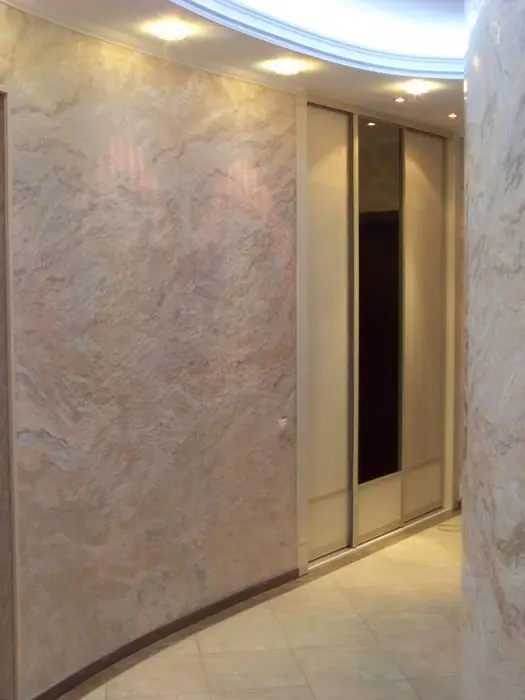
Photo 14 — Tynk wenecki in a modern interior
Venetian Plaster: Price (on Clavel products)
Now that we’ve discussed plaster types, it’s good to know how much this "very expensive" finish actually costs.
IMPORTANT! The application technology for some types (details below) requires a base layer of 'Veneto' plaster, so the total material cost is made up of two components:
IMPORTANT! When purchasing materials, remember that more than one layer must be applied — at least 2–3 layers are recommended. Ideally, Tynk wenecki has 3 to 10 layers.
But the purchase list includes more than just plaster. You’ll also need colorants and tools. More details below.
Venetian Plaster: Materials and Tools
For the job, you’ll need:
- putty knife;
- roller;
- special trowel for Tynk wenecki;
- sponge;
- lint-free cloth;
- containers (for water and mixtures);
- drill mixer attachment;
- polishing machine (plus wax polishing attachment).
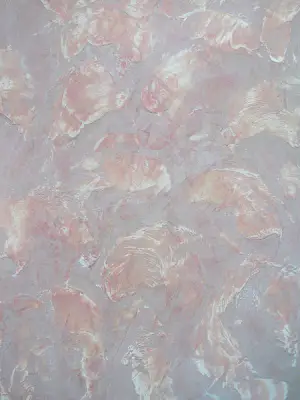
Photo 15 — Tynk wenecki Bayramix (Bayramix)
Venetian Plaster: Application Technique for Different Types
Before starting, inspect the wall surface: no dents, bumps, or cracks should be present. The base must be perfectly flat and vertical, with no level deviations.
Application varies by type:
VenetoPreparation:
Apply primer 'Mousse' and base coat 'Suprim-100' with a roller. Only after drying can plaster application begin.
Color the plaster mix using Purcolor colorants (type 'A'). Mix until homogeneous.
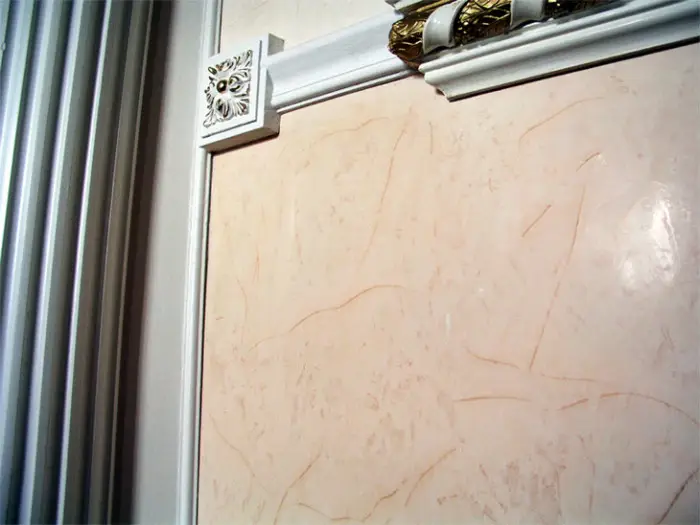
Photo 16 — Veneto plaster in office interior — multiple veins for enhanced marble effect
IMPORTANT! Add colorants to the mix just before use — not earlier!
Application:
Apply using a trowel with rounded edges (preferably stainless steel). Use a small trowel in corners, joints, and edges. No chips or cracks on the tool.
IMPORTANT! Immediately remove excess material from trowel edges, as dried particles may ruin the final result.
Apply up to 10 layers. The first layer is base coat, applied evenly over the wall. Drying takes 6–8 hours, then sand with 'zero' grade sandpaper. Subsequent 2–4 layers are applied randomly, avoiding repetition of tool marks. Layering creates a unique, textured wall surface.
The final layers must be applied by the same master. After drying, polish with a stainless steel trowel, lightly pressing.
Finish work begins 6–7 days after the final layer. Apply wax Durawax, then polish walls with a soft cloth after drying.
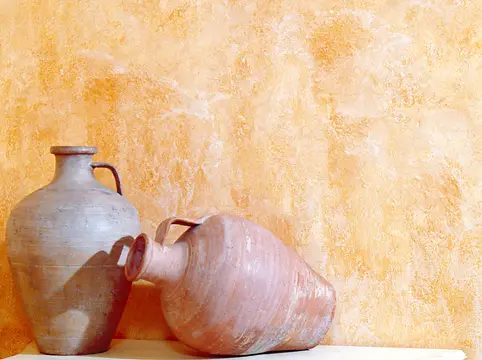
Photo 17 — Decorative plaster Bolars
Material Technical Data:
- VENETO dries to the touch in 1 h;
- complete drying time — up to 7 h;
- apply at temperatures from +12°C to +35°C;
- material consumption: 0.8 kg/m².
Venetian Plaster: Masterclass on Working with Veneto Plaster
TrevignanoWall and mix preparation is similar to steps 1 and 2 above. For coloring, you may use Purcolor type 'B' colorants.
IMPORTANT! Be extremely careful when selecting and mixing colorants, as Tynk wenecki loses up to 50% of its color after drying!
Application:
Apply base layer of Veneto and wait for it to dry (up to 7 hours).
Before drying, create a random pattern on the fresh layer.
Apply Trevignano immediately after the base layer. Use the same application method as for Veneto.
For the final layer, polish the wall firmly, pressing hard on the steel trowel.

Photo 18 — Tynk wenecki Grotto (Grotto) in a bathroom
IMPORTANT! The more layers you apply, the more pronounced the semi-transparent effect becomes, which is why Tynk wenecki is so valued. Each layer adds depth, and the wall texture becomes truly unique.
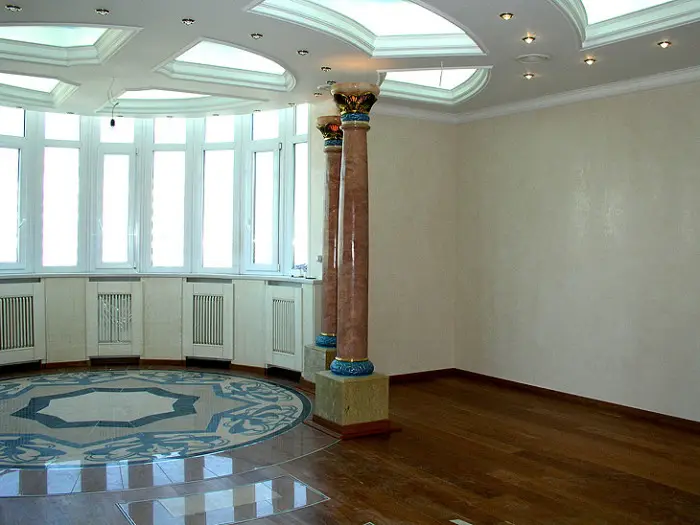
Photo 19 — Trevignano and Veneto plaster on balcony of a luxury apartment transformed into an oriel
After final layers, polish the wall until a mirror-like sheen appears.
24 hours after final layer, finish with Durawax. After another 5–7 days, polish walls with a soft cloth.
Material Technical Data:
- Trevignano dries to the touch in 1 h;
- complete drying time — up to 8 h;
- apply at temperatures from +12°C to +35°C;
- consumption: 0.4 kg/m².
Venetian Plaster: Video Tutorials on Working with Trevignano Plaster
MarbellaPreparation is similar to steps 1 and 2 above. For coloring, you may use Purcolor type 'B' colorants.
Application:
After base layer, apply Marbella with a stainless steel trowel, setting the desired thickness.
Smooth the surface with the trowel to create a random pattern (with slight build-ups of plaster).
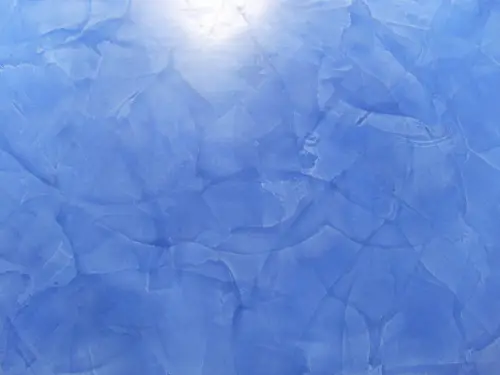
Photo 20 — Glossy Tynk wenecki Caparol (Caparol)
IMPORTANT! Marbella plaster dries very quickly — it must not be used alone. For best results, work in pairs: one applies the layer, the other creates the pattern simultaneously.
Subsequent layers must overlap the previous one.
The final layer should be lighter than previous ones — to add depth.
After at least 24 hours from final layer, polish Marbella with a stainless steel trowel. Edges must shine.
IMPORTANT! You can achieve a surface resembling moiré fabric.
Material Technical Data:
- Marbella dries to the touch in 2 h;
- complete drying time — up to 24 h;
- apply at temperatures from +10°C to +35°C;
- consumption: 0.45 kg/m².
Marbella: Venetian Plaster (VIDEO)
EncaustoPreparation:
Apply primer 'Suprim Granitee' to a level, dry, and dust-free wall.
Application:
Thoroughly mix Encausto-Premier and apply evenly with a stainless steel trowel. Let dry for 4–6 hours (drying time depends on humidity and air temperature).
After application, within 1.5–2.5 hours, level the surface using the same trowel, removing any protrusions.
The final Encausto coat, which creates a stone effect, must be tinted with Purcolor colorants (type 'A' or 'B') before application.
Apply the first layer evenly over the wall as a base. Subsequent layers may be applied 10–12 hours later (after full drying).
Four layers are sufficient: base layer followed by up to three random layers.
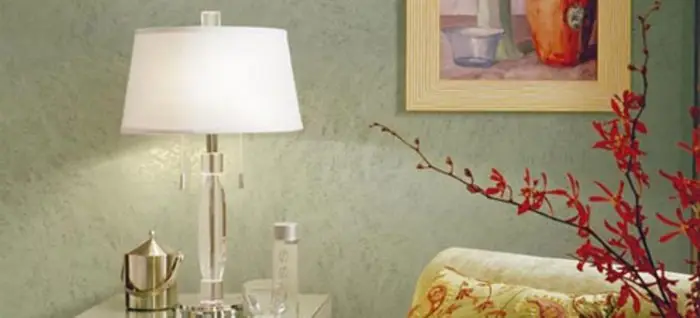
Photo 21 — Encausto plaster
IMPORTANT! Compact each layer immediately after application with a stainless steel trowel. Subsequent layers may be applied 4–8 hours later.
Each layer must be as thin as possible, otherwise the surface will not set properly and will run.
Polish the final layer until it shines — 'ironing'.
Wait 5–7 days before applying wax Bellawax or Durawax.
After full drying, polish the wall surface with a grinder to achieve a near-mirror finish.
Material Technical Data:
- Encausto-Premier dries to the touch in 10–12 h;
- complete drying time — up to 24 h;
- apply at temperatures from +12°C to +35°C;
- consumption: 1.2 kg/m².
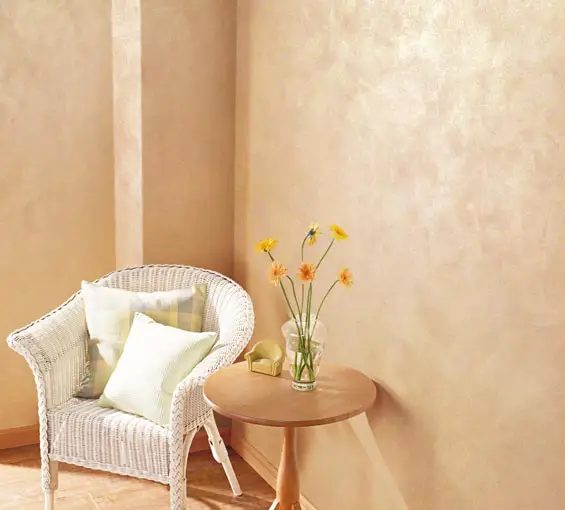
Photo 22 — Decorative plaster resembling silk
- Encausto (final coat) dries to the touch in 12 h (first layer);
- complete drying time for subsequent layers — 4–8 h;
- apply at temperatures from +12°C to +35°C;
- consumption: 0.8 kg/m².
Training on Working with Encausto Plaster: VIDEO
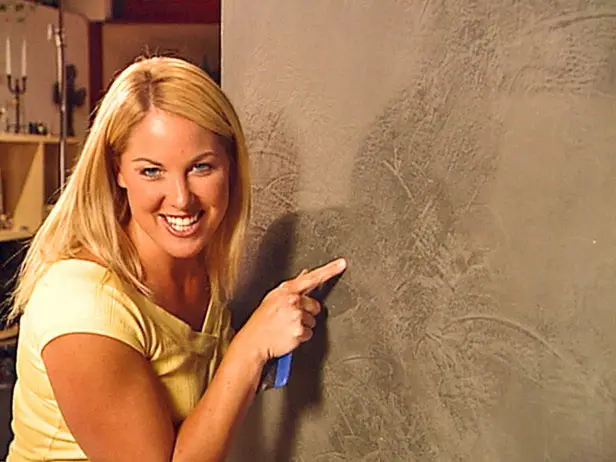
Photo 23 — Many domestic companies offer courses on Tynk wenecki (free for company dealers, others start from $120).
What is Color Tinting?
Colorant is a pigment for plasters. One dose contains 75 ml. Depending on desired depth, 1–4 doses may be used.
As mentioned, for coloring Tynk wenecki, you may need colorants type 'A' or 'B':
- Type 'A' — universal colorant for all exterior materials (20 base colors);
- Type 'B' — universal colorant (20 universal colors).
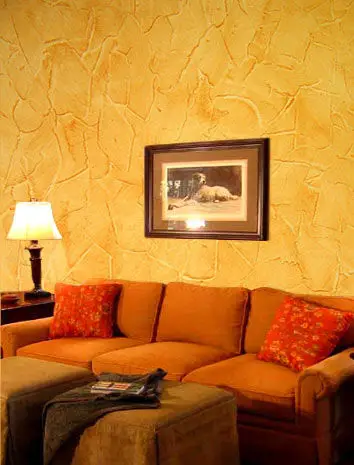
Photo 24 — Tynk wenecki in hallway from Clavel — Cracelure (Cracelure)
Type 'C' colorants are for decorative paints; type 'P' adds a pearlescent effect; type 'W' is white paint used for tinting some finishing materials.
Price for type 'A' colorants: approximately $14/0.10 kg (per unit).
Purchase additional components:
- wax Durawax — from $31/1 kg (consumption: 0.05 kg/m²);
- primer Suprim-100 — from $48/7 kg (consumption: 0.15 kg/m²);
- reinforcing primer 'Mousse' — from $19/5 kg (consumption: 0.08 kg/m²).
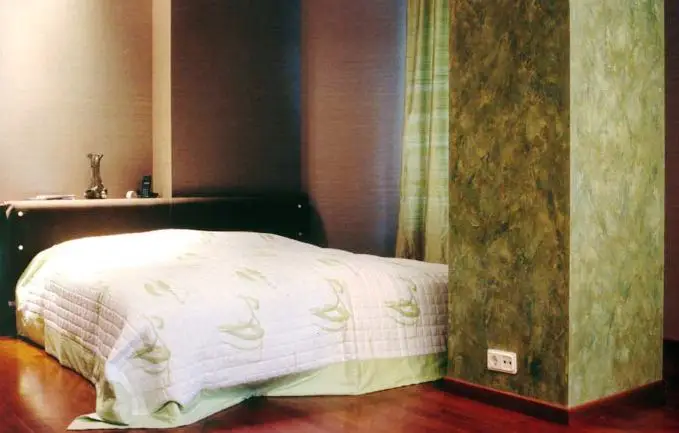
Photo 25 — Tynk wenecki for bedroom walls from Feidal — Marmo Lucido
How to Apply Primer?
Apply primer 'Mousse' with a roller, sprayer, or brush. Mix thoroughly before use.
Apply at temperatures from +5°C to +30°C. Drying to the touch takes 20–40 minutes.
How to Apply Primer?
Before application, dilute Suprim-100 primer 50–100% with drinking water and mix. Apply with a sprayer. Drying to the touch takes 60 minutes.
How to Apply Wax Properly?
Apply wax Durawax using a flexible trowel (Japanese trowel recommended) or a sponge. Two methods exist:
1. Flexible trowel: wax evens the surface, smoothes it, and fills small wall surface depressions.
IMPORTANT! The finish will look even more luxurious if wax is mixed with a toner giving a pearlescent or gold effect.
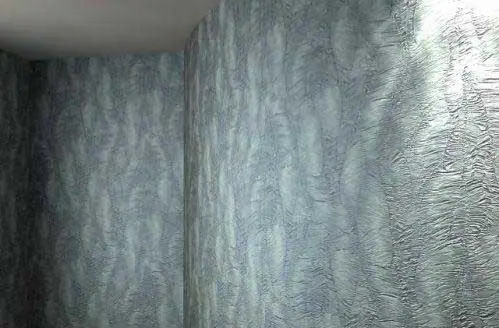
Photo 26 — Tynk wenecki with a pearlescent effect from V-Ray
2. Sponge: to keep the surface textured, use a sponge. Wax is applied evenly, not filling in depressions.
IMPORTANT! If wax contacts skin, wash immediately with plenty of warm water!
Master-level skill is required for Tynk wenecki application — beginners should not attempt it. The result depends on a skilled craftsman.
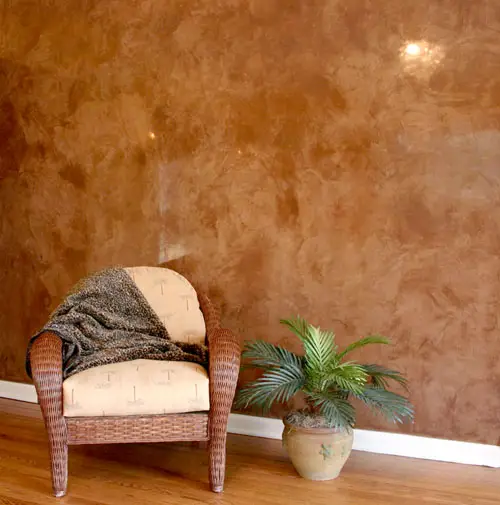
Photo 27 — Only professionals know how to make Tynk wenecki an aesthetic, durable, and long-lasting coating — entrust the coating to skilled artisans
IMPORTANT! The materials listed above are recommended by Clavel.
Other options exist: for example, finishing products from Parade (Parade), entire line of materials for Tynk wenecki from Jobi (Jobi) or Optimist Elite (Optimist Elite), base materials from Alpina (Alpina), and many other domestic and foreign manufacturers produce competitive materials in price and quality.

Photo 28 — Tynk wenecki on ceiling — design solution in a country house interior
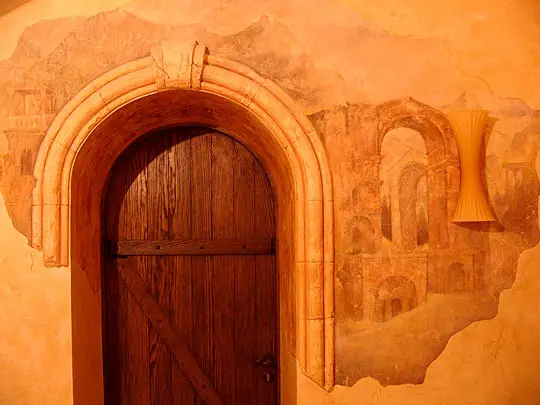
Photo 29 — Artistic Tynk wenecki with pattern
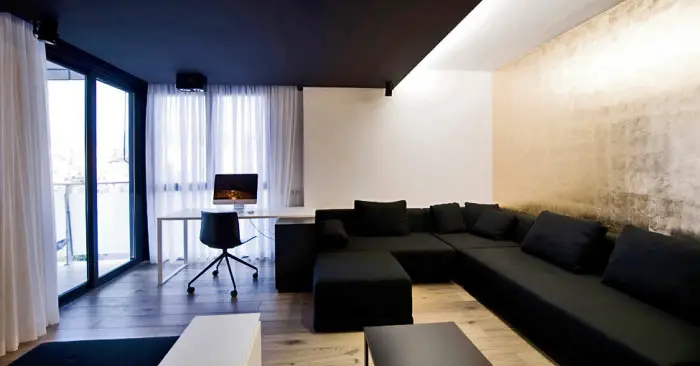
Photo 30 — Textured plaster resembling 'wet silk'
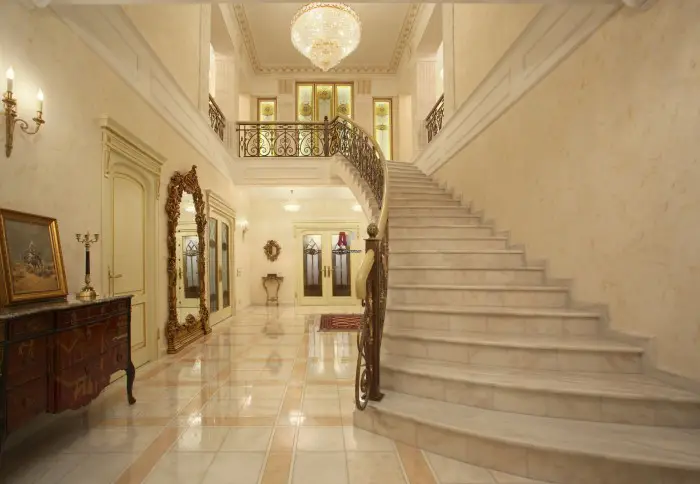
Photo 31 — Manor in 'Neoclassic' style (white marble in interior)
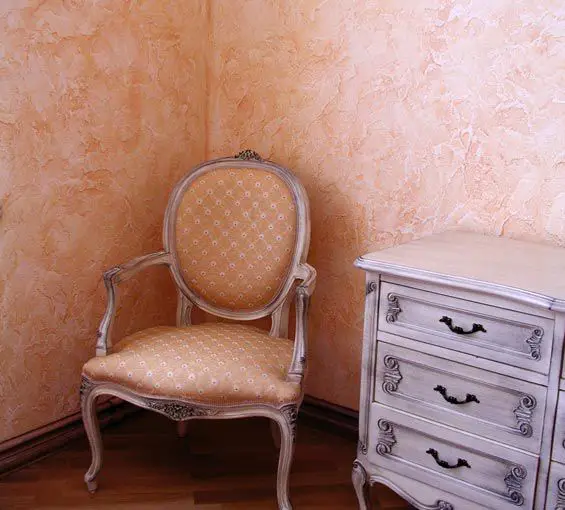
Photo 32 — Tynk wenecki in hallway from Clavel — Riviera (Riviera)
Venetian Plaster: Marble in Interior (Design from Magnat Style)
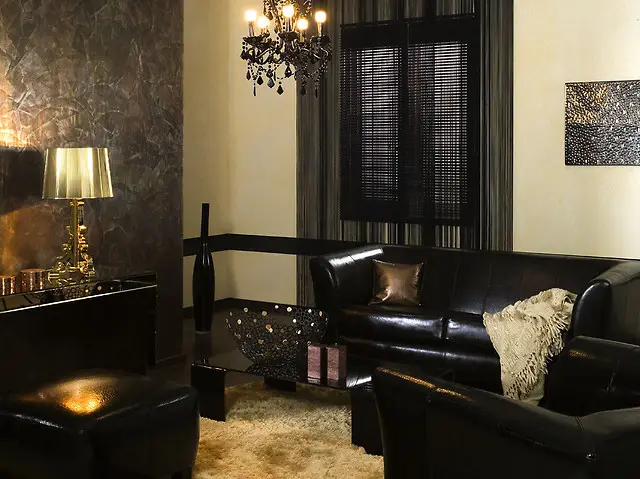
Photo 33 — Venetian artificial marble in interior from Magnat
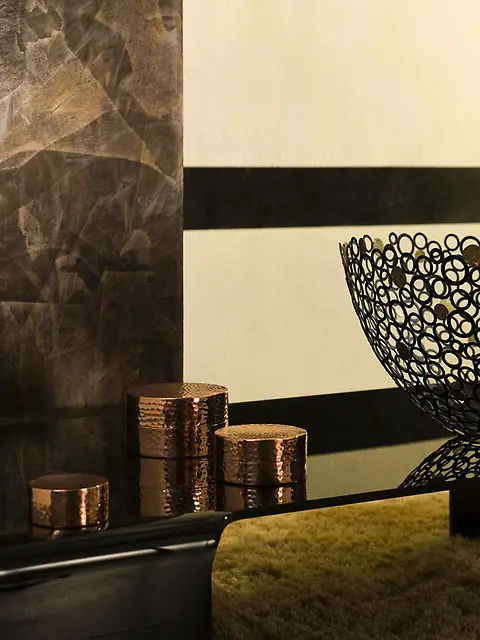
Photo 34 — Travertine and rustic gold lacquer
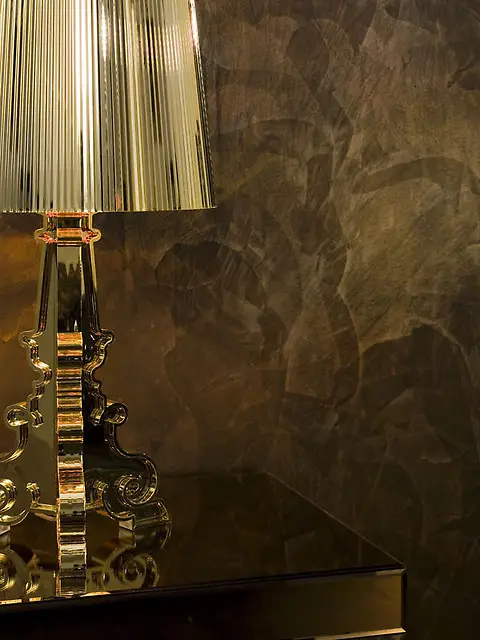
Photo 35 — Accent wall mimicking marble
Photo 36 — Room renovation using Magnat products
Master Labor Cost
As discussed, material costs for 'Tynk wenecki' vary. But what does a master charge? Here's a rough estimate:
- Moscow — from 560 RUB/m²;
- Kyiv — from 145 UAH/m².
IMPORTANT! Before hiring, confirm the workers have experience with such projects and check company reviews on their official website. Prepare templates for test plastering (e.g., try on drywall first).
Need a renovation specialist?
Find verified professionals for any repair or construction job. Post your request and get offers from local experts.